If you’ve ever wanted to preserve the architectural value of an old home with windows that seem to be falling apart, window glazing might be a solution to your problems.
Knowing how to reglaze a window isn’t something for professionals alone. You can do it and achieve a high-end look. And we’re going to show you how easy it actually is.
Key Takeaways
- Window glazing involves replacing the putty that holds the glass in place, improving insulation and preserving the old window’s appearance.
- To reglaze a window, you need to remove the old glazing, repair the frame, apply new glazing compound, and paint it after it cures.
- Reglazing is a cost-effective option, especially for preserving historical windows, and typically costs less than $50 for a DIY project.
- Choosing between reglazing and replacing windows depends on factors like window condition, historical value, and budget constraints.
What is Window Glazing?
The actual definition of window glazing refers to the glass pane that makes up a window. But it can also reference the putty used to hold the glass in place, which is known as a glazing compound.
Glazing is also used to describe the process of installing window glazing compounds. So that’s three definitions for the same term.
Today, we’re going to focus on how to reglaze a window by replacing old glazing putty with a new glazing compound.
How to Reglaze a Window with Glazing Putty
The glass on old single-pane windows is encased by a putty called “glazing compound” that secures the glass in place and shuts out the elements. Although this putty frequently lasts decades, it eventually turns rock-hard, fractures, and even falls off in the wind.
You’ll learn how to remove old putty, prep the surface, and add the new compound in the steps to follow. But first, gather your tools.
What You’ll Need
- Razor knife.
- Scraper.
- Heat gun.
- Two-part wood epoxy.
- Sanding paper.
- Glazing compound (putty).
- Oil-based primer.
1. Remove the Sash and Stops
Start by removing the sash, which is the part of the window that slides up/down. To expose it, remove the stops located on the interior side of the window (they lie perpendicular to the sash).
If there is paint over the screws that hold the stops in place, you can scrape the paint line with a razor knife.
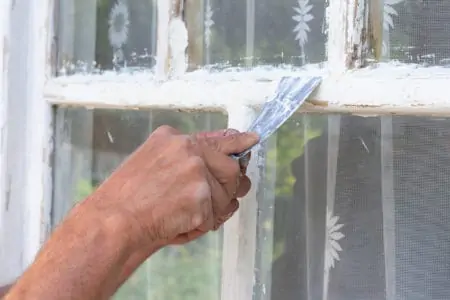
2. Remove the Old Glazing
Once the sash has been removed, you can take down the glazing. You can chip it off with either a scraper or a razor knife.
Some glazing is easy to get out of the way, but you have to be very careful with the glaze that’s still stuck to the glass and wood.
Proceed With Caution
Using too much force can break the glass.
If you’re unable to remove the putty with the scraper or knife, you may need to use a heat gun. This will soften the glaze and make it easier to remove it.
If you choose to remove old glazing using a heat gun, you will likely damage some of the surrounding paint. This could result in having to scrape and repaint your entire window.
3. Repair the Frame
Once you’ve removed the old glazing, it’s time to check and see if the window frame needs any repairs. If it does, you can shape and sand two-part wood epoxy (to make sure it matches the wood frame).
Give the frame a light sanding to open the wood. Wipe away dust. Then apply your epoxy according to its usage instructions.
4. Apply the Glazing Compound
The amount of new putty you’re going to need depends on how much reglazing there is to do. For example, reglazing just a couple of panes with putty requires about a half-pint of product.
Make sure that the putty is at room temperature. Take some putty in your hands (it should be about the size of a golf ball) and work it to make sure the consistency is even.
After about a minute, roll it out (it should look like a thin breadstick) and work it along the edges of the pane.
5. Work the Glazing Compound
Grab your putty knife and use it to press the putty against the glass and wood. Cover the entire window and get rid of any excess putty as you move along the edge of the panes. Run your putty knife at an angle along the glazing to give it a smooth surface and cut the excess as well.
6. Paint the Glazing
Since glazing takes pretty long to cure, you’re going to have to wait about a week before you can paint it. You can put the window back in its place during this curing period.
Use quality oil-based primer and lap your paint on the glass at least 1/16 of an inch. This will ensure the glazing doesn’t fall off ahead of time.
Cost to Reglaze Windows
When you hire a professional, it usually costs between $250 and $500 to reglaze a single window. That covers both the labor and the materials needed for the job.
To reglaze the windows with glazing compound all by yourself, you’re paying the cost of the materials listed. This entire DIY project shouldn’t cost you more than $50. And that’s if you have to buy most of the tools needed for window glazing.
How to Reglaze a Window without Removing It
When reglazing windows, replacing the glazing “bed,” or the putty upon which the pane rests in the groove (known as the glazing rabbet) is not necessarily essential. But deciding to replace the putty is a good idea since it will assist in air sealing the glass. It will also prevent inside humidity from reaching the putty.
However, it is far more convenient to replace only the worn-out finish glazing, easily accomplished while the window is still in place. You also won’t have to worry about outwitting the elements since you’re not taking the glass down.
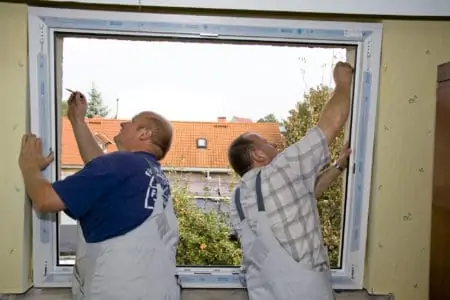
Reglazing vs. Replacing Windows
Upgrading the windows in your home? You might be faced with the decision of whether to reglaze them or fully replace them. Not all window issues require a complete replacement, and in certain cases, window reglazing may be the best option.
You might want to replace the window when:
- The frame is rotten or warped.
- You notice too many drafts coming from the window.
- There is a lot of noise pollution coming from outside.
- Your windows are too old and can’t properly insulate.
Reglaze or Replace: Which Should You Choose?
Sometimes it’s easier just to replace things in your home. But I always opt for the DIY fix first. Here are some scenarios to consider.
New Home
If you live in a newer home with well-maintained windows, replacing them may not be the best option. It may be both costly and unneeded. If the remainder of the window has held up well and is in good condition, reglazing is the best course of action.
Preserve Historical Appearance
Another advantage of reglazing over a total window replacement is that the original window is preserved.
This is critical if you own an older home and wish to preserve its historical significance and architecture. Reglazing the window preserves its original touch of elegance, which would be lost if it were replaced.
Low on Cash
While you may believe that cracked or shattered window glass requires complete replacement, this is not always the case. A competent glazier can replace your single-pane windows affordably and effectively.
This is an excellent option to explore, especially if you want to minimize your environmental impact. Or to prevent conflicts with your homeowner’s association that can completely replace windows.
FAQs
Reglazing windows depends on a few factors. Here are some common questions I often see to help ease your mind.

How Often Do Windows Need to be Reglazed?
You should perform a routine check at least once per year and look for potential problems with your windows. That includes water and air leaks, noise pollution, rot, mold, and the likes.

Is It Hard to Reglaze Windows?
It’s not that hard. But if you have old glazing that’s stubborn and difficult to remove, the process might take some time.

How Long Does It Take to Reglaze a Window?
This really depends on the complexity of the project. Reglazing windows should not take more than one hour, but it depends on how difficult it is to remove the old putty from your windows.

What Alternatives to Glazing Putty Can You Use?
You can also glaze windows using mitered moldings or with silicone caulk. In fact, more people prefer window glazing with caulk because it creates tight seals and minimizes water leak potential.

Can You Glaze Over Old Glazing?
You can sometimes put a new glaze on top of the old one as long as your old putty still has proper adhesion. But I don’t recommend it.

Can You Touch Up Window Glazing?
Yes, it is possible. You can use a special glazing compound known as glazing sealant to make these fine touches if need be.
Final Words
Now that you know how to reglaze a window, it’s just a matter of finding the patience to do it. Reglazing windows shouldn’t take too much of your time. Just make sure that you’re always using the best materials and careful with removing the old glazing compound.