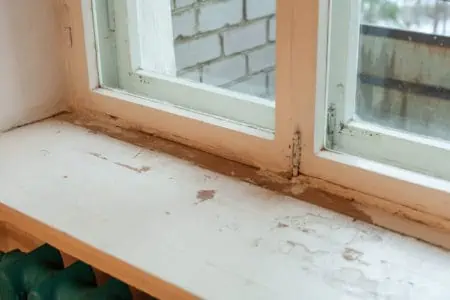
Knowing how to refinish water-stained window sills is crucial if you want them to look their best. Water damage is unsightly and can be costly if left untreated. Window sills and sashes are expensive, and nobody wants to pay out for replacements unnecessarily.
We explain how to repair water-stained window sills and give you tips to help prevent water damage in the first place.
Key Takeaways
- Assess the water damage on window sills and clean with sandpaper or wire brush if needed.
- Remove rotted wood and use wood hardener or filler to repair.
- Apply stain and polyurethane to refinish and protect the window sill.
- Prevent future damage by sealing windows, reducing humidity, and maintaining good airflow.
What Causes Water Damage on Wood Window Sills?
When the exterior temperature drops, it cools your window panes. When moisture touches the glass, it creates condensation, and droplets form. If left unchecked, the water pools, causing damage to the varnish and rotting the wood.
Other causes include cooking or bathroom steam. These rooms are high-moisture areas, where damp surfaces are more common. Prolonged contact with water stains the wood and eats away at varnish and other treatments.
Can You Repair Water-Stained Window Sills?
You can repair water-stained window sills depending on the extent of the damage. If you press your finger into the wood and it is spongy and soft, you must remove the rotten wood. This involves digging down until you find a solid surface.
If the rot is only slight, use a wood hardener like this Minwax High-Performance Hardener. It penetrates deep into the wood fibers and sets solid thanks to the resin formula.
Take Note
If the rot has spread to other parts of the sill, it may be better to replace the entire thing rather than attempting a patch repair.
Once you strike a firm part of the wood, you can cut a new piece to fit and smooth it with filler. Most water damage is superficial and can be fixed by rubbing it away with fine-grit sandpaper.
How to Remove Black Stains from Window Sills
Black stains are unsightly, but they look worse than they are. Black staining is a discoloration of the wood as it reacts with moisture.
What You’ll Need
- Sander.
- Shop-vac.
- Drop cloths.
- Oxalic acid wood bleach.
- Trisodium phosphate.
- Bucket of warm water.
- Hand brush.
- Respirator.
- Goggles.
- Rubber gloves.
1. Assess the Extent of the Damage
Examine the sill to determine if it is badly damaged. Black staining would indicate that it is only superficial, so you can easily clean it with sandpaper. Make sure the surfaces are entirely dry before you start.
2. Don Safety Gear
To protect yourself from caustic chemicals like bleach, wear rubber gloves. Also, wear a respirator and goggles to protect your face and eyes from nasty fumes.
3. Use TSP for Lighter Stains
Trisodium phosphate eats away at black mold and mildew and removes lighter stains. Mix 10 tablespoons of TSP into a gallon of warm tap water. Apply it to the stains with a scrubbing brush and rinse thoroughly with fresh water.
Ensure you dry the surface with a clean rag, or the mold will return.
Top Tip
TSP also removes ring stains caused by plant pots and wet crockery.
4. Use Oxalic Acid for Darker Stains
If the stain is still present after the TSP or you have darker blemishes, you will need oxalic acid. It bleaches stained wood back to its original color. You can pick it up at well-known online sites or your local hardware store.
Safety First
Follow the safety guidelines on the packaging and wear gloves, a respirator, and goggles. This acid is strong and gives off potent odors that could be harmful if inhaled.
Mix two tablespoons of oxalic acid with eight ounces of hot water. Moisten a rag in the solution and apply it to the damaged surface. Now, leave the sill to dry. If the stain remains, repeat the process.
5. Sanding the Wood
The final method is the simplest one: use a sander to remove the blackened layer. This Black and Decker Detail Sander is the ideal model to use because it has a pointed front edge to get into tight corners.
Work away at the stain to reveal the fresh wood beneath. Use the shop-vac to remove loose debris and sawdust.

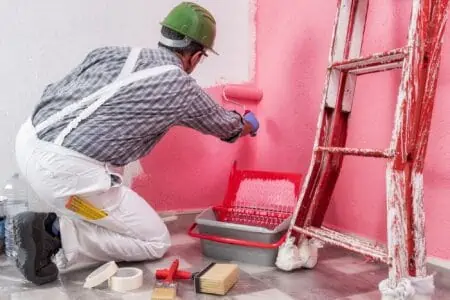
How to Refinish Water-Stained Window Sills
Refinishing your water-stained window sills involves more work because you want them to look as good as new. Again, we need to collect the right tools and supplies before making a start.
What You’ll Need
- Wire brush.
- 80 and 100-grit sandpaper.
- Interior caulk.
- Painter’s tape.
- Drop cloths.
- 1.5-inch stain brush.
- 2-inch natural paintbrush.
- Interior clear polyurethane.
- Color-matched stain.
- Shop-vac.
1. Scrub the Window Sill
Scrub the surface of the sill with the wire brush to remove loose debris and old varnish. Work vigorously along the line of the grain.
2. Sand the Sill
Grab the 80-grit sandpaper and rub the sill until the old varnish is removed. To get a smooth finish, switch to the 100-grit once all the blemishes are gone. As before, work with the line of the wood grain.
Switch on the shop-vac and remove the sawdust. If you get any dust in the polyurethane, it will spoil the finish and lead to you doing the job again. Use a tack cloth to get the last of the loose debris, like this Dura-Gold 12-pack.
3. Fill Cracks and Gouges
Fill the cracks, gouges, and splits with caulk, like this TEC Colorfast Caulk, because it blends in with the natural wood. Smooth the caulk with a wet fingertip and wait 24 hours while it sets.
If the damage is more serious, you may need to remove rotted wood and use a wood hardener like this Minwax High-Performance Hardener. It penetrates deep into the wood fibers and sets rock solid.
4. Sand Again
Using the 100-grit sandpaper, smooth the caulk to sit flush with the wooden frame. The shop-vac will remove loose sawdust while the tack cloth gets the finer particles.
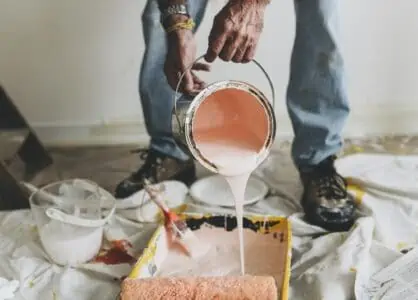
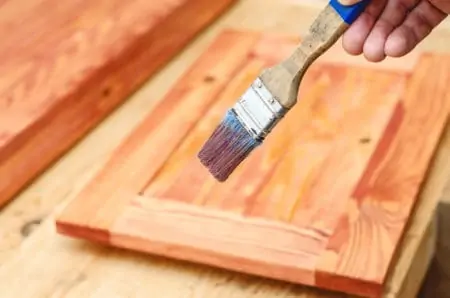
5. Add the Stain
Use a wood stain like this Varathane Golden Oak Premium Fast Dry. Depending on the surface quality, it dries to the touch within one hour, covering up to 70 square feet. Use the stain brush and apply it to the surface of the sill.
Work with the grain, ensuring an even coating and cover all gaps and corners. Allow 24 hours while the stain cures before applying clear polyurethane to seal and protect.
Keep In Mind
If the stain looks patchy, wait the specified time for it to dry between coats and add a second layer.
6. Time to Add the Polyurethane
Shake the polyurethane tin to ensure the formula is mixed correctly. If it’s been on a shelf for extended periods, the solution settles in the can and splits.
Dip the paintbrush into the polyurethane, and coat the ledge and trim in an even layer. Work with the grain and push the varnish into every nook and cranny.
Work in long strokes, starting at one end of the sill and finishing at the other. This ensures that you leave minimal brush marks and air bubbles.
7. Drying Time
For oil-based polyurethane, wait 48 to 72 hours while it fully cures. Water-based products dry faster, so you should be good to go in 48 hours.
Important Point
Because moisture collects on your window sills, sash, and trim, sand between coats and add a second coat of polyurethane. It gives additional protection.
How to Fix a Swollen Window Sill
When the sill bulges and swells, water has penetrated deep into the wood fibers causing them to expand. Old and untreated wood is particularly susceptible to swelling.
If your sill is made of MDF (Medium Density Fiberboard), you should take extra care because the compressed fibers lose structural integrity once they swell. They simply crumble to dust, so don’t leave treatment until it’s too late.
Locate the swollen wood and remove the loose fibers and debris to reveal the harder wood beneath. You can treat it two ways: using a wood hardener or a wood filler, like this Goodfilla Wood and Grain Filler.
If you use a hardener, fill the gaps with the solution and leave it while the resin dries hard. Then sand using 100-grit sandpaper to bring it flush with the sill. For filler, apply the paste into the gap and smooth it with a plastic spreader tool, like this set of Bates Putty Knives.
Wait the required time while the filler dries, and smooth it with 100-grit sandpaper.
Tips for Preventing Water Damage on Windows
Rather than battling for hours correcting water-damaged window sills, it makes better sense to prevent rotting and brown stains in the first place. Here are a few handy pointers to get you started:
Seal the Window
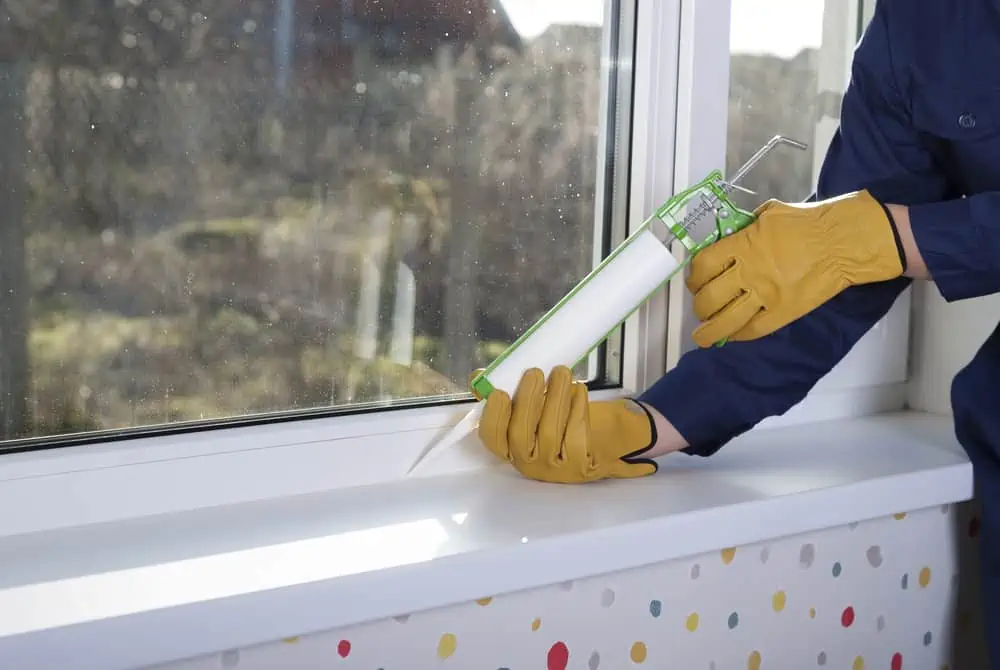
Sealing the window against water ingress helps to reduce instances of black staining. While condensation is a major contributor, so too are leaky windows. Use exterior sealants, like this GE Sealants Advance Silicone, because they remain flexible and impervious to the elements.
Keep Moisture Down

The best way to prevent water damage is to remove the water. Use a dehumidifier, like this hOmeLabs model for medium to large rooms. It extracts the moisture and collects it in a reservoir.
Reducing humidity is good for your window sills, and it improves the air quality inside your home.
Keep Good Airflow

Every home needs to breathe, especially in high-moisture areas like kitchens and bathrooms. The simplest way to counteract water damage is to open windows and allow fresh air into the home.
Wet air will dissipate out of the window, reducing condensation. If your bathroom lacks a window that opens, switch on your extractor fan.
Use Moisture Traps
Maybe your budget doesn’t stretch to a dehumidifier costing hundreds of dollars? In that case, use moisture traps, like this Vacplus Moisture Extractor. They are cheap, come in multiple packs, and are effective at trapping moisture.
Simply place one on your window sill or in areas around the home where moisture collects, and the crystals in the trap get to work. They absorb water and turn into a watery jelly. When the trap is full, replace it with a new one.
FAQs

How Much Does It Cost to Replace a Window Sill?
Window sill replacement will cost you approximately $25 per linear foot. A linear foot is the measurement of the length only rather than square footage, which includes length and width.

Can Mayonnaise Remove Water Rings?
Mayonnaise contains oil that penetrates wood fibers. As the wood absorbs the oil, it breaks down the moisture in the water ring. Dab the mayonnaise on with a paper towel, leaving it to cover the stain overnight.
The moisture rises to the surface and soaks into the paper towel.

Can You Use Rubbing Alcohol to Remove Stains?
Rubbing alcohol is more likely to leave you with a stain. It contains additional ingredients other than alcohol, including dyes that may stain your wooden sills.
Stain Be Gone
Knowing how to remove stains from window sills will keep your wooden frames in great condition and save you a packet. Prevention or repair is always better and cheaper than replacement.
Refinishing water-damaged window sills is less complicated than you might think, and with a few simple steps, you can achieve outstanding results.