Are your laminate cabinets chipped, cracked, and in a generally awful condition? If you don’t have money for new cabinets, you can use paint to give the old ones a new life. I will show you how to paint laminate cabinets with and without sanding the surface.
Key Takeaways
- Clean and prep the cabinets: Remove hardware, clean with a degreaser, and sand the surface for better paint adhesion.
- Apply primer: Use a laminate-specific primer and let it dry according to the instructions on the paint can.
- Paint the cabinets: Apply two coats of laminate paint, allowing each coat to dry for a few hours before applying the next.
- Maintain the cabinets: Regularly dust and clean the cabinets with mild dish soap and a microfiber cloth to keep them looking fresh and clean.
Can You Paint Over Laminate Cabinets?

Yes, it is possible to paint over laminate or prefab cabinets. When painting genuine wood cabinetry, some of the paint or primer will absorb into the wood’s pores. This forms a tight connection and assists the paint in adhering to the wood.
Laminate lacks a porous surface, making it more difficult for paint to adhere to it. But you can work around this for cabinet refinishing.
One common method is to sand the surface of the cabinet to make it more porous and paint-absorbing. You can also use a primer instead of sanding and even chalk paint to skip sanding and priming.
How Do You Tell If Your Cabinets are Laminate?
The appearance of the wood grain immediately distinguishes laminate from veneer cabinets.
Laminate
Laminate is a type of fake wood typically composed of finely grained wood or plastic and is printed so that the texture resembles real wood. It’s sometimes referred to as Formica.
Occasionally, laminate furniture is made using fiber and a combination of numerous different composites. It’s common to find MDF cabinets with laminate on top.
Veneer
A veneer is typically a thin coating of hardwood that has been cut and assembled on a piece of plastic or other inexpensive material. This approach enables the creation of furniture with various distinct designs at a reasonably modest cost.
Because the veneer’s upper surface is genuine wood, it can be polished, painted, and varnished just like real wood. The veneer is well-known for its realism and granular patterns.
If You See Chips
If your cabinets are slightly chipped, it’s even easier to tell if they are made from veneer or laminate.
Veneer surfaces, when chipped, won’t show huge color differences compared to the surface. Laminate cabinets, however, have noticeable differences between the exterior and the interior.
Best Paint for Laminate Cabinets
Choose a laminate-specific paint to make things go more smoothly. These materials are carefully formulated to adhere to the laminate’s gloss surface. Sand the surface both before and after priming.
It is best to use a specially formulated “Tile and Laminate” paint readily available at most hardware stores. However, if you followed the advice above and prepped and sanded the surface, use any high-quality paint.
If you’re still unsure, I highly recommend a cabinet painting kit like this Nuvo Hearthstone.
Because chalk paint “masks” brush strokes, it is an excellent choice for painting laminate cabinets. If you’re utilizing chalk paint like this Rust-Oleum Chalked paint on a job, you can hardly go wrong. Whether you’re a professional painter or a total novice, you can do this.

How Much Paint Do You Need for Cabinets?
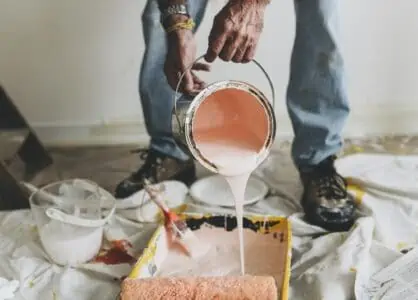
When purchasing laminate cabinet paint, you’ll want to know how much paint you’ll require. Fortunately, you won’t require much. One gallon of paint will cover 350 square feet with one coat.
Calculate the square footage of the cabinets. Then get twice as much paint to cover two coats.
Best Primer for Laminate Cabinets
Most laminate materials are not compatible with all types of primers. So, be careful when selecting your primer. Choose one that states it’s been designed for use on laminated surfaces.
For ideal results, I highly recommend using INSL-X SXA11009A-04 Stix Acrylic Waterborne Bonding Primer. I used this when I painted my bathroom vanity last year, and I’m so glad I did.
How to Paint Laminate Cabinets
I’ll show you how to paint laminate kitchen cabinets with this breakdown of steps!
What You’ll Need
- 240-grit sandpaper.
- 400-grit sandpaper.
- Primer.
- Degreaser or laminate cleaning solution.
- Clean microfiber cloth.
- Paintbrush or foam roller.
- Laminate paint.
- Lacquer.
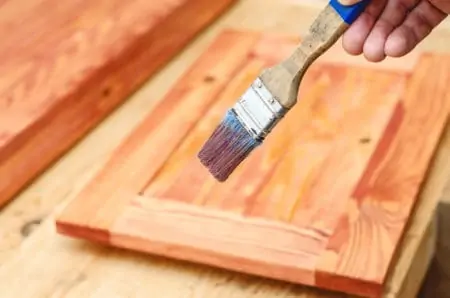
1. Sand the Surface
Use 240-grit sandpaper for your cabinets. This ensures the paint adheres better to the typically non-porous surface of the cabinets.
2. Clean the Cabinets
Get rid of any food residue, crumbs, dirt, grease, and debris. You can easily find tile and laminate cleaners in hardware stores.
Take Note
Read the label on your laminate cleaning solution. You might have to spray and leave it for a few minutes before wiping the cabinets clean.
3. Remove the Hardware
The cabinet may be hinged, but if you can, take it apart and remove any parts that you don’t want to paint. This includes hardware such as the handles.
4. Apply the Primer
You generally want to use two coats of primer so that the entire process goes smoothly when having to apply the paint. Use a paintbrush or a foam roller for best results. You most likely have to wait about five hours for each coat of primer to dry.
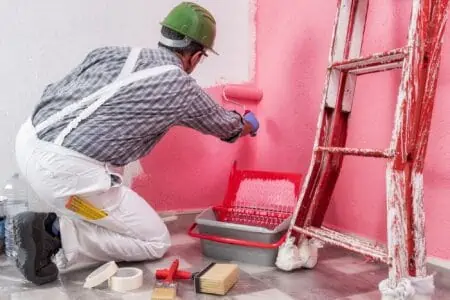
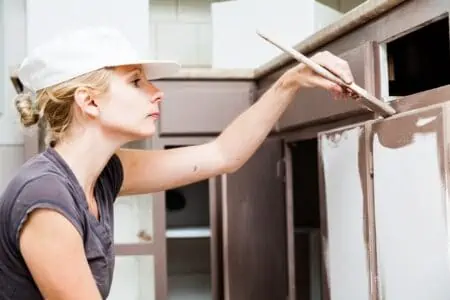
5. Apply the First Coat of Paint
Use a roller, paintbrush, or a combination of both to apply the first paint coat as evenly as possible.
Many people find it useful to start at the edges and work their way in. But each person’s painting method is different.
A roller can make this process much faster and easier when dealing with a flat surface and help you get that smooth finish you’re going for.
6. Apply the Second Coat of Paint
Sand the first coat with 240-grit sandpaper before applying your second coat, making sure to be very gentle. You shouldn’t take any paint off as you do this.
7. Lacquer and Sand Again
Grab your 400-grit sandpaper to gently sand the last coat of paint to help them look even and streak-free. Make sure you don’t sand too hard, or you can remove too much paint from the surface.
How to Paint Laminate Cabinets Without Sanding
While I don’t recommend it, you can do it. Just beware that the paint might not stick properly.
What You’ll Need
- Cleaner/degreaser.
- Paint.
- Primer.
- Foam and regular brushes.
- Water-based satin topcoat.
1. Clean the Cabinets
Using a degreaser and a clean cloth, wipe your cabinets clean. This will ensure that you get a nice and even coat of paint.
2. Remove the Hardware
As you remove the hardware and the doors/drawers of your cabinets, it would be wise to label them. That way, if you’re painting many cabinets at once, you’ll always know how to put the doors back correctly.
3. Apply the Primer
When your cabinets are completely dry, you can add the first coat of laminate paint. When the first coat is dry (about six hours), you can apply the second coat.
Dry Time
The paint will be dry to the touch after about one to two hours. Do not apply the second coat at this point, or you risk removing some of the first layer.
4. Paint the Cabinets
Use a foam brush or a roller when applying the paint. You typically have to apply two coats of paint, but some people go for one or three.
When painting laminate cabinets, you have to remember to use a topcoat. This is important for all surfaces that are frequently used.
How to Fix Peeling Laminate Cabinets
Although laminate is generally sturdy, it may peel back or break with age. You can either repair the current laminate or reface the door to resolve the issue without replacing the units. There’s a fix for this, and you should do it before you start painting.
Scuff up the particleboard or wooden surface with a corner of sandpaper inserted between the substrate and the laminate. This will remove excess glue and allow the fresh adhesive to adhere to the laminate easily.
Squirt a little amount of waterproof adhesive in there as well. Insert the laminate into the adhesive and cover the repair with heavy-duty masking tape. Wrap this around the opposite side of the door and secure it.
You may need to use many layers of tape to secure the laminate in place while the adhesive dries. But, if you have a clamp at hand, close it until it reaches the top of the door, secure the laminate and tighten the clamp.
Once the adhesive has fully set, remove the clamp/tape and scrape any extra adhesive from the cabinet with a sharp utility knife.
Painting Laminate Tips
Painting laminate cabinets is typically an easy job. However, the following tips might help you achieve that gorgeous professional finish.
Test Your Paint
With paint in hand, you’re nearly ready to begin. However, double-check that your stock is suitable for the task at hand. Before going into a whole paint job, testing its bonding qualities could save you from a future instance of peeling paint.
Paint a tiny, inconspicuous part of the cabinet (such as the back of one that you rarely open), allow it to cure, and then inspect the bonding.
Consult a paint dealer at your local hardware shop if you notice bubbles or that the paint won’t adhere. They’ll determine the issue and recommend the best paint for the job.
Consider a Foam Roller
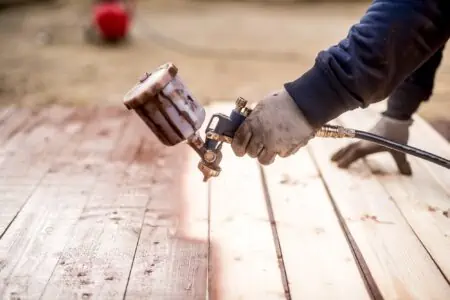
Laminate is completely flat and lacks any wood grain to aid the brush in blending the paint in. That’s why it’s best not to use brushes.
Use a small foam roller for a faultless coating. This is true for both primer and paint. Whatever coat you’re putting, strive for a consistent, streak-free application by only conserving the brush for emergency parts.
Buy Heavy-Duty Sealer
Painting your kitchen cabinets is a significant undertaking, and it’s natural to want to save money on such a large project. If you want to maximize the value of your time spent painting, seal the deal with a good clear coat.
Numerous homes have had success with sheen-enhancing finishes such as polyurethane, which takes two coats for maximum protection. You may also use a wax topcoat, but it will not be as durable. Opt for polyurethane to protect laminate cabinets from natural wear and tear.
Maintaining Your Laminate Cabinets
Cabinets made of laminate are easier to clean than cabinets made of wood. Food and grease deposits are also more easily absorbed into a laminate cabinet.
As a result, while laminate cabinets are typically easier to clean than wood cabinets, they may require more frequent, albeit rapid, maintenance.
Dust them Often
Dust adheres to virtually all surfaces, particularly laminate cabinets. To clear dust accumulation, begin at the top and work your way down with a lint-free cloth or duster. Not to mention the corners, which are notorious for accumulating dust.
Use a Mild Dish Soap
Avoid using abrasive cleaning agents such as baking soda or vinegar to remove grime and grease from laminate kitchen cabinets. A small amount of dish soap in warm water combined with a healthy dose of elbow grease should suffice. Clean the hardware as well.
Rinse and Dry Them
After cleaning with the detergent, wipe the surfaces clean using warm water and clean cloths. Warm water evaporates at a far faster pace than cold or room-temperature water. The less time your cabinets contact water, the better.
After rinsing any cleaning agent from your cabinets, wipe them down with a dry towel. Laminate surfaces exposed to water for an extended time will distort and crack.
Avoid Abrasive Tools
Laminate cabinets are very easy to scratch, particularly if you use wire-bristled brushes, steel wool, or scouring pads. You always want to use a soft microfiber cloth when cleaning them.
FAQs
While painting laminate cabinets isn’t a hard job, it does require some research and prep. Here are a few common details that go with the project.

How Do You Get Paint to Stick to Laminate?
There are two ways to get paint to stick to laminate. You can either sand the surface before painting it or use a good primer if you want to skip the sanding part.
But for the best results, I highly recommend at least a light sanding before applying anything. Sanding helps give the surface a texture for the paint to adhere to.

Can You Paint Laminate Without a Primer?
Yes, you can. However, you will either have to sand the surface first or, if you don’t want to do any of these, you can use chalk paint directly.

How Hard is It to Paint Laminate Cabinets?
Painting laminate cabinets isn’t a complicated thing to do. However, because of the laminate’s smooth surface, you need to make sure the paint adheres. Sanding and priming are two ways to make that happen.

How Long Does Laminate Paint Need to Dry?
It usually takes about eight hours of laminate paint to dry. Always read the paint’s label to make sure you give it enough time to dry.

Should You Paint Inside Cabinet Doors?
Keep in mind that the interior side will be visible every time you open your cabinet doors. It’s the same as painting your front door on a single side: is that something you’d want?
Bottom Line
Knowing how to paint laminate cabinets is important if you want to save money. Replacing laminate cabinets might be a costly expense, so why not update them cheaply with a fresh coat of paint?