Basements are below ground, so they are naturally damp. If left untreated, your basement becomes humid and smelly, resulting in water stains and peeling paint. If you recognize these symptoms, waterproofing a basement should be high on your agenda.
We show you how to waterproof a basement and offer hints and tips for the best outcomes.
Key Takeaways
- Recognize signs of a damp basement: Musty smells, water stains, and peeling paint are indicators that your basement needs waterproofing.
- Interior waterproofing: Use hydraulic cement to fill cracks and apply waterproof paint to walls to prevent moisture seepage.
- Exterior waterproofing: Remove debris, check gutters, and assess soil gradient to prevent water from seeping into your basement.
- Drainage solutions: Install drain tiles to channel water away from your basement, improving overall moisture control.
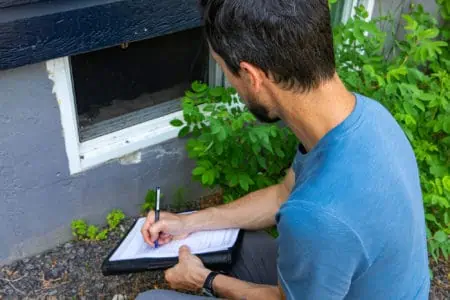
Signs Your Basement Needs Waterproofing
Concrete is porous and sucks up moisture like a sponge. It becomes saturated, releasing water into your basement. Look for staining, especially around the concrete joints, and never ignore pooling water at the base of the walls.
Another sign that your basement needs waterproofing is the smell. If your basement smells earthy, it’s time to act. Check around pipes and drains for the likely cause. Stagnant water gives off a pungent odor, like wet dogs or dirty socks.
If you have a washing machine, check that it‘s not leaking. Also, if you see water pooling at the base of window frames, you should take action.
Dry a one-foot square section of the wall with a rag and tape a sheet of aluminum foil to the wall. Use masking tape to secure it. Leave it for 24 hours and check to see if the underside of the foil is wet.
If moisture is present, your walls are still seeping water.
Is Basement Waterproofing Worth It?

It is if you value your basement as a usable space. There’s an entire floor down there that could become a gym, games room, or even a home cinema. Why let it go to waste?
Waterproofing your basement also removes dangerous mold and mildew spores and protects your belongings. Mold is common in a basement that floods.
Can I Waterproof a Basement Myself?
You can DIY waterproof your basement, saving thousands of dollars in the process. Some methods will indeed require the services of a professional, but most are manageable by you.
What Is the Best Way to Waterproof a Basement?
Knowing how to seal a basement is helpful, but which is the best method? Some are more involved than others, and different techniques deliver varying results.
Filling Cracks
One of the easiest methods is to fill cracks in the concrete walls and floor. The most common location for moisture is at the base of the wall. During construction, the floor is poured first, and then the walls are added.
This creates a “cold joint,” which is a weak spot where cracks appear.
You can use hydraulic cement to patch the cracks because it expands inside the gap and sets rapidly. It enables a novice to remedy the damage and costs less than other methods.
However, patching your concrete walls is often seen as sticking plaster on a more serious problem. In the long run, you may need new walls and floors if the issues remain.
Pros
- Easy to apply.
- Expands inside the crack.
- Relatively inexpensive.
- Readily available.
Cons
- Can be seen as a temporary solution.
Waterproofing Paint
Typically, basement walls are untreated concrete, so using a waterproofing treatment like this KILZ Basement and Masonry Waterproofer is an ideal solution. It forms a waterproof seal when it dries to stop water ingress.
Painting it on is simple; it is a relatively affordable product, and once dry, it looks appealing. It also dries in just four hours.
Waterproof paints provide some protection, but it isn’t the most robust solution, especially if your basement is exceptionally wet. Also, you need to ensure the walls are bone dry before application.
Pros
- Easy to apply.
- Relatively cheap.
- Enhances the basement.
- Fast-drying.
Cons
- Doesn’t stop all the moisture.
- The basement needs to be dry before application.
Installing a Drain
Installing a drain to channel water from your basement is probably beyond the skill set of most homeowners. It involves digging below the walls, installing a concealed drain, and covering the original walls with drywall.
You should probably consult a contractor to complete this because of the structural alterations needed. You need heavy machinery, and the work is disruptive and noisy.
Installing a drain with a pump effectively removes water from your basement. It is also a great option if you have a serious moisture problem in your basement.
Pros
- Removes a lot of moisture.
- Effective in wet basements.
- It is a long-term solution.
- Concealed behind drywall.
Cons
- Can be expensive.
- Requires a degree of skill and knowledge.
- May involve a contractor.
Exterior Groundwork
Rather than dealing with the symptoms of a waterlogged basement, identifying the cause is often the best option. Soil resting against the house walls becomes saturated with water in the rainy season and seeps into your basement.
While this is not a simple solution, it is an effective one. Check the slope of the soil to see how the water drains. If it flows towards your basement, you have an issue.
The work required is heavy and labor-intensive. Another solution is to dig to the foundations of the exterior basement wall and apply a polymer sealant.
You should also give priority to your gutters and downpipes. A blocked gutter can cause untold damage to your basement through continuous dripping. Also, ensure that the downpipe channels the water away from the walls.
Fitting a simple extension should suffice.
Pros
- Long-term solution.
- Effective at removing water.
Cons
- Labor-intensive.
- Involves heavy machinery.
- Can be expensive.
- May involve the services of a contractor.
How to Waterproof a Basement
This article looks at three ways to waterproof your basement: from the inside, the outside, and using drainage. The drainage option covers both internal and external solutions.
From Inside
To kick things off, we’ll start with the easiest methods. Inside solutions are also among the most affordable. Before we get started, we need to gather the right tools.
What You’ll Need
- Paintbrush.
- Masking tape.
- Dust sheets.
- Roller and paint tray.
- Waterproof paint.
- Flathead screwdriver
- Paper towels.
- Hydraulic cement.
- Putty knife.
- Utility knife.
- Sandpaper.
- Silicone sealant.
- Dry rags.
1. Check for Cracks
Water typically enters your basement via gaps and cracks. Take some hydraulic cement and insert it into the cracks using the putty knife. Wait for the cement to dry before sanding it smooth.
2. Check Pipes and Appliances
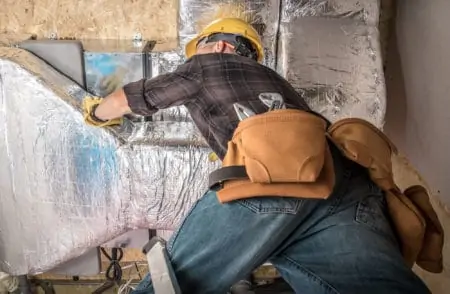
One of the most common ways for water to get into your basement is through leaky pipes and appliances. Condensation is attracted to water pipes and creates water misting, which drips onto your basement floor. Check pipe connections and inlets for leaks as well as condensation.
Feel behind washing machines and check taps for drips. Pipe insulation, like this M-D Building Products Foam Tube, is an excellent and affordable way to keep your pipes protected.
3. Waterproof the Walls
Bare concrete is cold, soaks up water like a sponge, and looks unsightly. Using a dedicated waterproof paint designed for basements is a great option. But before you begin, you’ll need to seal the ceiling and floor against paint contamination.
Run strips of masking tape along the floor and ceiling to avoid paint splashes. Dry the walls with a cloth, and ensure the surface is smooth. Now lay down your drop cloths to protect the floors.
Pop the lid on the paint can and give it a stir using the screwdriver. Wipe the residue from the screwdriver with the paper towels.
You will use a roller for the main wall sections, but not for the cutting in (painting the corners and edges). Pouring the paint into the roller tray makes it easier than carrying a 5-gallon tin of paint.
Start in the corners and then paint the edges where the wall meets the floor and ceiling. Angle the brush, so the bristles form a tip and slowly work your way along the edges. Don’t worry too much if you have an unsteady hand; the masking tape will protect against splashes.
Now grab the roller and load it with paint from the tray. Start in the middle of the wall and work your way out using long strokes. Once the first coat goes on, wait the recommended time to dry before applying a second coat.
Once dry, the waterproofer forms a watertight seal to prevent future moisture seepage.
From the Outside
Unsurprisingly, most of your moisture problems start on the outside. From gutters to the gradient of the soil, the solutions are more involved and time-consuming. As before, gathering the right tools and materials is crucial if you want the best results.
What You’ll Need
- Polymer-based waterproof sealant.
- Paintbrush.
- Roller and paint tray.
- Rake.
- Ladder.
- Downpipe extension.
- Hand brush.
1. Remove Debris and Loose Leaves
Grab the rake and drag fallen leaves away from windows and basement walls. Wet leaves increase the amount of water resting against the wall and restrict drainage.
2. Check gutters and Downpipes
Grab the ladder and rest it against the wall, ensuring that the feet are secure on flat ground. Keep the ladder at a safe angle so that it is stable when you are at the top.
Safety Notice
Before climbing the ladder, check its condition. If the ladder feels unsafe, it probably is.
Once you are satisfied, inspect your guttering for blockages. Leaves and other debris frequently cause gutters to become blocked. When water flow is restricted, it drips over the edge, saturating the ground beneath.
Use the hand brush and sweep out the gutter so that the water runs free. Also, downpipes carry the water from the gutters and away from the property. Consider an extension to the base of the pipe to remove water damage.
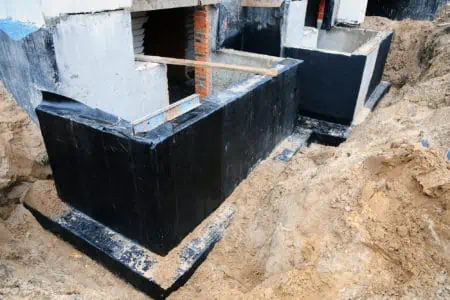
3. Soil Gradient
You may need to hire some heavy machinery for this technique because moving tons of soil is backbreaking work. Maybe consider hiring professional contractors to complete the job and install a tile drain system.
This is not a cheap solution, with some estimates ranging between $5,000 and $10,000. A tile drain system involves digging down to the wall footings around your property and installing a waterproof membrane.
Another product is a rubber sealant, like this Liquid Rubber Waterproof Sealant. It goes on like traditional paint, with a brush or roller, and when it dries, it forms a rubberized coating to repel water.
Drainage
Improving drainage works wonders for removing moisture from basements. Like the groundwork option, most homeowners will feel compelled to hire a professional to complete this work.
It may be hard work, but tackling the task yourself is very satisfying.
What You’ll Need
- Drain tile.
- Shovel or hired digger.
- String and stakes.
- Spray paint.
- Tape measure.
- Spirit level.
- Clean gravel.
- Coarse sand.
1. Identify Where the Water Pools
Walk around the perimeter of your house and look for low-lying water. This determines where you install the drain tile. You will need to wait for heavy rainfall.
Take Note
A drain tile requires a one percent drop to allow the water to drain away. So, that’s one foot for every 100 feet and 2 inches per 20 feet.
2. Mark Out the Drainage Path
You can use a shovel rather than heavy machinery for smaller drain tiles. Mark out the path of the drain using stakes, string, and spray paint. Once you’ve laid out the path, start at the lowest point and dig an eight-inch trench approximately eight inches in depth.
Adjust the gradient of the drain to allow for tree stumps and rocks.
3. Add Gravel
Use clean gravel, and spread it two inches deep at the base of the trench. Place a perforated drainage tile on top of the gravel layer. Use male couplers to connect the drain pipe.
Continue packing gravel around the pipe.
Important Point
Don’t use limestone rock as it may mold into concrete when it makes contact with water.
4. Add a Cover Sleeve
Slide on a cover sleeve over the drainpipe to ensure the holes don’t clog with debris. You can add further protection with a water-permeable landscaper’s fabric.
5. Check the Gradient
Place the spirit level on the pipe and check you have a good gradient. If the bubble sits in the middle, your drain is level, and the water will not flow. It can be easily rectified by packing more gravel beneath the pipe.
6. Cover the Trench
Once you are happy you have the correct gradient, fill the trench with the rest of the clean gravel. Now cover the channel with coarse sand. You can even cover the sand with soil or replace the grass.
Basement Waterproof Tips
Taking the best hints and tips straight out of the professional’s handbook means you get the job done faster, better, and cheaper. Here are a few to whet your appetite:
Dry Out the Basement
You can buy floor standing heaters, like this patio heater by Agiiman, to dry out your damp basement. Buy two, and place them in the center of the basement, facing the walls.
You will need to run them continuously for two or three days before they impact the dampness. Drying out your walls is essential before applying waterproofing treatment.
Strip Away Old Paint
Before applying waterproof treatment, make sure you remove old and flaking paint. The specialist paint doesn’t adhere to existent paint and only sticks to bare masonry. You can use a wire brush to remove the flakiest paint and a scraping tool for the rest.
Increase Airflow
Increasing the airflow keeps the moisture at bay and helps to reduce mold and mildew. Install a window fan or free-standing fans to circulate the air. Also, let some fresh air into your basement if your windows open.
Drywall and Batons
Concrete is a cold and unappealing material. Why not insulate your bare walls with polystyrene sheets and then baton and drywall. It creates a warmer space and looks more aesthetically pleasing.
It also keeps the moisture locked out thanks to the insulation and air gap between the drywall and the concrete.
FAQs

What Causes Basement Moisture?
Basement moisture happens when the water trapped in the soil outside seeps through gaps and cracks in your concrete walls. Concrete is porous and soaks up water, becoming saturated.

How Much Does It Cost to Waterproof a Basement?
Hiring a professional could cost upwards of $10,000. Doing the work yourself is much cheaper because you only have to factor in the price of the materials.

How Long Does Basement Waterproofing Last?
Basement waterproofing lasts about 10 years before it needs replacing. Check your particular brand because it may differ between manufacturers.
Dry Out That Basement
Waterproofing your basement creates a healthier environment and protects your belongings stored below ground. Most of the methods mentioned are relatively simple, but you may need to seek professional advice for longer-term remedies.
However, don’t let that put you off. It could be the best time, effort, and money you’ve spent.