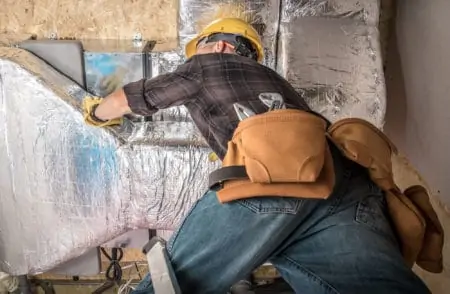
Replacing basement windows may be necessary if your old ones leak like a sieve. Seals perish, glass cracks, and wooden frames rot, so is it any wonder you need to install new windows.
This article explains how to replace a basement window and even covers the different types of windows you can buy.
Key Takeaways
- Measure the rough opening twice before fitting a new window.
- Choose the right type of basement window, such as hopper, awning, sliding, glass block, or egress windows.
- Remove old window sash and frame, clean the opening, and install the new window with appropriate screws and filler.
- Add trim to the window for a professional appearance and better insulation.
Cost to Replace Basement Windows
The price you pay depends on several factors, such as the size and type of windows you choose. Also, installing them yourself or getting a pro to do it makes a difference. Here’s a handy chart showing the cost of window replacements, including installation:
| Window Type | Unit Only | Unit (Including Installation) |
| Hopper/ awning | $45 to $500 | $195 to $1,000 |
| Sliding | $40 to $475 | $190 to $975 |
| Glass block | $80 to $1,500 | $230 to $2,000 |
| Egress | $275 to $1,000 | $425 to $1,500 |
Types of Basement Windows
While you may not get as much choice as you would for other windows in your house, you do still get options. Each style has its merits, and which one you choose is down to personal preference.
Hopper
Hopper windows are one of the most common types used in basements. They open inwards, pivoting from the base of the frame. Most hoppers are steel casing rather than wood, which are also called casement frames.
Awning
Awning windows are similar to hopper windows, except they pivot inwards or outwards from the top of the frame. Again, many are metal casement varieties.
Sliding
Sliding windows are also popular in basements and cellars. The glass panes slide rather than pivot, but it still allows you to let in the fresh air. Sliding windows in concrete basements are often narrow for security reasons.
Glass Block
Glass block windows are pretty basic, consisting of brick-like glass. These windows are cemented in place, offer zero ventilation, and limit the light coming into your basement.
Glass block windows are also the cheapest to install. They may be the best choice for small crawl spaces where you don’t need a window that opens.
Egress
Egress windows are among the most expensive varieties to install. Building codes call for egress windows in basements converted into bedrooms as a means of escape in an emergency.
They should be a minimum of 44 inches from the finished floor with an opening square footage of five-foot-seven inches.
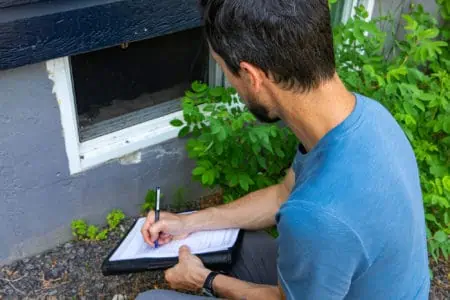
How to Measure for a New Window
Installing replacement windows is all well and good, but knowing how to get accurate measurements is crucial. It’s always best to measure twice, so you only have to fit the window once.
If you replace the window and frame, measure the rough opening. Grab a tape measure and check the width at the top and bottom of the window. Now, do the same for the height, measuring the left and right sides.
If there are discrepancies, always use the smallest measurement as your guide. When replacing the glass only, measure from the inside of the frame (including the putty line) to the opposite side.
Important Point
When ordering the glass, subtract 0.125 inches to allow for wiggle room.
How to Replace Basement Windows With Steel Casing
Steel casings are more common on basement windows because the frames are hard-wearing. They lack the insulating qualities of wooden frames, but they need less maintenance.
What You’ll Need
- Chisel.
- Mallet or hammer.
- Reciprocating saw.
- Pry bar.
- Replacement window.
- Siloxane concrete sealer.
- Putty knife.
- Miter saw.
- Trim.
- Liquid nails.
- Galvanized steel screws.
- Drill/driver and driver bits.
- Double-threaded concrete screws.
- Hammer drill.
- Filler or caulk.
- Shop Vacuum.
- Safety glasses.
- Face mask.
- Earplugs.
1. Remove the Metal Frame
Find the screws in the frame that secure it to the concrete. Use a screwdriver, but try the drill/driver if they are rusted. Pull the frame from the opening, using the pry bar if necessary.
2. Clean the Opening
Attach the hose to the shop vacuum and suck up any dust, concrete, or mortar from the rough opening. Inspect the gap for any irregular edges or ridges that might restrict the new frame.
Grab the hammer and chisel and remove any obstructions. Now, soak the concrete in Siloxane Concrete Sealer until it is saturated. Let the surface dry before moving to the next step.
3. Fit the New Window
Remove the sash and screen from the new window to get at the screw holes easier. Place the frame on the sill in the rough opening and mark the screw hole locations. Grab the drill and make pilot holes for the screws.
While dry fitting the window, use the spirit level to check if the frame is level.
Use the drill/driver with a driver bit to insert the double-threaded concrete screws around the frame. If your new window comes with screw cover plugs, insert them.
4. Fill the Gaps
Use the filler to cover any gaps between the frame and the walls. Smooth it with the putty knife so that it sits flush with the wall and frame.
5. Replace the Sash
Once the frame is in place, insert the sash and screen back into the frame. Now, wait while the mortar filler dries. Check the packaging for the required drying times.
6. Fit the Trim
To add a final touch of finesse, cut the trim and fit it with liquid nails or other adhesive to conceal the rough edges. Use a miter saw to cut accurate 45-degree angles for the corners.
Replacing a Basement Window With a Wood Frame
Wooden framed windows are not as robust as metal-framed versions, but they are just as easy to replace. There are slight variations to fitting a wooden framed window compared to metal ones. Here’s a list of the tools you will need:
What You’ll Need
- Mallet or hammer.
- Chisel.
- Reciprocating saw.
- Miter saw.
- Spirit level.
- Drill/driver and driver bits.
- Screwdriver.
- Putty knife.
- Mortar.
- Wooden shims.
- Expanding foam.
- Double-threaded screws.
- Siloxane concrete sealer.
- Filler.
- Trim.
- Liquid nails.
- Caulk and caulk gun.
- Pry bar.
- New window
- Shop vacuum cleaner.
1. Remove the Old Window
Don’t forget to remove the sash before pulling out the frame with the pry bar. Use the reciprocating saw to cut the fasteners between the studs and the frame. Pull the jamb out to reveal the rough opening.
2. Clean the Opening
Attach the hose to the shop vacuum cleaner and remove any dust and debris. Grab the chisel and mallet to remove any rough edges or ridges in the concrete that restrict the new frame. Soak the concrete in a siloxane sealer until it is saturated and wait while it dries.
Top Tip
If you cannot clean the edges of the rough opening, order a slightly smaller window and fill in the gaps using mortar.
3. Fit the New Window
Remove the sash from the new window to make it easier to access the screw holes. Lift the frame into position and mark the location of the screw holes. Use the drill/driver to make pilot holes, and drive the double-threaded screws into the frame and concrete.
Check to see if the window sits square with the spirit level. If your new window comes with screw hole plugs, insert them to disguise the screws.
4. Fill the Gaps
Run a line of decorator’s caulk along the window frame where it meets the concrete opening to fill the gaps. If they are more substantial, use mortar and wooden shims.
Top Tip
You can use expanding foam for more significant gaps. The trick is not to use too much, or the foam may damage the frame when it expands.
5. Smooth the Filler
Smooth the filler with the putty knife so that it is flush with the wall and frame, and all the gaps are concealed. If you’ve used expanding foam, use a utility knife to cut away the excess until it is level with the wall.
6. Fit the Trim
Using filler or expanding foam will leave a lot of unsightly edges, so to get a professional finish, use trim. Cut the 45-degree corners with a miter saw to get accurate angles and a neater fit.
Glue the trim in place using liquid nails.
How to Replace Basement Window Glass
Sometimes it is easier to replace the glass inside the frame than the entire window unit. This is especially true with cracked panes. Why give yourself extra stress if the frame is still in good condition?
Before you get started, gather the tools you will need.
What You’ll Need
- Tape measure.
- Hammer.
- Putty knife.
- Duct tape.
- Chisel.
- Paint scraper.
- Wire brush.
- Heat gun.
- Glass cutter.
- Glass pane.
- Glazing points.
- Glazing compound or putty.
- Clean rag.
- Linseed oil.
- Shop vacuum cleaner.
- Protective gloves.
- Goggles.
1. Remove Cracked Pane
You can remove the broken glass pane with the sash in place, but it is easier to remove it and lay the window on a flat surface. Don your goggles and protective gloves and carefully remove the broken shards of glass.
Top Tip
Tap the pane with a hammer to give the glass a clearer break line. It makes it easier to remove.
Cover the broken pane in duct tape to seal the pieces in place if the glass proves tricky to get out. Then use a heat gun and scraper to remove the putty around the inside edge of the frame.
2. Remove the Glass and Putty
Taking extreme care, remove all the shards of glass, all of the old putty, and the metal glazing points. These are small metal inserts that help secure the glazing in the frame and minimize damage.
Use a heat gun to soften the putty to make it easier to scrape away. Ensure all the putty is removed because you will need a clean edge for the new pane.
3. Prepare the Frame
Remove old paint, debris, and dirt with a wire brush. Use the shop vac to suck up the mess and wipe the frame clean with a cloth. Once clean, apply a coat of linseed oil to the rabbet (the lip of the frame) to help the putty stick.
You should have already measured the new pane of glass using the method described above and ordered the replacement glass.
4. Apply the Putty
Roll out a ball of the ready-mixed putty and then stretch it into a long thin sausage. Start in the corner of the rabbet and press it into place with your thumb. Finally, press the putty firmly with the putty knife to make a secure foundation for the glazing.
5. Attach the Glass
Press the glass into the putty and check it is flat in the frame. Every six inches, insert a glazing point to grip the glass.
Now, roll a rope of putty in your hands about 0.75 inches thick and press it onto the frame where it meets the edges of the glass. Again, press it with your thumb, working around the pane.
Wet a rag with linseed oil and periodically apply it to the putty for a better bond with the glass.
6. Smooth the Putty
Hold the putty knife at a 45-degree angle, and, starting from the top corner, drag the knife down the putty line, smoothing as you go. Repeat this for the other side and the top and bottom of the pane.
Finally, wet your finger and run it along the putty line to get a super smooth finish.
7. Replace the Sash
Reinstall the sash back into the frame and test the window to see if it opens and closes as it should.
FAQs

Is It Hard to Replace Basement Windows?
Replacing a basement window is fairly straightforward. Removing a frame and sash is more complicated, but someone with basic DIY skills can master it.

Do Basement Windows Need to Open?
Basement windows don’t have to open, but it helps if they do. It increases airflow, which helps regulate mold and mildew growth.
However, if you convert your basement into a bedroom, you are required by law to install an egress window. It is a means of escape in an emergency and needs to conform to the building codes for your local area.

What is the Standard Size of a Basement Window?
Egress windows have mandated sizes. They should have an opening of 22 inches or more between the window unit and the wall. The window should also be a minimum of 44 inches from the finished basement floor.
There should also be an opening of at least 15 inches and square footage of five feet seven inches for access.

How Do You Get More Light From Basement Windows?
There are a few tips to increase light through your basement window. You could paint your basement walls white to reflect sunlight or strategically place mirrors to bounce light around the room.
Another simple method of increasing natural light is to remove shrubs and plants on the outside and sweep away dead leaves. Finally, basement windows get splashed with mud regularly during heavy rainfall, so keeping them clean is a must.
Replacement Window Made Easy
Using a professional to replace your basement windows is expensive compared to the DIY approach. But, it doesn’t have to be complicated, especially if you follow our guide.
So, the next time you need to replace a window, gather the right tools and materials and get stuck in. Not only will you save money, but you’ll learn a valuable new skill.