Unless you’ve fitted windows and doors before, it is unlikely that you will have heard of shims. Knowing how to shim a door is the secret weapon in getting square door frames, so the door hangs properly.
In this article, we share the best way to shim a door and explain the difference between different types of shims.
Key Takeaways
- Door shims are used to square door frames, ensuring the door hangs properly.
- Shims come in different materials like wood, steel, plastic, and cardboard, with each suitable for different situations.
- Typically, three or four sets of shims are used per door, placed next to each hinge and behind the strike plate.
- To shim a door, remove the trim, check the frame’s squareness, insert shims between the frame and door stud, and trim the shims flush with the frame.
What Are Door Shims?
Door shims are thin slivers of wedge-shaped material that fit behind the door frame to ensure it sits square.
How Many Shims Per Door?
Typically, you would use three or four sets of shims per door. The shims go next to each hinge and behind the strike plate.
What Can I Use as Door Shims?
Door shims come in many materials. Some are better than others, and knowing which to use in different situations is crucial. You can’t just grab whatever is to hand and hope for the best because it could lead to problems later down the line.
Wood
Wood shims are better for interior door jambs because they don’t get wet. If they make contact with moisture, they will swell and rot, pushing the frame out of square. For exterior doors, use metal or plastic shims.
Also, wood is not permissible when you need increased fire resistance. However, they are easy to use and cut to size.
Steel
Steel is the ultimate hard-wearing material. It doesn’t deteriorate like wood, and it is fire-retardant. Using metal shims increases the costs because they are not as readily available as cardboard or wood.
Plastic
Plastic shims are ideal for locations where moisture is present, like exterior doors. It’s also perfect for hinge shimming because it doesn’t expand or shrink and keeps its form when it gets wet.
However, they are harder to use because they are a tougher material and more challenging to trim to size.
Paper or Cardboard
This shim material is readily available and easy to cut to size. It is ideal for interior door frames but not for exterior jambs where moisture is present.
Paper or cardboard should also not be used on fire-retardant doors where it may compromise the fire rating.
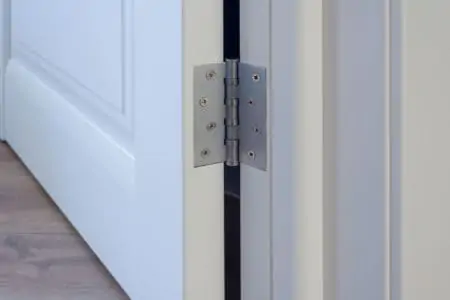
Door Shimming Diagram
Image: (Please use hinge-shim-fig-1 attached in Trello card).
Door shims work in many different ways. Whether you have a door that won’t close or a toe-in or out situation, door shims can help. We share some different scenarios and the best way to fix the issue.
Gap Too Big on Lock Edge of the Door
Image:(Please use door-gap-too-big-1 attached in Trello card).
The best way to install shims for a gap too large on the lock side of the door is as follows:
Place equal thickness shims next to each jamb mounting plate at location C on the diagram and hinge plate. You can make additional adjustments by mounting extra shims between the hinge leaf and jamb plate, as shown in location D.
Gap Too Small on Lock Edge of the Door
Image: (Please use door-gap-too-small-1 attached in Trello card).
The method is the same when the gap is too small, except you need to place the shims in locations A and B. This adjusts the door to widen the gap.
Take Note
If the shim is too thick in location A, it could cause the hinge to stick.
Out of Square (Toe-Out)
Image: (Please use door-toe-out-1 attached in Trello card).
Toe-out means the gap is wider at the bottom of the door than at the top, so the door won’t close.
Place the shims in locations C and D between each jamb and hinge plate at the bottom of the door. You can make additional adjustments by placing a shim on location A at the top of the door. It helps the door to rotate around the middle hinge.
Again, like before, if the shim is too thick in location A, it could cause the hinge to bind.
Out of Square (Toe-In)
Image: (Please use door-toe-in-1 attached in Trello card).
Toe-in means that the gap is more prominent at the top of the door compared to the bottom. The solution is to place a shim in location A at the top of the door and possibly a shim in the center hinge.
You can also make adjustments by placing a shim behind locations C and D on the top hinge.
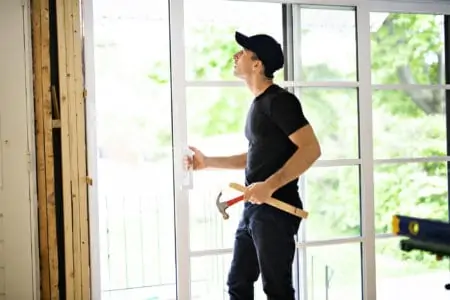
How to Shim a Pre-Hung Door
For this instructable, we will shim a pre-hung interior door with wooden shims. It may sound complex, but it is actually a straightforward process. Before starting, you will need the right tools and materials.
What You’ll Need
- Nails and screws.
- Hammer.
- Spirit level.
- Shims.
- Utility knife.
- Pry bar.
1. Remove the Trim
The trim surrounds the door casing, and by removing it, you expose the rough opening. Trim is typically installed using finish nails, but there might also be a layer of paint. Use the utility knife to break the paint seal.
Take care not to gouge the trim as this is needed later on. Insert the pry bar and apply gentle pressure to pull the trim away from the frame. Start at the base and work your way around the jamb.
2. Check the Jamb Is Square
Place the spirit level on the left side of the door jamb and the bubble should sit in the middle of the level. If not, you will get a clear idea of where the shims need to go. Do this on both sides of the jamb.
Take Note
If you were installing a new pre-hung door, you would need to check that the door slab is level so it will latch.
3. Place the Shims on the Left Jamb
Shims are tapered, making them easy to insert into your door frame. Grab the hammer and insert shims on the left side of the jamb from both sides of the door. The two shims should slide on top of one another, and it’s best to start with the largest gap first.
Check the level and repeat the process on the same side of the jamb. Focus on the top of the door first and then the base and middle. If the bubble in the spirit level is in the center, the door frame is plumb.
4. Place the Shims on the Right Jamb
Repeat the process on the opposite side of the door opening. Check at each stage that the frame is square using the spirit level.
5. Shim the Header
Once you’ve placed the side shims, turn your attention to the header jamb. Using the spirit level, check if it is square, and start tapping the shims into the largest gaps along the jamb. Insert the shims from both sides of the frame and check the levels at each stage.
When the bubble sits in the middle of the level, you will have a perfectly square door frame.
6. Secure the Shims
Once you are satisfied with the shim locations, insert two and a half-inch finish nails to secure them to the frame. Don’t drive the nails in too hard, as this might knock the jambs out of plumb.
Do the same for the other side of the frame and the header.
Important Point
If you were shimming an exterior door, screws would be better than nails because they are more secure.
7. Trim the Shims
Grab the utility knife and cut away the excess shims so that they sit flush with the door frame. This conceals them when you replace the trim.
8. Test the Door
Close the door to check that it operates as it should. Do this before replacing the trim so that you can add or remove shims as necessary to find the square. Once you are satisfied that the door fits snugly, check that the frame is plumb with the door closed.
9. Replace the Trim
Use a hammer and the finish nails to secure the trim. Start at the bottom of the frame and work your way around. If you are lucky, the existing nails may still be embedded in the trim, making it easier to locate the nails around the frame equally.
FAQs

Do All Doors Need Shims?
Not all doors need shims. Internal and external doors need shims, but you couldn’t use shims on cabinet doors because they lack a frame.

Can I Use Cardboard As a Shim?
You can use cardboard as a shim, but only on internal doors. The minute moisture penetrates the cardboard, it disintegrates, so keeping it dry is crucial.

Do They Make Shims for Door Hinges?
You don’t need specialist shims for door hinges; the standard ones will do. Place them next to the hinge location to provide the added stability the frame needs.

Do You Screw Through Shims?
You screw through shims to secure them to the frame and the door stud. You can also nail them, but only on internal doors.

How Do You Shim a French Door?
You do it in the same way as shimming a standard door. The only difference is you need to check the alignment of both doors when shut before you begin.

Why is My Door Still Offset After Shimming?
If the door is still offset after shimming, you probably need to add more shims on the opposite side to even the door. It could also result from too many shims on the top or bottom of the hinge side door frame.
Shim(ply) Wonderful
Without shims, getting that door frame square would be almost impossible. For such a simple concept, shims are ingenious bits of kit. They allow you to gradually adjust until you have the perfect angle, so the door and frame are square.
So, the next time you have a sagging door, or it won’t close without catching on the frame, get shimming to solve the problem.