Removing laminate flooring is far easier than lifting a wooden floor, but you still need to know the proper technique. You also need the correct tools to get the job done swiftly and safely.
This article explains how to remove laminate flooring, including glued and floating floors, and the associated costs.
Key Takeaways
- Determine the type of laminate flooring: glued or snap-on.
- Clear the room, remove baseboards and trim, and wear safety gear.
- For snap-on laminate, use a pry bar and chisel to remove the flooring.
- For glued laminate, use a mop, heat gun, and scraper to remove the glue before lifting the flooring.
Is Laminate Flooring Hard to Remove?
Laminate floor removal is pretty straightforward and within the capabilities of the average DIY enthusiast. Whether stripping it from plywood or from concrete, it comes up easily if you use the correct tools.
Cost to Remove Laminate Flooring
The costs vary depending on your location and the type of flooring. Glued and hardwood laminates are more challenging than floating floors. You should expect to pay between $125 and $310.
The cost to dispose of the old floor adds another $50 to $65, depending on your Zip code. However, if you opt to do the work yourself, you only have to account for the tools and disposal costs. Your time and labor are free.
How to Remove Laminate Flooring
Laminate has a lifespan of between 15 and 25 years, so it stands to reason that over time, the floor fades. When that happens, it’s time to rip out the old planks.
There are two types of laminate: glued and snap-on; the removal method differs for both.
Floating or Snap-On Laminate
Floating floors snap together without glue, making them easier to remove. When the laminate is glued down, it requires more elbow grease. It’s also more challenging to lift the floor without breaking it.
What You’ll Need
- Work gloves.
- Goggles.
- Face mask.
- Work boots.
- Drywall knife.
- Side cutter.
- Utility knife.
- Chisel.
- Hammer.
- Heat gun.
- Marker pen.
- Floor scraper.
- Pry bar (best removal tool).
1. Don Safety Gear
Put on your face mask, goggles, work boots, and safety gloves, as laminate boards have sharp edges and chips easily. The last thing you want is a splinter in your eye, so safety is paramount. Also, there will be a lot of dust, so the face mask keeps your lungs safe.
2. Prepare the Room
Clear all the furniture from the room and lift any coverings like rugs. Use the utility knife to score along the top of your baseboards to break any paint seals. This prevents the baseboard from ripping the drywall when you pull it away.
3. Remove the Baseboards
Grab the drywall knife and slide it between the wall and the baseboard. Using the pry bar, insert it into the gap created by the knife. Use the knife to protect the wall when you pry the baseboard.
Once the baseboard comes free, use the side cutters to trim back any visible nails protruding from the wall. If you can’t cut the nails, use the hammer to drive them into the wall, so they sit flush.
Now mark the wall and the corresponding baseboard with a number so that you know where to replace it. Once you’ve removed all the baseboards, pry up the transition strip covering the laminate and the door threshold.
Take Care
When pulling up baseboards and other trim, be careful because you need to reuse them when the new floor is down.
4. Remove the Laminate Floor
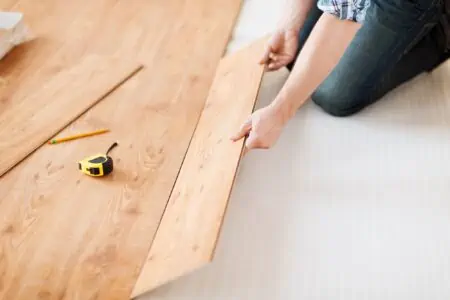
Slide the pry bar into the gap under the first row of boards nearest the wall. Apply pressure and lift the first board to a 45-degree angle. Snap-on laminate planks interlock with the adjacent board and separate when angled.
Repeat this procedure along the first row of boards.
5. Insert the Chisel
Grab the hammer and chisel and insert it under the first plank in the second row and lift the board. Repeat this process with the next plank and so on until the floor is up.
6. Lift the Underlayment
Beneath your vinyl floor is a foam layer that softens the board’s echo and helps to retain heat. If it is in poor condition, you will need to lift it from the subfloor. However, it can stay in situ if it is usable and you are laying a new laminate floor.
Use the floor scraper to lift the edge of the underlayment and then pull it up with your hands.
7. Cleanup Time
Use the shop-vac to suck up the loose debris from the subfloor, and you are ready to install your new flooring.
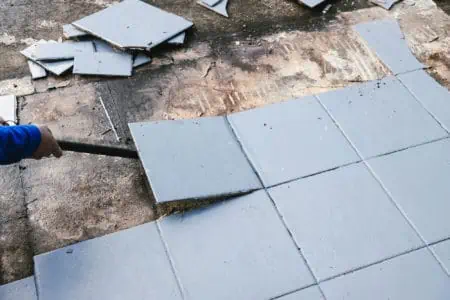
Glued On Laminate Planks or Tiles
It can be more challenging to remove your floor without damage when the flooring is glued. It also takes a bit more brute force. Removing glued tiles from stairs is just as tricky.
Before we get into the details, you will need to gather the correct tools.
What You’ll Need
- Pry bar.
- Utility knife.
- Chisel.
- Mallet.
- Mop.
- Heat gun.
- Face mask.
- Goggles.
- Safety gloves.
- Work boots.
1. Remove the Baseboards and Trim
Follow the same steps as before and remove the baseboards and trim. Don’t forget to remove the transition strip covering the laminate and door threshold.
Safety Notice
Always wear your safety gear because laminate splinters and chips easily.
2. Mop the Floor
Mopping the floor helps soften the glue between the joints and the adhesive on the subfloor. Using a heat gun also helps to loosen the glue. Once pliable, run the utility knife along the joint to break the seal.
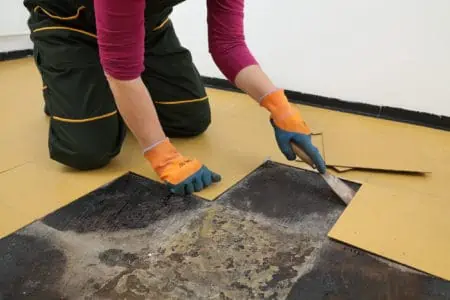
3. Remove the Floor
Using the pry bar, insert the hook-end in the gap between the first row of planks and the wall. Lift the board to 45 degrees and pull it free. If the glue fails to release the board, use the heat gun again.
Repeat this process along the first row until you reach the end.
Next, insert the chisel under the second row of laminate and strike the end with the hammer. The shock should dislodge the glue holding the plank to the floor. Using the same technique as before, lift the board to 45 degrees and pull it free.
Continue doing this until you have stripped the floor.
How to Remove Laminate Flooring Glue
Once you lift your glued laminate floor, the adhesive is left behind. It bonds to the wood beneath and sets solid. You will need to remove it to lay a new floor over the top.
What You’ll Need
- Heat gun.
- Mop.
- Scraper.
- Putty knife.
- Shop-vac.
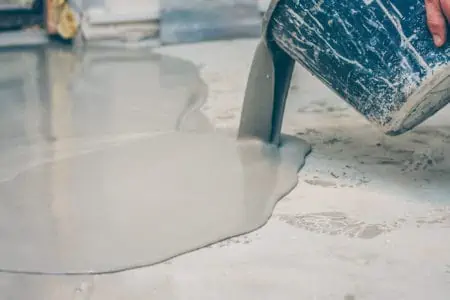
1. Mop the Subfloor
Water helps to soften the glue. Mop the adhesive to make it more pliable.
2. Use the Heat Gun
Applying heat to the glue is a great way of removing it. As it heats, it becomes pliable. You can then scrape it off with the putty knife or scraping tool. Continue stripping the glue until you have covered the entire floor.
3. Cleanup Time
Use the shop-vac to suck up the debris from the subfloor. This is crucial if you want to lay a new floor similar to the one you lifted.
Removing Laminate Flooring Without Removing the Skirting
Trying to remove laminate flooring without removing skirting is only possible if the floor was originally laid with the skirting in situ. If the laminate sits under the baseboard, you will need to remove the skirting to get the boards up.
Some floating floors have a beaded edge, making it possible to lift them without pulling out the baseboard.
A flathead screwdriver will lift the trim to expose the gap between the edge of the laminate and the baseboard. Once the opening is exposed, you can use the same techniques as before to lift the floor.
Can You Reuse Laminate Flooring?
You can reuse snap-on laminate because it is a dry installation. It means you don’t use glue because the boards connect and lock into position. Trying to reuse glued on planks is more tricky because you need to get the flooring up without any damage.
That is pretty unlikely, considering the amount of force needed to break the adhesive seal with the subfloor. Plus, laminate boards snap and chip easily.
How Long Does Laminate Flooring Last?
It depends on the quality of the laminate flooring. High-end manufacturers like Pergo produce laminate that will last 25 years before they start to fade or show signs of wear and tear. Some cheaper versions might deliver 15 years of useful life.
It also matters where you lay the laminate. In kitchens and hallways, you get more footfall, testing the laminate’s resilience. When you compare that to wood flooring for cost, it holds up pretty well.
FAQs

How Do You Remove Laminate Flooring Without Damage?
Lifting snap-on laminate without damage is easy because the boards clip together and can be unclipped. No glue is used in the construction of the floor, unlike older flooring, which was typically glued in place. All you need is a pry bar and a few simple tools.
Take off the baseboards and lift the first row of laminate with the pry bar. Then insert the chisel under the first plank on the second row and hammer it to lift the board. Repeat this process, and you will be done in no time at all.

Why Does My Laminate Floor Keep Lifting?
Your floating floor expands and shrinks when humidity levels change. If you haven’t left a small gap between the edge of the floor and the wall, it bows as it expands.
The Last Word
Laminate has been popular since its invention in the 70s, and it shows no sign of waning. It’s thanks to their ease of installation and the cost compared to solid wood flooring. However, a wooden floor can last for hundreds of years, unlike the 15 to 25-year lifespan for laminate.
Removing a laminate floor is easy enough, and you can do it with minimal cost. So, if you think it’s time your floor got a new lease of life, what are you waiting for?