Tiling a shower floor is a great way to breathe new life into your shower room. Whether it’s an ensuite or the family shower cubicle, knowing how to tile a shower pan is super useful. It saves you money and gives you the satisfaction you did it yourself.
We show you how to tile a shower floor and share some modern color ideas to get your creative juices flowing.
Key Takeaways
- Prepare the shower floor by installing a waterproof membrane if needed and ensuring a gentle slope towards the drain.
- Perform a dry run with tile spacers to plan the layout and make necessary cuts to the tiles.
- Lay the tiles using thin-set mortar, starting at the wall and working outwards, maintaining consistent spacing with tile spacers.
- Once the mortar has set, apply grout to fill the gaps between tiles, removing excess grout with a damp sponge.
Is It Hard to Tile a Shower Floor?
All tiling requires a level of skill, but the more you do it, the easier it gets. Tiling a pre-made plastic pan is no more challenging than tiling any other surface. If you are new to tiling, take it slow, and don’t fret if you make mistakes.
Building a shower floor and pan from scratch is more complicated, but it can be done by someone with intermediate DIY skills.
How to Prepare a Shower Floor for Tile
Preparing a shower floor without a pan in situ requires a bit more background work before you can begin tiling. Most subfloors are made of wood, so they are susceptible to water damage.
If you tile directly on plywood, it will expand and rot, which will lead to more significant problems further down the line.
Do You Waterproof a Shower Floor before Tiling?
If you are laying the tiles onto a plastic shower pan, you don’t need waterproofing. On concrete, however, you will need a waterproof membrane. Once the concrete base has set, cut the membrane to size and lay it over the top.
You’ll need to ensure the liner overlaps the wall by about six inches. Nail it to the exposed studs to hold it in place. Feel for the drain location and draw around it with a marker pen.
Then cut out the opening with a utility knife. Allow for a 0.5-inch overhang on the edge of the tray to prevent water from getting underneath.
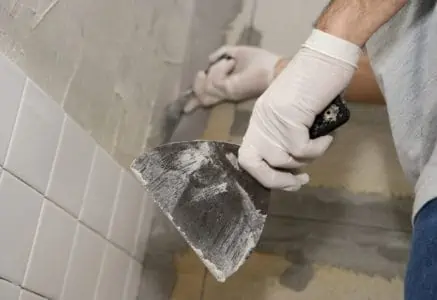
The final stage is to lay metal lath (a thin mesh) over the liner. You will then need to cover the lath in a layer of mortar.
You must ensure that the floor has a gentle slope towards the drain. Use the spirit level to check the gradient drops four percent, or 0.5 inches per 12 inches from the wall.
Take Note
Be careful not to walk on the lath as it could puncture the liner.
How to Tile a Shower Floor
Before we get to the fun part of replacing your tiles, you will need the right tools and materials. You could buy a premade shower pan designed to take tiles, but this is more fun. For this exercise, we will be tiling over a cement base.
What You’ll Need
- Trowel.
- Notched trowel.
- Spirit level.
- Rubber mallet.
- Manual tile cutter.
- Grouting float.
- Bucket and sponge.
- Tile nibbler.
- Thin-set mortar.
- Ready-mix grout.
- Tile spacers.
- Paper and pencil.
1. Dry Run
The best way to check your tiled floor fits is to dry-place them using the tile spacers. This helps you work out the layout and cut any tiles to shape. Think of it like a giant jigsaw puzzle with all the right pieces.
You can use a manual tile cutter for the straight cuts and a tile nibbler for more intricate shapes. It’s also a great idea to draw a rough plan of the tiles. Number the back of the cut tiles so that you can remember where they fit and correspond that number with the plan.
2. Lay the Thin-Set Mortar
It is easier to buy a tub of ready-mixed mortar, especially as most shower pans are small. This Weldwood Ceramic Tile Adhesive is a good choice. Use a notched trowel, like this Schluter Ditra model, to spread the thin-set mortar.
Cover the entire enclosure in tile adhesive, leaving a half-inch gap around the edges.
Top Tip
You should spread a layer no thicker than five millimeters, depending on the weight and size of the tile.
3. Lay the Tiles
Start the first line of tiles nearest the wall for a straight line to work with, ensuring the rest of the tiles are aligned. Use two spacers placed between the wall and the tile. If you opt for larger tiles, use three or four spacers for each one.
Don’t forget to place two spacers in the gap where the next tile joins. Work along the length of the wall to the edge of the enclosure, repeating the spacer pattern with each new line of tiles. Cover the entire floor, remembering the order of the cut tiles.
As you place the tiles in the thin-set mortar, apply firm pressure for a better bond. You can use a rubber mallet for this.
4. Check the Level
While the shower floor slopes gently towards the drain for the water to run off, the tiles individually should be level. There shouldn’t be any jutting out. Laying a spirit level onto the tiles is the best way to gauge this.
Get on your hands and knees and lower your sightline to the height of the floor. You will spot any anomalies instantly. Use the mallet to tap down any rogue tiles that catch your attention.
Now remove the tile spacers and wait 24 hours while the adhesive sets.
Top Tip
You can also check the gradient of your floor by holding the spirit level on the floor, so the bubble sits in the middle. You should notice the floor sloping towards the drain so that the water can flow away.
5. Time to Grout
Once the mortar has set, it’s time to grout. Load a generous amount of the grout onto the tip of your smooth trowel and press it into the gaps. This Premium One-Quart ready-mixed tub is easier to use than mixing it yourself.
Work across the floor surface, repeating this process, ensuring all the gaps are filled. Now grab the sponge and bucket and fill it with water. Soak the sponge in the water, squeeze it out and wipe it across the tiled surface.
Run the sponge along the joints of the tiles, removing excess grout. Ensure that you remove grout from the tile’s surface because when it dries, it sets hard. If not, you may have to chip it away, which damages the tile.
Now, wait 24 hours while the grout sets.
How to Tile a Shower Floor Slope
All shower basins have to slope towards the drain outlet. If the floor is perfectly level, the water will pool as it fails to drain away. The drop is typically four percent or 0.5 inches for every 12 inches from the shower wall.
Here’s how to tile a sloped floor:
- Check for high and low points on the floor. Use a tape measure to set the height and a spirit level to gauge the slope of the floor.
- Ensure the subfloor is free of debris.
- Coat the subfloor concrete in a priming agent, like this KILZ Latex Primer/Sealer.
- Wait for the primer to dry. Consult the instructions for your product’s specific guidelines.
- Use a notched trowel to lay down a five-millimeter layer of thin-set mortar.
- Lay the tiles, starting from the flat wall side and working out.
- Use tile spacers to ensure even spacing.
- Wait 24 hours while the adhesive dries.
- Apply the grout using a grout float or trowel. This Troxell Urethane float is an excellent product to use.
- Wipe down the tiled surface with a damp sponge to remove the excess grout.
- Wait 24 hours while the grout dries.
Do You Tile the Shower Floor or Walls First?
You should always tile the floor first because the tiles slot underneath the overhang on the walls, making the tiles much more watertight.
Shower Tile Color and Design Ideas
Are you stuck on tile designs and color ideas? If you need some inspiration, take a look at our inventive ideas to kick start the creative process.
Go Bold or Go Home
Contrast bold and light colors in vertical and horizontal stripes. Using darker colors creates a design statement. It also has the added benefit of tricking the eye that the shower unit is wider.
Contrast Feature Walls with Plain Walls
Most bathrooms are stark white, which is great for that sterile and hygienic look, but it can be boring. Why not contrast your shower walls with a bold pattern from the east or go retro for an added wow factor. .
Try Herringbone
If you’ve ever been to an old building, the chances are it has a parquet floor in a herringbone design. The design dates back to Roman times, so it is a true classic. Herringbone consists of interlocking tiles laid at 45-degree angles.
Use Bright Colors
Who wants a dull shower room? Think about bright colors like yellow, pink, or even neons if you wish to stand out and make a statement. Tiles come in thousands of varieties and colors, so get playful and inject some fun into your shower.
Color the Grout
Almost all grout is white, which looks classy, but contrasting the color of your tiles with grout creates amazing effects. You can even buy glitter additives to make your shower enclosure sparkle. This Hemway Glitter Additive is an affordable product that transforms your grout.
Wood Effect
Nothing oozes style like warm wood-effect tiles. Your shower looks inviting and intimate, making it a delightful place to be. Mix and match different faux wood grains and shades to further enhance the effect.
Mix and Match
Try mixing different patterns or small and large tiles. It looks great on floors and walls. You can be as random as you want, and the bolder you go, the more striking the effect.
FAQs

When Tiling a Shower, Where Do You Start?
You should always start in the corner. Tile the floor first so that the wall tiles will overhang, making it more watertight. For the walls, always begin in the corner at the top.
You always have whole tiles at the top of the wall and cut the tiles at the base to size.

What is the Easiest Tile to Install In a Shower?
Mesh-mounted tiles are the easiest to install because they come attached to a mesh frame that makes them flexible. You can cut them to size, and the project gets completed faster because you can lay multiple tiles at a time.
Try using mesh-mounted tiles if you want to speed up your installation time, or lack confidence.
The Last Word
You could take the easy road and buy a premade plastic shower basin. It slots into your available space and is ready in double-quick time. But no one will ever compliment you on your style choices.
Creating a tiled shower floor will win you friends and influence people (okay, so we exaggerated), but it will make your shower stand out. We all like beautiful things in our lives, so why should your shower floor be any different?