Tiling a shower adds the wow factor to any bathroom. Knowing how to tile a shower saves you money, and gives you the satisfaction of creating something stylish yourself.
We show you how to tile a shower wall and explain the correct order to complete the shower tile installation. You will also pick up some valuable tips along the way.
Key Takeaways
- Preparation is key: Measure the shower area, create a layout plan, and gather necessary materials and tools.
- Choose the right type of tile: Consider factors like water absorption, durability, and cost when selecting porcelain, ceramic, glass, granite, or slate tiles.
- Follow the correct order: Start at the center of the shower base or back wall and work outwards, using tile spacers and checking for levelness regularly.
- Seal and finish: After tiles are set and dried, apply grout to seal joints and caulk exposed edges for a watertight, polished look.
Can I Tile My Shower?
You can tile your shower as long as you possess the necessary skills. Tiling is not something you can just dive into without learning a few techniques first. We want to show you the correct way to do it.
You will need a basic grasp of tiling and at least a week of free time to complete the task. You should also put safety at the top of your list.
You’ll need safety goggles to protect against flying tile splinters, gloves, and a face mask to prevent dust inhalation. When grout dries, it creates a lot of particles, especially if you need to smooth any rough edges.
DIY tiling a wet area means you will need to take precautions to get the shower stall watertight. The floor and corners will need to be completely sealed, or you risk water damage below the shower base.
Here are some other safety considerations to keep in mind:
- Disconnect the power supply if wires run behind the shower walls.
- When using a tile saw, ensure that the water reservoir is full. The water needs to cover the cutting area to prevent dust and flying chips.
- Wear earplugs to protect against the noise of the tile saw.
- When operating a tile saw, always wear appropriate workwear. Don’t wear baggy sleeves or loose clothing that could become entangled in the saw blade.
Take Note
If you lack the skills, confidence, or the spare time to devote to the project, bite the bullet and call in a professional tiling expert. It will cost you more, but it is much better to be safe than sorry.
What Is the Correct Order to Tile a Shower?
There’s always a correct order to complete any DIY task, and knowing where to start tiling a shower wall is no exception.
When tiling a shower from scratch, always start with the floor first if you have a shower without a pre-molded pan. Laying the floor first is better for sealing against water ingress and gives better structural integrity to the wall tiles.
Start at the center point of the base on the back wall. Work outward towards each corner because it’s more pleasing to the eye to cut the tiles to size in the corners.
Once the shower floor is complete, follow the same process of starting in the center of each wall and working outwards. When you’ve covered all the walls in the first row of tiles and cut the corner pieces to size, move on to the next row. Check every third row with the spirit level to keep them level.
Different Types of Shower Tiles
Knowing which tiles are better can be tricky with so many sizes, styles, and materials available. From porcelain tiles to glass, it mostly comes down to taste and layout. Let’s look at your options to give you some ideas:
Porcelain
According to the Porcelain Tile Certification Agency (PTCA), porcelain tiles have an absorption rate of just 0.5 percent, making them waterproof.
Porcelain tiles are more expensive than ceramic tiles, making them a luxury option, so if you have a limited budget, look elsewhere.
Ceramic
Ceramic tiles are an excellent alternative to porcelain. They are typically made from recycled materials like clay, glass, and sand. They are cheaper to buy, but there is little difference in the overall robustness and visual effect compared to porcelain tiles.
Ceramic tiles are easy to maintain and come in thousands of pattern and color varieties. One thing to bear in mind, ceramic tiles have an absorption rate higher than porcelain, at just above five percent. While this is nothing to worry about, it means they soak up more moisture.
This may not lead to severe leakages, but it does weaken the tile’s useful lifespan.
Glass
Glass tiles are mold and mildew resistant, easy to maintain, and come in multiple options. Glass tiles are rated at zero for water absorption, so you can sleep peacefully knowing your shower will not leak.
Glass tiles are more expensive, so you will need deeper pockets, but they last longer than most alternatives. This makes them expensive initially, but possibly a cheaper long-term alternative.
Granite
Granite is an excellent tile alternative. It is hard-wearing, comes in several designs, and is easy to keep clean. It has low porosity, making it ideal for shower stalls, and it resists mold and mildew.
Granite tiles are expensive and ultra-smooth, making them treacherous as floor tiles when wet. Stick to using them for shower walls instead.
Slate
Slate is 100 percent natural, hard-wearing, and excellent for laying in locations with high moisture. Slate doesn’t have the same reflective surface as other tile materials, but it has texture, making it ideal for shower flooring.
Slate tiles are the most expensive option, so it might be better to use them sparingly to cover your shower floor only.
How to Tile a Shower
Okay, so we’ve covered the different tiles you can use to complete your project, but what about the materials and tools? Preparation is as crucial as carrying out the work because it’s here that mistakes can happen.
What You’ll Need
- Wet tile saw.
- Notched trowel.
- Spirit level.
- Tape measure.
- Drill.
- Rubber grout float.
- Hammer.
- Pry bar.
- Rubber mallet.
- Protective eye, face, and gloves equipment.
- Chalk snap line.
- Caulk.
- Clean sponges.
- Bucket.
- Utility knife.
- Jigsaw and hole saw.
- Shower tiles.
- Cement backer board.
- Tile spacers.
- Edge tiles.
- Thinset mortar.
- Drop cloths.
- Shims.
- Cement board tape.
- Waterproof membrane.
- Roller frame and sleeves.
- Grout sealant and cleaner.
Preparation
The more time you invest in prep work, the better the outcome. No DIY task goes well with minimal planning, and your tiling project is no exception.
1. Draw a Layout Plan
Grab a piece of paper and draw a detailed plan of the tile layout. Measure the stall space and draw the design to scale. Once you factor in the size of your tiles, you will get an accurate picture of how many rows you’ll need and how many tiles per row.
The size of tile you use influences the number of tiles you need. Sometimes it’s easier to use larger 12 x 24-inch tiles because you use less grout (reducing the chances of water absorption), and it covers the surface more rapidly.
The downside with large tiles is they can be tricky to cut and shape, so make sure you have a good quality tile saw handy.
2. Cover the Floor
If the bathroom floor is in the sub-floor stage, don’t worry about protection. Lay down the drop cloths to protect the floor from adhesive splatters. This is especially important if you have a pre-installed shower tray that you want to keep safe.
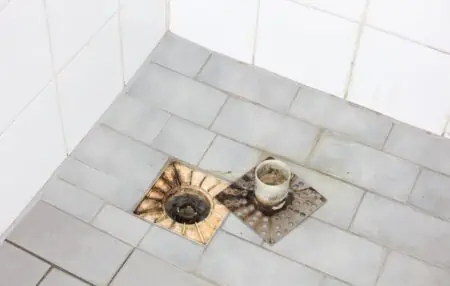
3. Remove Old Tiles
Use the pry bar and hammer to chip off the old tiles. If you can do this without ruining the backer board, it will save you from installing a new one. However, removing old tiles can be challenging, often damaging the backer board as you pull them away.
If you have a direct-to-wall enclosure, it will be installed without a backer board attached from the studs. Once removed, you will have to install cement board if you are tiling.
Safety Tip
Remove a couple of tiles at a time because they are easier to dispose of and can be slippery to stand on when working.
4. Repair the Shower Wall Structure
Once all the tiles are stripped and the framing of the shower enclosure is revealed, remove any green board or drywall. Replace it with a moisture-resistant cement board.
Make repairs to any shower wall studs that show signs of water damage or rot, and rip out any moldy insulation.
Take Note
You may need to cut out sections of the framing if the damage is beyond repair. Measure and cut the new pieces to size and slot them into place.
5. Measure the Shower Area
Find the horizontal center of each wall using the tape measure and spirit level. Mark the wall with the chalk line. Repeat this process for the other shower walls.
Then find the vertical center of each wall. Measure the height of the wall, find the center point and use the spirit level to mark a line on all three walls.
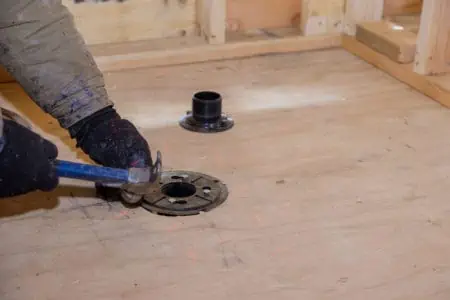
6. Cut the Backer Board
Hold the new cement board against the studs and measure the gap. Cut the board to size by scoring the back with the utility knife and bending it, so it snaps. If your board is 0.5-inches in thickness, use a jigsaw to cut the board.
Once you’ve cut it to size, screw it to the studs. You will need your drill and drill bit to make pilot holes on the backer board to prevent it from cracking.
Use the hole saw to remove sections where the fixtures like the shower unit will go. If you need to cut the board into intricate shapes, use the jigsaw.
Once the board is secured using cement screws, use cement board tape to cover the seams and press the thinset mortar into the joints using the trowel.
Top Tip
When cutting cement boards, do it outside to reduce the chances of breathing in silica dust.
7. Apply Waterproof Membrane
Using the roller and sleeve, apply the liquid waterproof membrane to the board, paying particular attention to the seams and corners. Follow the manufacturer’s instructions for the drying times, but it could take up to 12 hours.
Laying the Tiles
So, now comes the fun bit. You’ve done all your prep work, installed the backer board, and sealed the seams with tape and waterproof membrane. Let’s get tiling!
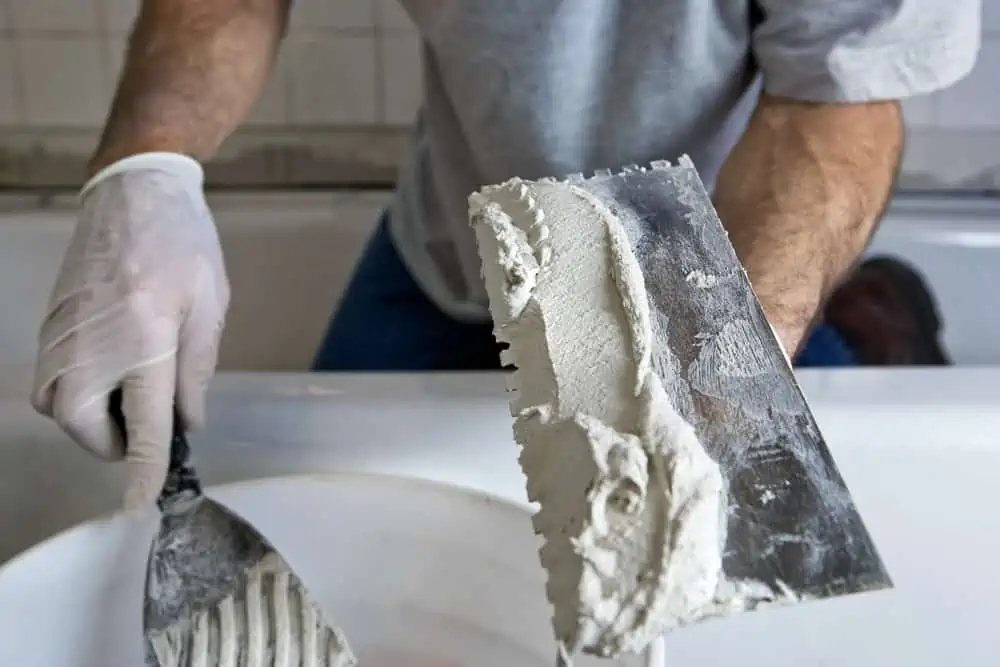
1. Mix the Tile Adhesive
Pour the tile adhesive into the bucket, adding the required amount of cold water. Use the drill with a mixer attachment to churn the powder and water into a smooth consistency.
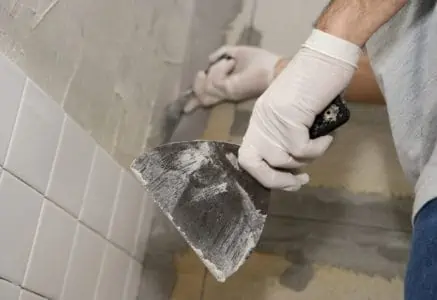
Grab the trowel and layer the back of the first tile, spreading the thinset mortar to a depth of 0.33 inches. When you press it against the wall, it will squash to about half that depth as the mortar bonds with the wall.
2. Lay the First Row of Tiles
Using the technique above, find the center point of your floor. Lay the first tile so it sits precisely halfway and work outwards from both sides. You only need to do this if you are tiling the base instead of using a pre-cast shower tray.
Use the spacers to create equal seams and the shims to ensure that your first tile line butts closely to the wall. This helps create a watertight seal when you place your first layer on the wall.
If your shower stall has a tray installed, find the center point on the wall and work outwards, both left and right.
3. Cut Tiles to Size
When you get to the corners, measure the space between the tile and the abutting wall and cut the tile to size.
Fire up the tile saw and ensure that you wear goggles, earplugs, gloves, and a face mask. Push the tile against the blade using gentle pressure and work along the cut line. When the blade chews through the tile, switch off the machine.
Place the section of tile in the gap, ensuring that the cut edge faces the adjoining wall for neatness.
4. Repeat the Process
Work upward following the center line and outward from left and right. Repeat the cutting procedure with the tile saw for the outer edges. Keep checking that the tiles are level using the spirit level, and don’t forget to insert tile spacers on each tile corner to ensure uniform seams.
Take Note
If you use smaller tiles, it is more effective to spread the thinset mortar directly onto the wall and place the tiles into the adhesive. Heavier tiles tend to pull away or slide down the wall when using this technique.
Grouting and Caulking
Once the walls are covered and you’ve let the tiles dry for 48 hours, it’s time to seal the joints and exposed edges. Without grout, water gets behind the tile, and it falls off the wall.

1. Mix Up the Grout
Mix up a batch of tile grout, following the manufacturer’s instructions. Let the grout stand for a few minutes while it thickens. Alternatively, you could use pre-mixed tile grout for convenience.
Now would be a great time to remove the shims and spacers.
Spread a generous amount on the base of the rubber float and spread it into the seams in a diagonal motion. Cover one wall at a time and leave it to set for 30 minutes. Next, fill the bucket with water and use a damp sponge to wipe the excess grout off the tiles.
Work in circular motions until all the grout comes away. Your tiles may look dirty at first, but they buff up with a clean sponge.
2. Time to Caulk
Caulk along the seams where the walls meet the base of the shower tray. Do this where the tiles meet the shower frame too, and don’t forget to seal where the walls meet the ceiling. It helps to seal the exposed edges against water ingress.
Average Cost to Tile a Shower
If you call in a pro to tile your shower, the average price range is $1,000 to $3,500 (assuming you need the base tiled). If you choose to do the work yourself, the price comes in at $400 to $500, depending on the tiles you use.
Here’s a handy chart based on a typical 90 to 100 square foot shower:
| Variable | Low | High | Average |
| Ceramic tile | $275 | $715 | $370 |
| Porcelain | $660 | $1,210 | $935 |
| Project supplies | $400 | $500 | $450 |
| Equipment (purchase, not rental) | $100 | $200 | $150 |
| Per square foot | $24 | $35 | $29.50 |
Tips for Styling a Shower
If we could peek into the book of secrets for all trades professionals, we’d work twice as fast and be three times more precise with the results. Here are some trade secrets to get you started:
Make a Plan
Draw a scale plan of your shower and plan the layout before starting. You can also use online design tools to see the impact of your layout in 3D modeling.
Cut Tiles to Fit
Do a dry run of the tiles on the walls and measure and cut the tiles ready to fit. Then you can lay your tiles out on the floor in the order you will install them and have all the correct parts ready to use. It saves time and improves efficiency.
Buy Ready-Mix Mortar
If you are worried about getting the mortar mixed to the right consistency, buy a tub of ready-mixed adhesive. Simply remove the lid, and you are ready to go. It may be more expensive, but it is a lot more convenient.
Wet the Backer Board First
If you are tiling directly onto a new backer board, wet it with a damp sponge before applying the tile adhesive. Backer board is porous and will suck the moisture from your glue, which weakens the bond between the tile and the wall.
Shower Tile Ideas
Are you looking for some inspiration for your new shower tile design? We share some suggestions to fire your creative juices.
Mix and Match Colors
If you have a lot of leftover bright tiles, why not mix them to give you a random colored shower enclosure. It looks trendy, cheerful, and a lot of fun.
Mix and Match Sizes
Try using random tile sizes. Mixing larger and smaller tiles creates exciting patterns and shades. Why not go all in and mix and match both sizes and colors for a totally unique effect?
Go Herringbone
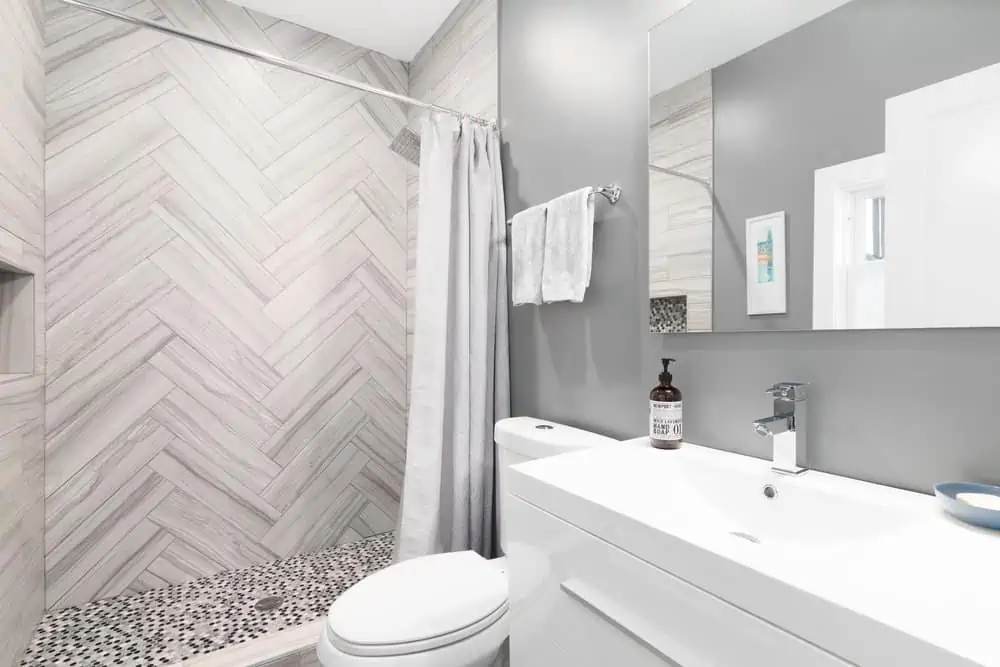
Herringbone patterns have been around for hundreds of years, most commonly seen on old parquet flooring of the thirties and forties. The herringbone pattern consists of interlocking rectangles placed end-to-end and at 45-degree angles.
Alternatives to Shower Tiles
Don’t fancy using shower tiles to create your new shower enclosure? Here are a few alternatives to fire your imagination:
Acrylic Shower Wall Kits
Shower enclosure kits, like this DreamLine shower base and three-section wall, are an ideal solution. They come in single, three, and five-piece kits. Many of these kits install directly to the studs, so there is no need for a backer board or drywall.
The advantage of a ready-made kit is it speeds up your shower enclosure construction, and you don’t need to fret about water penetration. However, they are expensive, with many costing $1,000 or more.
Fiberglass Panels
Fiberglass is a cheap and affordable material to line a shower enclosure. It goes up quickly, doesn’t absorb water, and minimizes the risk of leaks.
It is also easy to repair, should it get damaged. And because fiberglass panels are lightweight, one person could complete the installation in a fraction of the time it takes to tile.
Glass Panels
If you want a seriously classy look for your shower, glass sheets are hard to beat. Glass repels water, resists mold and mildew, and is easy to keep clean. However, glass is expensive compared to other alternatives and very heavy.
You will need assistance when installing glass panels in your shower. They also smear easily, showing up every dirty mark and blemish.
FAQs

How Long Does Tiling a Shower Take?
Tiling a shower enclosure will take you between three and five days, depending on the size of your shower. You will then need to allow 48 hours for the adhesive and grout to set. So, when you add the two together, it will take you seven days to complete the project.

Can I Use Bathroom Tiles In My Shower?
You can use bathroom tiles in your shower stall. Bathroom tiles are made from porcelain, slate, ceramic, and granite, so they are impervious to water.
You may want to avoid natural stone because it is more porous.

Can You Use Green Board Behind Tiles In Shower?
You can use green board behind your tiles, as long as you accept that if there is a leak, green board is water-resistant, not waterproof.

How Do You Tile a Shower Floor Without a Pan?
It’s best to start at the rear of the shower floor, where the rear wall butts against the base. Find the center point of the floor, and start by laying the first tile and working outward from both sides.

What is the Thinnest Backer Board for Tile?
The thinnest backer board is 0.25 inches. It might be better to use a 0.5-inch backer board or double the thickness with two sheets of quarter-inch board for better rigidity.
And Finally
Tiling a shower is not a task for the inexperienced. Call in the pros if you have any doubts about your abilities, especially when tiling around electrics.
There are alternatives, like acrylic shower enclosures that are pre-molded into one, three, or five sections. These ready-made kits have built-in shelving and seats and go up in half the time of tiles.
Whichever route you take, revamping your shower is an easy way to make an impact and smarten up your bathroom.