Removing your shower door is sometimes necessary, especially if it is misted, dirty, or cracked. But how easy is it to do? If you have limited DIY skills, is it a task you can accomplish without calling in the professionals?
We show you how to remove shower doors in easy-to-follow steps and give you hints and tips to make it a lot easier.
Key Takeaways
- Gather the necessary tools: plastic scraper, screwdriver, silicone caulk, caulk gun, and utility knife.
- Lift the doors off the sliding top rail, and remove the screws holding the frame to the wall.
- Use a utility knife to cut the caulk seal between the frame and wall, then remove the shower door frame.
- Remove excess caulk, fill in screw holes, and wait for the caulk to dry before painting or exposing to moisture.
Why Do You Need To Replace Your Shower Doors?
Glass and plastic become scratched and misted over time. No matter how many times you clean them, you just can’t get your shower doors to look good. Misted shower doors can ruin the look of any bathroom.
Maybe you want to swap your doors for a shower curtain? After all, a shower curtain is easier to maintain and it takes up less room in a small bathroom. When the shower curtain liners get dirty, simply remove it and put it in the washing machine. What could be easier?
If you have a small space, maybe you want to open it up to make it look bigger. Shower doors make your compact bathroom look smaller, so replacing them with a curtain creates the illusion of a larger space.
Whatever your reasons, let’s look at how to remove sliding shower doors.
What Tools You Need
Before we launch into how to remove a shower door, we first need to take stock of the tools you will need.
- Plastic scraper (you could also use an old credit card).
- Screwdriver.
- Silicone caulk.
- Caulk gun.
- Utility knife.
How To Remove Shower Doors
Removing shower doors should be simple enough, and it is typically a one or two-person task. Some shower doors are heavy, so if you feel like an extra pair of hands would be helpful, ask someone to help you.
1. Lift the Doors
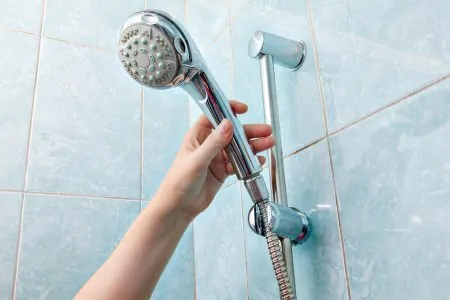
The configuration of your shower doors may differ, but in the main, they move on runners, and the upper rim is not attached. This allows you to lift them free. Before you do, you will need to disconnect the base clips.
Most have retractable grips that unclip when you push them down. Once you have released the base of the doors, carefully lift and free the top from the runner. If you think the doors will be too heavy, having that extra help is a great idea.
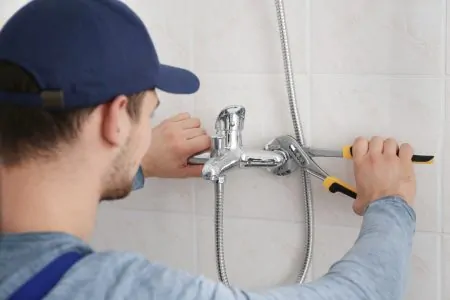
2. Remove Screws
Once the doors are off, grab the screwdriver and remove the screws that hold the frame. Most shower door frames have the bulk of the screws in the sides, although you do need to check the top and base rack for small concealed screws.
Don’t exert undue pressure because you could damage the wall or tiles that attach to the frame.
3. Remove the Caulk
Grab the utility knife and run it gently along the caulk line that abuts the frame to the wall. Hold the blade parallel to the wall rather than perpendicular. Be careful not to cut the wall or cause any damage, and don’t go too fast because you might slip and cut yourself.
4. Remove the Shower Door Frame
Now you are ready to start taking the frame apart. Always remove the top rack first because it will make life easier, and it avoids it falling and causing an injury.
A simple tap with the palm of your hand should dislodge it because most top rails are not attached, and rely on gravity and the weight of the doors to hold them in place. Now remove the side rails.
5. Remove the Bottom Rack
Using the utility knife, run the blade along the line of the caulk that attaches the rack to the base of your shower. Be careful because one slip could result in a gouge or cut in your shower tray. Now lift the base rack away.
6. Remove Caulk
When the frame is down, you will have excess caulk attached to the wall. You can use the utility knife to scrape away most of this, but the plastic scraper or credit card is extremely effective at removing caulk.
7. Fill in Screw Holes
Grab the silicone caulk and load it into the silicone gun. Fill the holes with caulk, smoothing them with your finger, so they are level with the surface of the wall. You could use a credit card instead.
Wait for 6 to 8 hours for the caulk to dry before painting over the screw holes or exposing them to moisture.
Hints and Tips for Removing Shower Doors
Whenever you start a job, there’s an easy way and a hard way. So, what are the hints and tips that make life that bit more straightforward?
Wear Rubber Gloves
Shower doors are either made from glass or plastic, but they can be heavy and difficult to grip. Rubber gloves give you a non-slip grip that makes holding shower doors so much easier. The last thing you would want is to drop them and have them shatter on the floor.
Use a Credit Card
We’ve already mentioned that a credit card is a cheap alternative to a plastic scraper, but it does the same job. Obviously, it will need to be an old card. It has to be a plastic scraper rather than metal to preserve the walls and shower tray from scratches and gouges. Most trays are plastic or fiberglass and mark easily.
Use a Caulk Remover
If you have stubborn caulk that won’t come off, you could try using a caulk removing gel. Spread the gel over the patches where the caulk remains and wait for a few minutes while it gets to work.
Grab the plastic scraper or credit card, and the caulk should slide right off. This method is also useful to use when the caulk sticks to the shower tray or bathtub, and you need something that will shift it without leaving any lasting damage.
Use An Old Sheet
When you need to move the doors from the bathroom to your car, wrap each door in an old sheet to make it easier to transport. You can grip the sheet, and it gives the door some degree of protection. It also makes it more straightforward when unloading it at the other end.
FAQs

How Much Does It Cost To Replace Shower Doors?
The prices vary depending on what style door you go for. The cheapest option is to replace like for like. That way, you don’t incur additional costs for swapping the entire door frame and rails.
The average cost of replacing a shower door ranges from $600 to $1,650. And there is also the cost of disposing of your old door. That could set you back anything from £30 to $100.

Do I Need a Professional To Remove Shower Doors?
Removing a shower door is surprisingly easy. It’s a lot easier than fitting them. It all depends on your skill level and confidence. Shower doors can be heavy, especially glass ones, so you might need someone to help you lift and carry them.
If you do employ a professional, you will see your costs rise substantially.

How Long Will It Take Me To Remove Shower Doors?
The good news is removing your shower doors, rails, and tracks is relatively simple, so you should be able to complete the task in a few hours, depending on your skill levels and whether you have someone to help you. The longest part of the job is removing the caulk. It can be hard to shift in places, so you might need to use a gel caulk remover to speed up the process.

How Do You Remove Caulk From Shower Doors?
There are several methods to remove caulk, including blades and scrapers. One of the most effective ways is to use a plastic scraper or a credit card. It gets the caulk off without damaging the walls, shower, or bathtub.
Another great product you can use is caulk removing gel. It reacts with the caulk, softening it, so it comes off easily. This is useful when you have stubborn spots that no amount of scraping will shift.