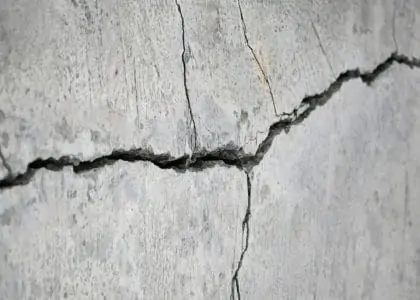
Concrete is such a popular material for patios, and when it is new, it looks good, but with time you inevitably need to perform a concrete repair. Weather, erosion, settlement, and general use cause it to crack or become uneven with raised concrete.
When this occurs, it’s time for a concrete patio repair. We explain the causes of cracked and uneven concrete and what you can do to repair your concrete slabs.
Key Takeaways
- Causes of cracked and uneven concrete include improper installation, ground movement, moisture loss, incorrect concrete mixture, and excess weight.
- Slab jacking and polymer slab lifting are professional methods to level and repair concrete patios by injecting material beneath the slab to raise it.
- Patching involves cutting out small sections of concrete, adding sand, and sealing gaps to repair minor cracks and unevenness.
- Veneering creates a new top layer of concrete to fill in gaps and dips, while replacing the entire concrete patio is a more involved process.
Concrete is such a popular material for patios, and when it is new, it looks good, but with time you inevitably need to perform a concrete repair. Weather, erosion, settlement, and general use cause it to crack or become uneven with raised concrete.
When this occurs, it’s time for a concrete patio repair. We explain the causes of cracked and uneven concrete and what you can do to repair your concrete slabs.
What Causes Cracked and Uneven Concrete?
Before we get into the details of how to repair cracked concrete, we thought you should know what causes your concrete to break in the first place. After all, prevention is better than the cure.
Improper Installation
If the concrete is overmixed or applied when the weather is too hot, it causes the water in the mixture to evaporate before the concrete has time to set properly, and you get shrinkage and cracks.
You can mitigate this effect by spraying the concrete with water, but if you apply too much, you could alter the mixture and weaken the concrete.
Ground Movement
Settlement occurs when the ground dries out and it shrinks, causing a space to appear under the concrete slab. It is also the result of changes in moisture levels. If the soil becomes saturated, it expands, and then when it dries, it shrinks.
Plus, the type of soil you have has an impact. Clay is notorious for shrinking and expanding due to weather conditions.
Loss of Moisture
Surprisingly, moisture loss can be a problem several years after the concrete has been installed. It begins when the concrete starts to dry out and shrink. The best way to avoid this outcome is to keep one eye on the weather reports and try not to lay the patio at the hottest times of the day.
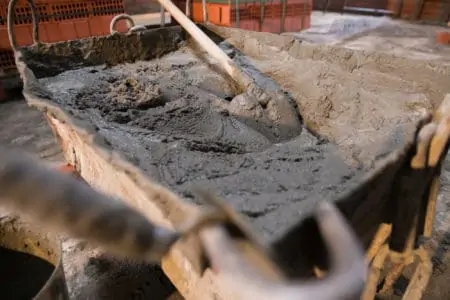
Improper Concrete Mixture
You need to mix your concrete to cater to different applications. For heavy-traffic areas like driveways and footpaths, you should include more aggregate to increase the strength of the formula.
There are several ways to mix concrete, each with different compression strengths, measured in PSI (pounds per square inch). Here is a handy chart:
| Concrete Grade | Mix Ratio | MPa | PSI |
| M5 | 1-5-10 | 5 | 725 |
| M7.5 | 1-4-8 | 7.5 | 1087 |
| M10 | 1-3-6 | 10 | 1450 |
| M15 | 1-2-4 | 15 | 2175 |
| M20 | 1-1-5-3 | 20 | 2900 |
Corrosion and Chemical Damage
Sometimes in high-use areas, concrete is reinforced with steel bars or wire mesh. If moisture gets into the soil, it causes the metal to rust, which weakens the concrete. And in the winter, when you sprinkle salt to melt ice and snow, it reacts with the concrete and causes a chemical reaction.
Sand is a much kinder substance to use because it doesn’t react with the surface of your pathway or drive.
Excess Weight
This sort of ties in with the correct concrete mix. If you lay concrete in a heavy-use area and get the mix wrong, the excess weight could cause the concrete to compress, and cracks appear. If you have heavy objects like cars and trailers, use more aggregate to reinforce the mix.
5 Ways How To Fix Cracked and Uneven Concrete Patio
So, the inevitable has happened, and you see cracks starting to appear in your concrete patio, but what can you actually do about it? Let’s take a look.
1. Slab Jacking
Slab jacking is a slightly more involved process and typically requires the services of a professional contractor. It works by pumping a concrete mix beneath the existing concrete slab, lifting and leveling it, and filling any air gaps where further subsidence could occur.
2. Polymer Slab Lifting
This is another technique that requires the services of a professional. The patio has strategic holes drilled so the polymer foam can be injected under the surface of the slab. It fills the spaces beneath the concrete patio where water can pool.
As the foam expands, the slab lifts to the appropriate level. Polymer slab lifting is an affordable alternative to slab jacking because the polymer is far cheaper than a concrete mix.
And the other advantage is the foam dries in minutes rather than days for concrete to set.
3. Patching
Patching is a great technique if you only have small areas of the patio that need repairing. It involves cutting out a small square of concrete, lifting it to reveal the sand layer beneath. More sand is then packed into the hole to lift the concrete to the required level before being replaced.
You need to seal the gap around the cut section to remove the risk of water penetrating beneath the patio to wash away the sand and cause further sinking.
4. Veneering and Extensive Veneering
Veneering is the process of creating a new top layer of concrete to fill in any gaps or dips on the surface of the old patio. To get the new layer to adhere, you should rough up the surface where the repair is needed using a hammer and chisel.
Another way to ensure the top layer sticks is to drill a series of holes in the concrete with a masonry drill. Once you have prepared the surface, add your thin mix of mortar and carefully smooth it so it matches the level of the old patio, and leave it to cure for 30 minutes.
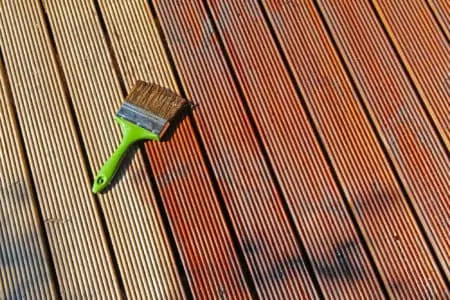
The last task is to take a brush to the surface after 30 minutes to finish it off. Extensive veneering is the same process just performed over the entire patio.
You will need to remove loose concrete and dust and then build a box frame around the edge of the patio about 2 or 3 inches above the current surface level. Next, you should add a layer of sand to any depressions and cracks and pat it down.
Pour the concrete mix and allow it to cure for the recommended time, using a trowel or brush to finish off the surface.
5. Replacing the Concrete
This is the most involved procedure because you have to strip away the old concrete patio first. Assuming this has been done, you should build a box frame to cover the area you want to concrete, and then you need a generous layer of sand to level the surface.
Use a spirit level to determine how accurate you are, and remember to leave a slight gradient so the water can run off the patio when it rains. You can also use the broken pieces of the old patio as aggregate to add compression strength.
Make your concrete mix using a 1-2-3 or 1-2-4 formula, which is 1 part cement, 2 parts sand, and 3/4 parts aggregate. The more aggregate you include, the stronger the concrete.
Make the mix so it is wet enough to fill all the surface area, including the corners and edges, and level it off, again using the spirit level as a guide. You also need to tamp down the mix to remove any air pockets.
A great technique is to use a long plank of wood and slide it backward and forwards on the edge of the box frame to get the correct level. Make sure the plank is straight, or you risk an uneven surface.
Allow the mix to set, keeping an eye on the weather conditions and extreme heat. If it’s too hot, the concrete will dry too quickly as the moisture evaporates before the curing process has been completed. Leave the patio for a couple of days to fully set before removing the wooden frame.
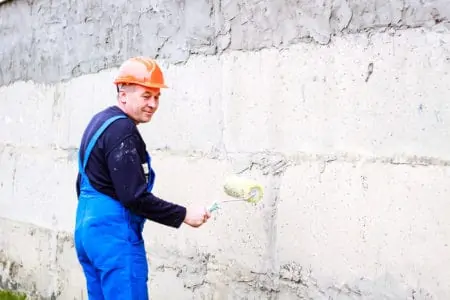
Choosing Between DIY and Hiring a Professional
It probably comes down to a few factors like your competency to complete the task, whether it’s a small job and the cost.
If you are a confident DIY enthusiast who loves rolling up your sleeves, then it may be cost-effective to have a go yourself. If you need the slabs jacking, call in the professionals. They have the tools and the know-how to get it done efficiently, plus their work will be guaranteed. For small patch jobs, it probably pays to do it yourself. And repairing concrete is a lot of fun, and you get the satisfaction of knowing you did it yourself.