Are you getting ready for a paint job and want to learn how to paint without brush marks? Or maybe you’re looking to touch up on brush marks after finishing a sloppy paint job. Either way, the information in this article is bound to help out.
Key Takeaways
- Use high-quality brushes and paint for smoother results.
- Paint with the grain on wood surfaces and apply thin coats.
- Consider using a paint sprayer for larger projects to avoid brush marks.
- If brush marks are already present, sand the area or use drywall compound to smooth the surface.
Spray Painting vs. Painting with a Brush
Do you want to learn how to paint on walls without streaks showing? Don’t use a paintbrush! It is that simple. Using a paint sprayer always ensures that the result is smoother. That goes for walls or even furniture.
Spray painting with enamel is an ideal choice if you want to avoid creating brush strokes on the paint’s surface while still achieving an even covering. It is a considerably quicker method of painting cabinets, walls, doors, baseboards, wood window frames, or other surfaces.
Most of the time, you will only need to apply one coat of spray paint for it to provide adequate coverage. Using spray paint will also considerably reduce drying time (compared to applying it with a brush).
There are a lot of advantages to painting with a brush, too, such as the fact that you have more color options and the ability to create your unique colors.
Just ensure you use high-quality brushes, apply just the right amount of paint, and arm yourself with patience.
How to Paint Without Brush Marks
Looking for more tips on how to avoid brush marks when painting? Here’s a list of 10 ideas, techniques, and suggestions to ensure a smooth finish.
Avoid Quick-Dry Paint
The primary reason paintbrush markings appear is that the paint was not smoothed out before it dried and hardened.
Therefore, the first tip for removing paintbrush lines is to use paint that dries at a slower rate. Look out for paint that indicates on the label that it may take up to 24 hours to completely dry.
Be wary of products advertised as “quick-dry” after only a couple of hours. Doing this might be helpful if you’re in a hurry to finish a job. But it probably won’t lead to the finest possible outcomes for you.
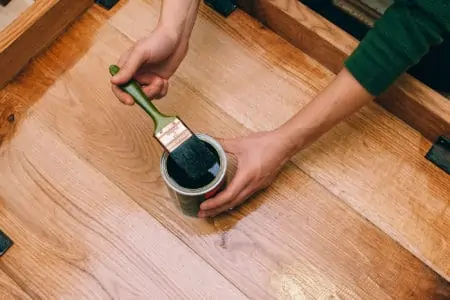
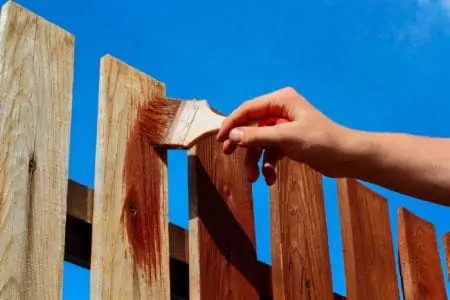
Follow the Grain
Another piece of advice that you might already be familiar with (but need to try out more) is to paint with the direction of the grain on wood surfaces. Working in the same direction as the grain ensures brush marks are less noticeable.
Avoid Painting Vertically Whenever Possible
Paint on a flat, horizontal surface whenever you have the possibility. If you’re painting something like a door, take it off the hinges and place it horizontally. This allows the pull of gravity to spread the paint out evenly rather than pulling downward, which causes drip marks.
A pair of saw horses is one of the most useful weapons in a painter’s arsenal. They can be adjusted to the ideal height, making it easier to paint particularly long or large parts.
Don’t Oversaturate the Brush with Paint
Don’t overuse paint. Start with a small amount and work your way up from there.
Too much paint results in drips and messes. But it also causes excess paint in your strokes and can show when it dries.
Use Moderate Brush Pressure
Painting beginners frequently make the error of using too much pressure, regardless of the media they use. Pressure forces the paint to pool at the edges of the paintbrush on the surface. This results in uneven distribution and unsightly streak marks.
Stick to Two Coats
Remember that applying at least two coats of paint to a surface will almost always be necessary. But it also helps level out any brush strokes from the first coat. If spray painting, usually only one coat is needed.
Be Careful with End Strokes
Sometimes, learning how to paint without brush marks is as easy as ensuring all end strokes point in the same direction. The same rule applies whether you are using a paintbrush or a roller. You want the end of each stroke to point in the same direction.
Use the Right Paint Type
You must ensure you use the right paint for the surface you’re painting. A longer dry time means more time to self-level, which avoids brush marks.
Consider Paint Additive
It is difficult to prevent brush strokes from being visible in freshly painted areas when the paint dries rapidly, as occurs on hot days.
Floetrol can be added to make the paint stay wet longer. This provides the paint with time to blend or self-level, so prevents brush strokes.
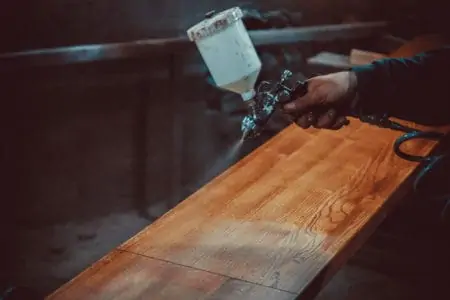
Use a Paint Sprayer
You can paint larger projects with a simple brush, but it will take much longer if you do it this way. That’s where a paint sprayer comes in.
Spray guns that don’t require a lot of precision in their tips are the ones that are the easiest to operate. Remember that although you’ll save time on the painting, you will still need to mask the area to avoid unwanted drips.
Pro Tip
If you’re interested in how to paint trim without brush strokes, use the cutting-in method, avoid over-brushing, and feather out.
Paintbrushes That Don’t Leave Streaks
It’s tempting to buy low-cost brushes to save costs. However, you might not be saving any money because your paint job will look sloppy, requiring a lot of retouches.
You won’t regret the additional money invested in a high-quality paintbrush for most of your jobs. The best brushes can hold more paint, deliver smoother effects, endure longer, and be easier to clean than their less expensive counterparts.
The most straightforward indicator of quality is the price. For a high-quality paintbrush, you should budget anywhere from $10 to $20, like these Pro Grade brushes.
There are two types of bristles used in paintbrushes: synthetic and natural bristles obtained from the hair of various animals. Picking the right paint brush for the job means a lot in terms of results.
Synthetic Brushes
- These are a good choice if you are working with varnish or paint that’s water cleanable.
- Best for oil-based paint.
Natural Brushes
- Use these if you are applying oil-based paint.
- Will produce a smoother finish.
- Pick synthetic brushes for acrylic paint.
Nylon Brushes
- These are best for chalk paint application.
How to Remove Brush Marks from Paint
If you have raised dried paint marks, you have two options to rectify them.
Sanding
Try the sanding technique first because it might solve the problem with less effort. Use 80-grit sandpaper on a sanding block or pole.
Make sure to use sandpaper that is “clog-resistant,” or wipe the sandpaper down frequently with a sharp brush to prevent it from becoming clogged.
Resist the need to utilize an electric sander. Rather than smoothing out the brushstrokes, it will heat the paint, causing it to become runny in the process.
Using Drywall Compound
If sanding doesn’t give you the desired results and a large area of paint is covered in brush marks, there’s one more method to try.
Put a thin coat of topping joint compounds on the wall using a 12-inch drywall knife. Use 100-grit sandpaper to smoothen the surface. Add primer and paint the wall.
FAQs

Will a Roller Cover Brush Marks?
Yes, it can. Use minimal paint on the roller and minimal pressure. Make sure to do it while the paint is still wet.

How Do You Avoid Brush Marks When Touching Up Paint?
When you have to touch up a paint job, make sure to stipple using the brush. Gently tap and push the new paint in place. This allows the new dab of paint to blend in with the coat that’s already dry, so brush marks won’t be visible.
Bottom Line
Learning how to paint without brush marks requires understanding a few basic concepts and techniques to get a smooth paint finish. Remember that investing in quality products is the first step to ensuring a paint job is properly done.