Installing a storm door not only increases security but might also provide an additional source of light to a dark entrance hall. But before you rush out to the nearest hardware store, you need to know how to measure for a storm door.
This article will show you how to get accurate storm door measurements to help you achieve the best possible results.
Key Takeaways
- Check for obstructions: Look for things like door handles, pillars, and foliage that could affect how the door opens and closes.
- Measure the height: Take measurements from the top of the threshold to the base of the header on the right, middle, and left, and use the smallest distance as your guide.
- Measure the width: Measure the width of the rough opening from the top, middle, and bottom, and use the smallest width as the guide for your new storm door.
- Standard sizes: Most storm doors come in standard sizes, but custom-sized doors are available if needed, though they can be more expensive.
How to Measure for a Storm Door
The first step is to check for obstructions. Pillars, mailboxes, and trees or bushes could affect how the door opens. Even the thickness and size of your house numbers could impede the way the door closes.
Also, you will need to decide which way you want the door to open. Typically, the storm door is hinged on the same side as the front door, but that’s only possible if there are no obstructions.
Plus, look for the size and placement of the door handles. If there are obstacles that make it difficult to grip, you might need to consider a different handle or placing it somewhere else.
Here’s an at-a-glance list of common obstructions to watch out for:
- Door handles.
- Pillars.
- Porch design.
- Mailbox.
- Foliage/trees/bushes.
- House numbers.
- Doorbell.
- Outdoor light fittings.
One To Watch
Choose the side with the fewest obstacles so the door can swing open fully.
What You’ll Need
- Tape measure.
- Pencil.
- Sheet of paper.
1. Measure the Height
Measure the height of the door from the top of the threshold to the base of the header (the top piece of trim). Do this three times, working from the right, middle, and left.
Hopefully, these three measurements will be the same, but you always use the smallest distance as your guide if there are minor discrepancies. As a guide, most doors are between 80 and 81 inches high. Write down the measurements, so you don’t forget.
2. Measure the Width
Using the same method, measure the width of the rough opening from the top, middle, and bottom. Make a note of the measurements, and as before, you will use the smallest width as the guide for your new storm door.
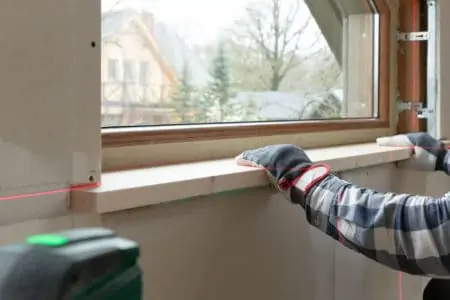
3. Measure the Depth
To get the depth of the door frame, measure the outer width as shown in the image. You can see that measurements one, two, and three show the measurement includes the depth of the exterior door trim, called the brickmould.
Again, use the smallest measurement as the guide.
4. Estimate the Size
Windows and doors are always written as width first and then length. Write down the smallest width measurement followed by the smallest length measurement (for example, 36 inches by 80 inches). These are the dimensions you will use for your replacement screen door.
Top Tip
You should always measure twice to ensure you have accurate dimensions. It could prove costly if you make a mistake.
Standard Storm Door Size Chart
Most manufacturers produce standard-size storm doors, making for an easier installation because your opening will be a standard size. Modern buildings and new homes are constructed to accommodate standard sizes because it is cheaper.
This is especially true of homes built within the last 30 years. Your door opening will likely be between 34 and 36 inches wide and 80 to 81 inches high. When you move into custom designs and sizes, the costs jump significantly.
The chart below has the standard door sizes from Andersen, EMCO, and Larson to make it easier for you to choose the right storm door.
| Standard Size Width Range | 30 inches | 32 inches | 34 inches | 36 inches | Standard Door Height Range |
| Andersen 3000 and 4000 storm door with 45 -minute easy install system | 29.88 to 30. 38 inches | 31.88 to 32.38 inches | 33.88 to 34.38 inches | 35.88 to 36.38 inches | 80 to 80.88 inches |
| Andersen 3000 TruEase, 2500 and 200 series. EMCO storm door (excluding Forever®) | 29.75 to 30.38 inches | 31.75 to 32.38 inches | 33.75 to 34.38 inches | 35.75 to 36.38 inches | 80 to 80.88 inches |
| Larson (no shim required) | 29.88 to 30 inches | 31.88 to 32 inches | 33.88 to 34 inches | 35.88 to 36 inches | 80 to 81 inches |
| Larson (shim required) | 31.17 to 30.88 inches | 32.17 to 32.88 inches | 34.17 to 34.88 inches | 36.17 to 36.88 inches | 74.5 to 75.5 inches |
Not all storm doors will match these measurements exactly, but that’s fine. A 30-inch door will fit an opening measuring 29.75 inches to 30.38 inches. The same is true of the height; an 80-inch door will fit a gap measuring 80.88 inches.
Custom Size Storm Doors
It may be that you require a custom size door. If you live in a mobile home, you will likely have an entrance that measures just 30 or 32 inches. Likewise, some door openings are as tall as 97 inches in larger houses.
For replacement storm doors, most manufacturers stock custom sizes. You can pick them up from reputable hardware or DIY stores or order them online.
FAQs

What is the Difference Between a Storm Door and a Screen Door?
Most people confuse the two, but there is a difference between storm and screen doors. Screen doors typically have a mesh covering that prevents bugs from getting into your home, whereas storm doors have glass inserts. This increases protection against the elements.
You can buy storm doors with removable panels to swap from mesh to glass. A storm door seals the exterior of your home against strong winds as well as ventilates in the summer.

Should You Paint a Storm Door?
You can paint storm doors to match whatever color scheme fits best with the exterior of your home. Make sure you use an exterior paint, like this Zinsser Exterior White.

Should a Storm Door Match Your Trim or Door Color?
It’s a matter of choice whether your storm door matches your trim or front door color. There is no rule about the color of your storm door, so you can get creative.

How Much More Does a Custom Size Storm Door Cost?
Custom-size storm doors can cost between $1,000 to $1,500 depending on the make, model, and design you opt for. Compare that to a standard storm door costing between $100 and $300, and you can see there is a significant difference.
Brewing Up a Storm
When it comes to replacing an existing storm door or fitting one for the first time, getting the measurements right is half of the battle. Once you are confident you have the dimensions, you will need to select the new door.
Luckily, there are many options for you to choose from, so you should find one that suits you, even if your storm door is custom-sized.