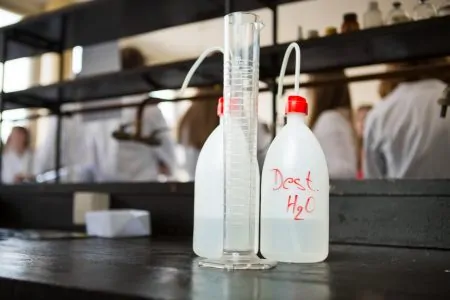
Distilled water has been purified to remove contaminants and make it safer to use and drink. Distillation is highly effective, which is why it has been used in various forms for thousands of years.
Buying distilled water can be quite expensive over time, so it makes sense to try distilling water yourself. It is also very useful if you are in a remote location and are unable to get distilled water delivered to you.
In this article, we will explore the various ways distilled water is used. Then, we will share how to make distilled water using three of the easiest and most reliable methods, before answering some frequently asked questions.
Key Takeaways
- Distilled water is purified water, free from contaminants and minerals.
- Common uses include medical equipment, automobiles, and humidifiers.
- Distilled water can be made at home using methods such as using a bowl or a bottle.
- Proper storage is essential to maintain the purity of distilled water.
What Is Distilled Water Used For?
Distilled water is commonly used in medical equipment and automobiles, where contaminants can be particularly harmful. Distilling water involves heating it until it evaporates into a gas, which is transferred to another container before it condenses back into liquid, leaving impurities behind.
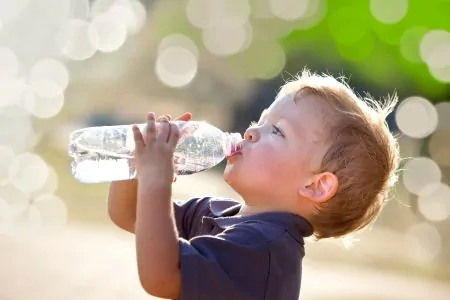
This purity means it is safe to drink distilled water. However, the process also removes some beneficial materials, so there are better types of water to drink.
When we drink tap water or bottled water, our body receives important nutrients such as calcium and magnesium. As distillation can’t distinguish good materials from bad, they will also be removed — this is why you shouldn’t drink it while fasting (1).
Medical Industry
Distilled water plays an essential role in the medical industry. Its purity means it is hygienic and safe to use for various purposes, including:
- Cleaning instruments: All medical instruments must be sterilized before and after use. As distilled water contains no minerals, it won’t leave any dirt or harmful materials on the equipment.
- Wound cleaning: Distilled water is important when cleaning wounds or during surgery. There are no bacteria or microbes in the water that could cause an infection, making it the safest option.
- Pre-surgery: Surgeons must clean their hands thoroughly before operating. They wash their hands using disinfectant soap, then rinse them with distilled water to prevent any bacteria from reactivating on their skin.
- For dentists: Distilled water is used to rinse away potential bacteria after a root canal or tooth extraction.
CPAP Machines
Continuous Positive Airway Pressure (CPAP) machines are essential devices for people with sleep apnea.
A CPAP machine applies air pressure while you sleep to keep your airways open. Some CPAP machines have an integrated heated humidifier to help prevent a dry mouth or nasal congestion (2). Using distilled water in the humidifier keeps it free from any mineral or bacterial build-up.
Laboratory Experiments
To receive accurate results from experiments, distilled water is the best option. As it is free from contaminants and minerals, there is nothing in the water to influence the results. Every day, scientists use distilled water as an important part of their research.
Improves Humidifiers
Humidifiers are important for people with sinus or allergy problems, or dry skin. Although it is possible to use standard tap water in these devices, it can quickly cause a build-up of minerals. Using distilled water means your humidifier will be kept clean and can continue improving the air quality in your home.
Keep In Mind
Canned Fruits and Vegetables
Canned fruits and vegetables often use distilled water. This will not only ensure the cleanliness of the product but will also preserve its color and taste. Distilled water will slow down the spoiling process.
When food is canned with non-distilled water, the minerals can affect the taste.
Cars and Trucks
Minerals in untreated water can quickly corrode the internal parts of an engine. This is why distilled water is widely used in car operation and maintenance. It is often used for the following purposes:
- Cooling an engine
- Topping up lead-acid batteries
- Car washing
Cosmetics Industry
If you look at the back of a cosmetics product, you will often see distilled water among the ingredients. Companies use distilled water to ensure the purity of their products and to avoid any contaminants. As cosmetics are applied to the skin, they must be free from bacteria and other contaminants.
What Is the pH of Distilled Water?
Immediately after being distilled, water should have a pH of 7. This means the water is neutral.
However, distilled water can change when it is exposed to air, with a pH closer to 5.8. This happens when water absorbs carbon dioxide from the atmosphere and reacts to form carbonic acid (3).
It can take about two hours for distilled water to fully absorb as much carbon dioxide as it can from the atmosphere.
How to Store Distilled Water
When storing distilled water, there are some key points to keep in mind:
- Ideal conditions: Distilled drinking water should be stored like any other water. It should be kept in a cool area, out of direct sunlight. After the bottle has been opened, ensure the lid is sealed tightly before storing it.
- Glass is perfect: Your homemade distilled water can easily be stored in a glass bottle in a refrigerator. Home distilling kits usually include a glass container for storage. If you don’t have a glass bottle, you can use a BPA-free food-grade container instead.
- Food safety: The material used for storage must be safe for contact with food. If you’re planning on storing distilled water for emergencies, consider replacing the water every few months. This isn’t essential as distilled water shouldn’t spoil, but it will ensure that you have fresh water to drink.
- Clear away chemicals: Whatever your reason for distilling water, you must keep it away from chemicals and solvents. This includes gasoline, household cleaners, paint thinners, and dry-cleaning chemicals. It should also be placed in a high-density polyethylene container for long-term storage.
If you are keen to try distilling your own water, the following sections will explain some of the most straightforward and reliable ways to distill water.
How to Make Distilled Water Using a Bowl
To make DIY distilled water using a bowl, you need the following:
- Large pot (ideally, 5-gallon) and lid
- Glass or metal bowl
- Round baking rack
- Ice cubes
Step 1: Prepare the Pot
Fill the large pot with tap water until it is about half full. Place the glass, or metal, bowl in the water and see if it floats.
The bowl will likely sink as it fills with distilled water. If you fear it will touch the bottom of the pot, place the round baking rack into the pot first.
Step 2: Set the Temperature
Place the pot on the stove on medium to high heat. The water must boil before you proceed. When it boils, it removes chemicals such as ethanol and methanol.
Step 3: Create Condensation
Once the water is boiling, turn the temperature down to low. Flip the lid and place it upside down on the pot.
To create condensation, you need a hot and cold barrier. You can achieve this by filling the flipped lid with ice cubes. Then, when the hot steam rises and touches the cold lid, it will create condensation.
Step 4: Increase the Heat
Turn the heat back up to high to boil the water and create steam that will become condensation. As the condensation forms, it will drip into the glass bowl.
Leave your homemade distillation device to work until you have enough distilled water. However, watch the bowl closely to ensure it doesn’t boil. If you notice any bubbles forming that indicate boiling, turn the heat down immediately.
Step 5: Remove the Pot
Once you have enough distilled water, turn the heat off and remove the pot. Remove the lid carefully — there will be hot steam and water.
Carefully lift the bowl out of the pot. If you struggle to do this while it’s hot, leave it to cool for a while before removing the bowl.
Step 6: Store Your Distilled Water
Allow your freshly-distilled water to cool completely before pouring it into a glass storage container.
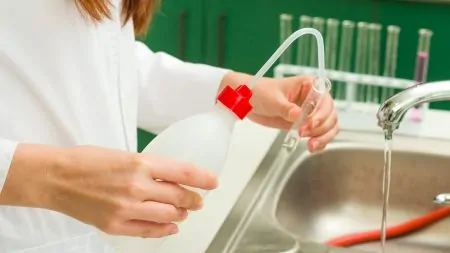
How to Make Distilled Water Using a Bottle
If you want to make DIY distilled water using a bottle, you will need the following:
- Two glass bottles
- Duct tape
- Large pot (5-gallon is ideal)
- Ice pack
Step 1: Prepare the Bottles
For this method, you will need two standard glass bottles. However, the process will be much easier if one of them has a curved neck. This curve will prevent the distilled water from running back into the first bottle.
Fill one bottle with tap water. Leave 5 inches between the water and the top. Join the bottles at the neck using duct tape. Make sure they are sealed tightly.
Step 2: Prepare the Pot
Fill your 5-gallon pot with just enough water to cover the bottle containing tap water. Place it on the stove on high heat.
Tilt the bottle to a 30-degree angle, allowing the empty container to rest on the inside rim of the pot. The 30-degree angle will make it easier for the evaporated droplets to make their way to the empty bottle.
Step 3: Apply the Ice Pack
To create cold and hot barriers, apply an ice pack to the body of the empty bottle. If you don’t have an ice pack, you can fill a bag with ice cubes or use any other frozen item.
The cold and hot barriers will cause the water to evaporate and condense to the cold, empty bottle.
Step 4: Continue the Process
Leave your distillation device to do its work until you have enough distilled water.
Once you’re satisfied, turn off the heat, and carefully remove the bottles from the pot. You should wait until they have cooled before touching them to avoid any burns.
Pour your newly-distilled water into a glass bottle and store it in a fridge.
How to Make Distilled Water Using Rain Water
Knowing how to get drinkable water from rainwater is very useful during emergencies or natural disasters. In a sense, rainwater is nature’s distilled water. Rain is created when pockets of water evaporate and condense to form clouds (4).
Before you run out and drink water from a puddle, keep in mind that rainwater doesn’t always stay clean. The pureness of rainwater depends on the atmosphere — if there are contaminants present in the air, the rain will absorb them.
A more obvious factor is the ground on which the rain lands. If it falls on contaminated soil, chemicals and other impurities could find their way into the water.
After collecting rainwater, you must take further steps to purify it and ensure it is drinkable. Collecting drinkable rainwater is relatively straightforward but might take a while, depending on the weather.
Here’s what you need:
- Large, clean container
- Fine wire mesh
- One or more clean jugs
- Water might require treatment
Step 1: Get Prepared
Place your large container outside in an exposed area to catch as much rainwater as possible. To collect enough water to drink, monitor the weather forecast and look for a few consecutive days of rain.
To keep the rainwater as pure as possible, place the container in a clear area away from trees and overhanging branches. It should also be away from any roofs or gutters to avoid contamination.
Place a fine wire mesh over the container to filter out any materials that might contaminate the water. The container should be light-proof to prevent any algae growth. It should also be tightly sealed to keep any mosquitoes from laying eggs on the water.
Step 2: Separate the Minerals
Once your container is full enough, leave it to stand outside for two days. This will allow the minerals to dissipate and leave you with pure water.
Step 3: Store Your Rainwater
After two days, pour the distilled rainwater into one or more clean jugs and store it as appropriate.
If you intend to drink your collected rainwater, there are three effective ways to ensure it is clean enough.
1. Boiling
For short-term drinking of rainwater, boiling is the best option. Although boiling water alone won’t distill it, rainwater has already undergone a sort of distillation. Boiling it will kill viruses, bacteria, and parasites.
The CDC recommends that you boil water for at least one minute, then allow it to cool before storing it. Your drinking water should be stored in a clean container with a sealed cover. If you don’t like the taste, adding a pinch of salt to each quart of water can improve it slightly (5).
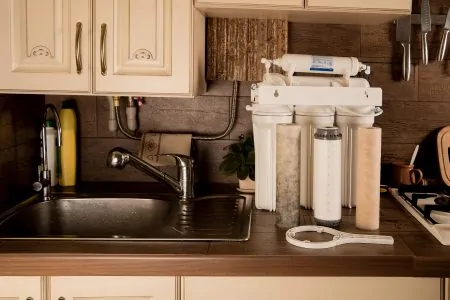
2. Water Filters
There are various types of water filters available, all of which are effective against different contaminants. Some of the most common filters include ceramic, carbon, and membrane. The most effective filters to remove pathogens have a pore size of less than 1 micron (6).
3. Chemical Treatment
If you are unable to boil the water, it’s best to use chemical treatment. Most commercial purification products contain either iodine or chlorine. The CDC advises that chemical treatment won’t always kill certain parasites, however.
Iodine tends to be more effective than chlorine. However, although iodine is important in our diet, overconsumption can cause thyroid problems. It’s also recommended that pregnant women avoid high iodine levels (7). To overcome this, use a carbon filter to remove excess iodine after the treatment.
FAQs

Is It Cheaper to Make Distilled Water or to Buy It?
The cost of distillation can vary greatly depending on the method you use. Distillation kits use electricity to run, which will increase your bill. If you have a gas stove, you will need to pay for extra gas.
The only method that is almost free is gathering rainwater. However, you will still need to pay for the treatment and any extra equipment you require.
Many experienced distillers have found it to be more expensive than simply buying distilled water. With that said, it is worth knowing how to distill water at home if you live in a remote location or in case of an emergency.

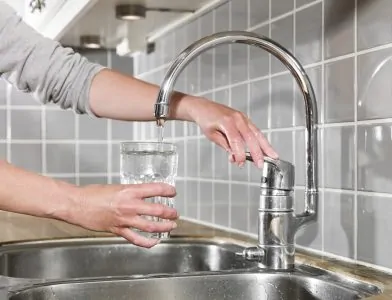
Is Filtered Water the Same as Distilled Water?
Filtered water is a quicker, cheaper substitute for distilled water. The two types are similar but they aren’t identical. When you filter water, the amount of contaminants that are removed depends on the type of filter you use.
Distilled water is the purest water you can create. As the water is evaporated and then condensed back into liquid form, any contaminants will be left behind. In a sense, filtration removes contaminants from water, whereas distillation removes water from contaminants.

Does Distillation Remove Fluoride?
Fluoride is often added to municipal water in an unnatural form as sodium fluoride, sodium fluorosilicate, or fluorosilicic acid. Sodium fluoride is the most widespread type, but it is significantly more toxic than calcium fluoride, which is a natural form (8).
Although some water filters will remove the majority of fluoride, most will only reduce it. In comparison, distillation will remove all fluoride — leaving you with pure, safe drinking water.

How Long Can I Store Distilled Water?
How long distilled water can be stored depends on how you plan to use it. Distilled water used in cars, appliances, and other uses can be stored for over a year in the right conditions. If you intend to drink the water, consider discarding it if you haven’t emptied the bottle within a week of opening it.

Should Distilled Water Be Refrigerated?
Distilled water doesn’t necessarily need to be refrigerated, but it should be kept in a cool area. You should also keep it out of direct sunlight. The easiest way to achieve this is usually by simply placing it in your refrigerator.

How Should I Clean the Container for My Distilled Water?
The surest way to ruin your distilled water is by storing it in a dirty bottle or container. This will introduce new bacteria or contaminants to your pure H2O.
The best way to ensure a clean container is to disinfect it using a natural product such as white vinegar. To make it even cleaner, you could use distilled white vinegar. Leave it in the container for a couple of minutes, then rinse it using distilled water.

Is Rainwater Similar to Distilled Water?
Rain is created using the natural equivalent of distilling water, but it is also influenced by other factors.
As rainwater travels through the atmosphere, it absorbs pollutants and other contaminants. When it lands on your roof or in your gutter, it collects bacteria and other impurities that are present.
You must take additional steps to clean your collected rainwater and ensure it is safe to drink. You can do this by either boiling it, filtering it, or treating it with chemicals such as chlorine or iodine.

Is Distilled Water Good for You?
Distilled water can be good for you based on what type of foods you eat. Distilling water will remove contaminants that might be polluting it. Still, it also removes minerals that are good for your health.
Drinking distilled water is safe for you if you can get these minerals from your diet and don’t mind the weird taste. However, experts believe drinking distilled water will not dramatically improve your health.

Does Distilling Water Purify It?
The distillation process removes contaminants from water, resulting in the production of purified water. To distill water, one must first bring it to a boil and then collect the steam. Once the steam has cooled, it transforms back into water.
This method is highly efficient at getting rid of contaminants. Since the water that has been distilled has a purity level that is far superior to that of tap water, it is frequently utilized in clinical and research settings.
Even though distilled water is not quite as prevalent as other types of purified water, some individuals still choose to drink it because it does not contain any toxins.

Does Distilled Water Expire?
Distilled water typically has no expiration date as long as adequately stored. The fundamental recommendations for storing “plain” water and distilled water are extremely comparable.
Store the bottle or container that has not been opened in a cool location that is out of direct sunlight. Once you’ve opened it, you should always be sure to keep the container tightly shut while it’s not used.
If you intend to consume the water that you distill at home, it is recommended that you store it in a glass container.
This is because the majority of home water distillers feature a glass tank. However, a plastic bottle that is approved for food use and does not contain BPA will work just as well.
Suppose you want to save some water in an emergency. In that case, you can do so in either one large container or a couple of smaller containers. Either option will serve its purpose. Remember to check that they are designed to come into contact with food.
Distilled water can remain contaminant-free as long as it is kept in an airtight container. Even so, you should replace it every few months just to be sure, especially if it’s stored in a container made of plastic.

Can Distilled Water Grow Bacteria?
Unfortunately, bacteria are still capable of growing in water that has been distilled. Any opened container can support the growth of bacteria because it is possible for pollutants to enter the bottle.
If you open the container and then keep it for a very long period without using it, there is a good probability that green algae will begin to grow inside it.
The fact that visible sediment will collect at the bottom of the container is one of how you might be able to know. There’s a possibility that the water will smell foul. In each of these circumstances, throw it out right away.

Why Is There No Distilled Water In Stores?
If you can’t find distilled water in stores, it’s usually because it’s in high demand. Since 2017, many areas of the country have experienced difficulties obtaining sufficient distilled water.
However, these shortages were only transitory, occurred in specific locations, and occurred at random. However, since the pandemic started, the demand for distilled water has also grown.