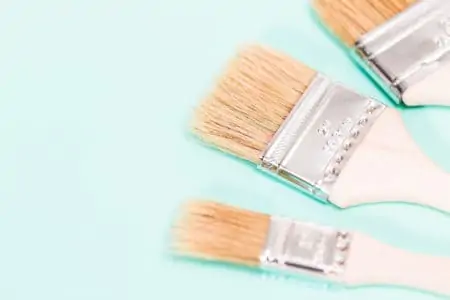
That crusted old paint brush needs resurrecting, but not even Dr. Frankenstein could bring it back to life. Wrong! Some techniques just might revive your dried-out paint brushes, making them usable again.
We show you how to soften a paint brush using various materials and methods, as well as how to clean dried paint brushes.
Key Takeaways
- Softening methods: Try white vinegar, fabric softener, paint thinner, or brush cleaner to soften and clean dried paint brushes.
- Proper cleaning: Prevent brushes from hardening by thoroughly cleaning them immediately after use.
- Be gentle: Treat brushes with care, as good-quality paint brushes can be expensive and delicate.
- Maintenance tips: Wrap wet brushes in plastic wrap overnight to keep paint fresh for the next day.
Why Do Paint Brushes Get Hard?
The most concise answer to this problem is they are not properly cleaned before you store them away. Even the smallest amount of paint left on the bristles will harden and bond with the other strands, causing it to set hard.
Also, the type of paint you use makes a difference. Oil-based products are harder to clean because you need to soak the bristles in mineral spirits or thinner. Water-based paint is easier because it only requires soap and water to get the color off the bristles.
You need to make sure that all the paint is removed and the bristles are dry.
Methods for Softening Paint Brushes
So, the brush is set hard, but before you toss it in the trash, try one of these techniques to get the bristles to soften.
Vinegar
Vinegar is an excellent natural product for softening paint brushes. The best technique is to pour the vinegar into a pan and heat it on the stove until it is almost boiling. Next, pour the vinegar into a glass jar and drop in the brush.
Ensure all the bristles are submerged in the hot vinegar and set a timer for 20 minutes. After the time has elapsed, check that the brushes have gone soft. If not, add another 10 minutes and recheck.
Remove the brush from the jar and comb it through with an old fork to remove any traces of paint from the bristles. The final stage is to rinse the brush to wash away any vinegar and paint residue.
Lotion
Squeeze a pea-size amount of lotion on your palm. Any baby lotion will do. Try and use a cream that dries cleanly without an oily residue, as this might damage the bristles. Run your paint brush through the cream, working it into each bristle.
Do this for about 2 minutes, and you should feel the brush start to loosen. Wipe off the brush with a paper towel, making sure you remove as much lotion as you can. This method may need to be repeated several times if the brush does not loosen the first time.
Fabric Softener
Before using fabric softener, you should remove as much excess paint from the bristles with a brush tool or a comb. A fork might also work to separate the bristles.
Mix some fabric softener into a large bucket with water. About half a cup of softener to every 1-gallon of water should be enough. Fabric softener works better than soap because it breaks the bond between liquids and solids.
Swish the brushes one at a time in the bucket so that the paint starts to fall away. Count to 10, keeping the brush moving in the solution. Lift out the brush when you are satisfied it is clean, and dry it off using a paper towel.
Paint Thinner
Using paint thinner is the most convenient way to soften a brush but is damaging to the environment. Pour enough thinner in a jar and place the brush inside so that the bristles are submerged up to the ferrule (the metal bit that holds the bristles in place).
Wait for 20 to 30 minutes while the thinner gets to work, and check the brush is softening. Once it has softened and most of the excess paint sits at the bottom of the jar, lift out the brush and dry it thoroughly using a clean rag.
Brush Cleaner
Brush cleaner works in much the same way as thinner. It dissolves the paint, working the bristles free. Pour the same amount into a jar and submerge the bristles up to the ferrule. Allow 20 to 30 minutes to pass, and then start working the brush in the solution back and forth.
The paint should lift off and discolor the brush cleaner. Now lift the brush out of the jar and dry it thoroughly in a clean rag.
What You Need To Soften Your Paint Brush
Before we get started on how to soften your paint brush, we first need to compile a list of what tools you will need.
- Hot water.
- Dish soap.
- Glass jar.
- Brush comb or fork.
- White vinegar.
- Fabric softener.
- Paint thinner.
How To Soften a Hard Paint Brush
Grab that hardened paint brush, and let’s get on with softening the bristles. So, what’s the first step?
1. Give the Brush a Warm and Soapy Bath
Get those hardened bristles submerged in warm soapy water as quickly as possible. The water can be almost at boiling point if the brush is set hard, but be careful you don’t melt the glue that holds the bristles in the ferrule.
What you are looking for is the brush to become pliable, even by a tiny amount. You can leave it soaking if it proves a little stubborn, but make sure you keep topping up the hot water as it cools.
Top Tip
Soak your brush in coconut oil as it helps to break down the dried paint. Baby oil is another alternative if you don’t have any coconut oil to hand. Failing that, cooking oil will work just as well.
2. Add a Generous Amount of Dish Soap
Once the hot water and oil have given the bristles the flexibility you need, it’s time to lather up. Squirt a generous amount of dish soap onto the bristle and start to massage it in. What you want is a liberal coating that gets into the middle of the brush and starts to loosen the bristles further.
Top Tip
Turn the brush upside down and squirt the dish soap on the tip of the bristles and let it soak in. This ensures you get the soap into the ferrule, where the bristles are glued to the handle.
3. Drop the Brush in a Jar
Now you have the brush soaked in dish soap, and you can feel it start to loosen its grip on the bristles, drop the brush in a glass jar (one that you don’t intend to use to store food), and add more hot water and dish soap.
Start to build up the lather by vigorously working the brush backward and forward in the soapy solution. You should see the color start to change, which is a great sign it’s working.
4. Rinse With Water Then Repeat
Once you’ve finished making bubbles with all that dish soap, it’s time to rinse off the brush to check on your progress. If the bristles are moving a little more freely, then great, you can proceed to the next phase.
If you don’t notice any difference, repeat the whole dish soap and hot water process all over again. The main thing you should keep in mind is if the bristles get cold, they will stiffen again. You need to keep them pliable, and that means plenty of hot water.
5. Step It Up With Vinegar or Fabric Softener
The dish soap did a great job, but now it’s time to bring out the big guns to get that paint brush softer. You can use either vinegar or fabric softener.
Empty the dirty dish soap and water from the glass jar, and add some more hot water with a teaspoon of vinegar or fabric softener. The fabric softener helps ease the bristles apart and is more effective than the other methods we’ve tried so far.
You could also try the boiling vinegar trick, where you fill a pan with white vinegar and bring it to the point just before it boils. Now pour it into the glass jar and immerse the brush, working it from side to side to try and loosen the bristles.
Whichever method you use, you need to put in a shift by swirling the brush in the vinegar or fabric softener solution vigorously. You should feel the bristles soften some more, and the paint starts to discolor the water solution.
6. Grab the Brush Comb
If you have a brush comb, now is a great time to use it to remove the excess paint. It might speed up the process so that you can skip a few stages. The comb works the soap, softener, and vinegar through the bristles, splitting the bristles apart just like combing conditioner through tangled hair.
Grab the comb, add some fabric softener to the brush and run it through the brush’s bristles. As it moves through the strands, it spreads fabric softener, which loosens the bond and starts to break down the dried paint.
7. Time To Clean
Rinse out the fabric softener to check on your progress so far. If the brush looks like it is loosening, keep at it with the fabric softener or vinegar until you yield results. If not, it may be time to step it up once more and go nuclear on that brush.
8. Add Paint Thinner
Sometimes you have to concede that vinegar isn’t going to cut it, and you need something with more punch. Say hello to paint thinner. Now paint thinner is no lightweight when it comes to removing paint from a hardened brush.
Paint thinner is caustic, which means it will burn if it comes into contact with your skin or face. It’s at this point that you should don your safety goggles, gloves, and face mask to protect you against splatters and fumes.
Now that you are protected, pour enough paint thinner or mineral spirits into the glass jar so that it covers the bristles. Pop the brush in and let it sit for 10 to 20 minutes to allow the thinner to get to work. If the brush is still caked in paint, leave it for an hour.
Give it a helping hand by swirling the brush in the solution, but be careful that you don’t splash any onto your arms or face.
9. Time To Rinse Clean
Lift out the brush, taking care to avoid drips, and place it under the hot faucet and rinse it off. Make sure you remove all the thinner. You should notice a marked difference in the bristles after soaking it in thinner.
10. Apply Fabric Softener and Repeat the Process
Your bristles should be suitably softened now, but if you think it still needs work, soak it in fabric softener and add some to the jar and leave the brush to soak for another 30 minutes.
Lift out the brush and check to see if it is now usable. If it is, you’ve just saved a few dollars buying new brushes.
Paint Brush Maintenance Tips
So, what are the tips that the pros use to keep their paint brushes in the best condition? Let’s take a look.
Clean Your Paint Brush Immediately After Use
It sounds obvious, but if you delay cleaning your paint brush immediately after finishing the task, the paint starts to dry, and that’s when the bristles bond together.
Brushes are expensive, and they do a lot of work, so you should show them some love. Any of the cleaning techniques we’ve mentioned will help you clean your brush and keep it in top condition.
The secret is to do it while the paint is still wet because it makes it easier to remove it.
Top Tip
What if you pack up for the evening, and want to resume your painting in the morning? Grab some plastic wrap and wind it around the wet brush, with the paint still on the bristles. The paint stays fresh for the next day.
Be Gentle With Your Paint Brush
Good quality paint brushes are expensive, so when you use them, you should take good care to make sure they keep performing for years to come. That way, prevention is always better than the cure.
The more gentle you are with those delicate bristles, the less you lose. And the better you treat your paint brush, the less likely it will set hard from improper cleaning, which means you don’t have to attack the bristles to loosen them up.
That preserves the bristles and the glue that holds them in place in the ferrule.