Is your toilet clogged, but you can’t afford to call in a plumber right now? Most commode clogs are something you can deal with if you learn how to use a toilet auger. With these easy steps, you’ll figure out how to fix the problem yourself.
Key Takeaways
- Use a toilet auger to unclog toilets by inserting the cable into the drain and cranking the handle.
- A toilet auger is different from a snake, as it is designed specifically for toilets and can handle bigger blockages.
- Properly maintain and clean your toilet auger to prolong its life and prevent damage to the toilet.
- If the toilet remains clogged after using an auger, try alternative methods like baking soda and vinegar or dish soap and hot water, or call in a professional plumber.
How Does a Toilet Auger Work?
A toilet auger (aka a toilet router) is a tool for clearing your toilet drain. It works by pushing through the blockage, breaking it up to a point where it can be flushed. The tool consists of a semi-rigid wire that can be bent in the bowl and a sharp wire spiral at the very tip.
Using a toilet auger is pretty simple; you eliminate the clog by feeding the flexible cable down the toilet drain. Then you use an offset hand crack to turn the spiral tip.
Toilet Auger Vs. Snake
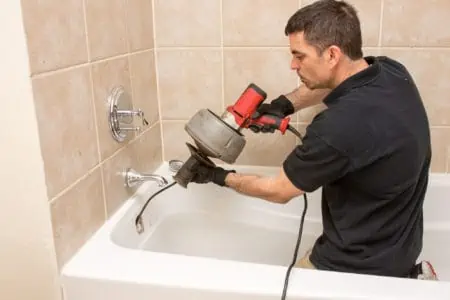
Think of a drain snake as just that: a snake. It’s a fine coiled cable that snakes down a drain to remove clogs by bringing them back the same way they went in. It’s best used for sinks and showers, but you can use it for small toilet clogs.
A toilet auger is a heavy-duty tool used to unclog bigger blockages in a toilet or drain. They force their way through the clog to break it up. As they are specifically designed for a toilet, they’re the better choice of the two options.
How to Use an Auger
Before you get started, make sure you’ve got the right tools for the job.
What You’ll Need
- Protective rubber gloves.
- Empty bucket.
- Dish soap.
- Warm water.
- Toilet auger.
1. Locate the Clog
Clogs in the toilet can be divided into two categories. Soft clogs are made of things like grease and waste, and hard clogs are from solid objects like Q-tips.
It might be toilet paper or an improper item that fell (or was dumped) into the toilet. Children’s toys, beauty items, and unclean laundry water are the most prevalent offenders.
The sewer is the location of the second type of obstruction that might occur. If sewage begins to back up into your sinks and bathtubs in addition to your toilet, there’s no doubt the problem isn’t caused by the toilet alone. You will need a licensed plumber’s assistance for this kind of clog.
2. Remove Toilet Debris
This part is often overlooked but can make a difference when you’re unclogging the toilet. Put on a long pair of rubber gloves and grab an empty bucket. Reach inside the toilet, remove any debris or messy solids, and dump them in the bucket.
Then slowly pour a bucket of warm (not boiling) water into the toilet bowl to see if any more debris comes loose. You can also add a few drops of dish soap into the water.
Caution
Don’t flush the toilet at this point. If the clog has not loosened enough, you risk flooding the bathroom with unhygienic water. If you notice the water levels rising too high, refrain from pouring more water into the bowl.
3. Insert the Auger Cable
Stick the auger into the toilet hole as far as it can go and release the cable.
4. Crank the Handle
Hold the housing of the auger using one hand to keep it in place. Put your other hand on the handle and crank it slowly to feed the cable into the toilet drain.
Don’t use force because it could cause the cable to double back on itself instead of reaching down the toilet and meeting the clog.
If it feels like the cable is stuck and it’s not moving forward, switch the cranking direction a few times to give it a little nudge. You’ve likely hit the clog when you can’t move forward and meet a lot of resistance.
5. Remove the Cable
Now that the cable is forced through the clog, pull the auger cable out. Rotate the handle and pull it back to do this. You can remove the auger completely when the tip is against the tube.
6. Flush the Drain
Give your toilet a flush to see what happens once you’ve removed the cable. The clog should now flush deeper into the drain and land in the sewer system. You might have to flush your toilet more than once.
Tool Maintenance
Always thoroughly clean and sanitize your tools after you’re done. This prolongs their life and prevents the spread of germs.
Using a Toilet Auger to Unclog Vent Stack
If the vent stack is blocked, air will not be able to exit the drains, causing what is known as negative pressure.
A clogged toilet or one that is slow to flush will be among the issues you encounter.
What You’ll Need
- Ladder.
- Toilet auger.
1. Reach the Vent Stack
If you can’t access the vent stack through the attic, you’ll need to use a ladder to access the roof. Ask for someone to hold the ladder from the bottom for better stability.
Safety First
Call in a professional if you don’t know what you’re doing, as this could be dangerous.
2. Insert the Auger
While pressing the auger down, spin the handle counter-clockwise. When it comes into contact with the debris, crank the handle in the opposite direction.
3. Remove the Clog
Each time the auger is passed down the vent, the obstructions will be broken into small pieces and sent down the drain. Repeat this procedure a minimum of three times to remove any obstructions from the pipe. Then use a garden hose and spray water down the vent stack.
Toilet Auger Won’t Go In
So, you’ve figured out how to use a toilet auger, but, for some reason, it won’t go down the toilet. Multiple things could be causing this.
Wrong Auger Type
If you use the wrong kind of auger, you may not be able to get it all the way down the drain. Choosing the appropriate one, therefore, is critical.
Standard drain augers shouldn’t be used on toilets because they will damage the porcelain. They are also normally used for smaller drains such as your sink or bathtub, so they won’t be much use on a toilet. Toilet augers are specifically designed with a rubber casing to prevent damage. They are also better equipped to handle a larger drain.
Dirty Auger
This is why you should clean your toilet auger after each use. Debris that sticks to the auger will make it difficult to use and might prevent it from going inside the toilet properly.
Loose Thumb Screw
If the thumbscrew is loose, your toilet auger won’t be of much use. A loose screw prevents the rotating cable that is supposed to reach the clog from functioning correctly. Tightening the screw should fix this.
How to Store a Toilet Auger
You shouldn’t just leave your toilet auger lying there after using it because it most likely has toilet paper and other garbage. Submerge it in a bucket filled with soap and disinfectant.
If you want an environmentally friendly option, use hot water and vinegar instead. Just don’t allow it to soak for too long, as the metal can begin to rust. It is sufficient to wait five minutes.
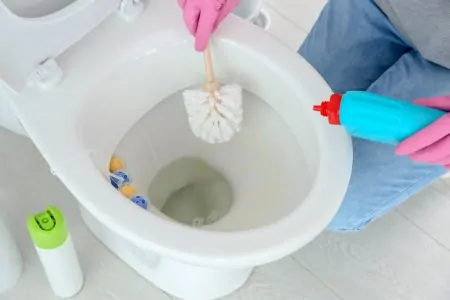
Scrub the cable and the coil at the tip of the cable with a toilet brush in a circular motion to remove visible debris. Use a pipe cleaner to clean the interior of the tube.
After rinsing the auger in warm, clean water, properly dry it by patting it down with a newspaper or a rag. This step is crucial as the auger can rust if it is stored while damp. Any metallic tool will have a shorter lifespan if it is exposed to rust.
Since your toilet doesn’t get clogged every week and you don’t get to use your auger that often, it will sit in storage for a long time. So ensure you properly dry the toilet auger before storing it.
What to Do If the Toilet Won’t Unclog
So, you’ve learned how to auger a toilet, but the clog is still there. Is there something else that can be done about it?
Baking Soda and Vinegar
This combo is great for cleaning many household items. They react to form bubbles that could remove some clogs from the toilet, so be sure to try it out.
Pour baking soda into the toilet bowl, then pour vinegar until it bubbles up. Wait a few minutes, then try to flush. Repeat as necessary.
Dish Soap and Hot Water
You can mix warm water and dish soap and pour that down the toilet bowl. It could be efficient if the clog is mostly grease, fat, or dirt that could dislodge.
Call In a Plumber
When everything else fails, a professional is your best bet. They’ll know what to do.
FAQs
Is a Toilet Auger Better Than a Plunger?
It depends on the type of clog. A plunger works for toilet trap clogs, while an auger can go deeper in the toilet, all the way up to the main soil stack.
Can You Damage a Toilet with an Auger?
Yes, particularly if you use force when feeding the auger into the toilet. You want to rotate the crank slowly to avoid scratching the porcelain inside the toilet.

How Much Does a Toilet Auger Cost?
Different factors determine the price of a toilet auger. To give you an idea, you can buy toilet augers for as little as $30, while there are professional tools that can cost up to $3,000.

Will a Toilet Eventually Unclog Itself?
It depends on what’s clogging it. If the obstruction clogging the toilet is water-soluble, such as human waste or toilet paper, it will eventually dissolve and unclog itself.
The Bottom Line
Once you learn how to use a toilet auger, you’ll probably be able to deal with many future clogs by yourself. Be patient when cranking the auger to avoid scratching the toilet bowl.