There are many ways to insert bolts and screws, thanks to modern tools such as power drills and impact drivers. However, there might also be times when you need to remove a bolt, which can be very difficult if it has been damaged.
Bolts can become stripped, their heads can become rounded, or they might rust into place. Removing these damaged bolts is a daunting task but it doesn’t have to be a complicated one with the right technique.
In this article, we will explore how to remove a stripped bolt using 10 different methods. At least one of these techniques should be enough to get a damaged bolt out.
Key Takeaways
- Use impact force and an impact gun to shock the bolt free.
- Apply heat to the bolt or its housing to expand and contract the metal, breaking the corrosive seal.
- Make relief cuts into the bolt head, and use a chisel and hammer to turn the bolt or split the nut.
- Use a bolt or screw extractor by drilling a pilot hole and inserting the extractor, turning it counterclockwise to remove the bolt.
How to Remove a Stripped Bolt
There are various ways to remove a stripped bolt and which ones will work will depend on how stubborn the bolt is. We will look at the simplest, quickest method first, which is a reliable way to remove many bolts:
Method #1: Impact Force
In many cases, brute force is enough to remove a rusted bolt, so it is worth trying this before moving on to other methods. It uses tools that most DIYers will already have in their collections.
Take a chisel or a punch and use a hammer to strike it into the center of the bolt. Your aim is to shock the bolt free. If it doesn’t work the first time, you can try it repeatedly until you are sure it won’t move.
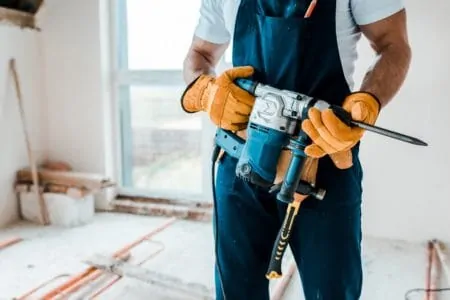
Before you concede defeat, try using an impact gun. The rapid percussive force it uses should be able to free the bolt.
Take Note
Method #2: Heat
Heating a bolt will make it expand before it cools and retracts. This process should break the corrosive seal that holds the bolt in its housing.
There are two effective ways to do this:
Method #2: Relief Cuts
Relief cutting is the most reliable way of removing rusted bolts or nuts that are stuck fast. This includes cutting two or three grooves with a hacksaw or rotary cutting tool into the head of the bolt. Cut them almost as deep as the thread.
Then, place a chisel in the groove and strike it with a hammer. You want the bolt to turn in the housing, causing as little damage as possible, or the nut to split off the bolt completely.
Using this method should help you get enough grip on the bolt or nut to clamp on some locking jaw pliers. You can then twist the bolt out of the housing.
Method #3: Shake the Bolt
This is one of the most straightforward methods. Grab a socket wrench and start twisting the bolt or nut back and forth, trying to loosen it further each time.
Feel for the bolt to offer some resistance, and always move the same distance forward and backward, returning the bolt to its original position. Gradually increase the rotation with each turn until you see the bolt start to rise out of the housing.
Squirt some penetrating fluid into the gap you have created between the bolt and housing. This will lubricate the hidden thread and allow for a cleaner exit of the bolt. Hopefully, it will also cause less damage to the threads in the housing.
You will need patience when using this method, but it will usually work with enough patience.
Method #4: Drill it Out
Last Resort
Drilling a bolt could break it into multiple pieces and leave fragments of metal in the hole. However, it is the go-to method if the bolt has sheared off and is now sitting flush with the surrounding surface.
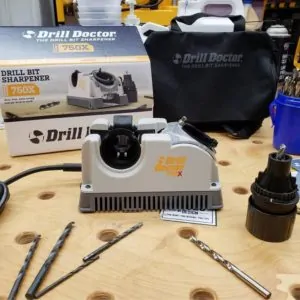
Start with a smaller drill bit, working through the center of the sheared bolt lengthways. As the bit works its way down the shaft of the bolt, it will heat it and that heat will help loosen the bolt.
The bolt also has more room to contract when it cools, as its shaft will now be hollow. If you are lucky, a pair of long-nosed pliers will be sufficient to grip the bolt and twist it out. If not, you will need to use a larger drill bit and work through the frozen bolt again.
Hopefully, the bolt will break apart and you can clear the hole of debris. Be careful not to damage the surrounding thread. If you do need to make repairs, use a universal tap tool.
Method #5: Bolt or Screw Extractor
This method is tricky to get right. If you get it wrong, you could cause a more significant problem than the one you are trying to solve.
Start by drilling a small pilot hole into the shaft of the bolt or screw. Don’t drill the entire length as this will weaken the bolt and also reduce the grip of the extractor.
Then, insert the extractor bit into the pilot hole and give it a couple of taps with a hammer. Turn the T-bar or locking pliers counterclockwise, applying downward pressure. This should make the screw or bolt start twisting out.
Be careful not to snap the extractor bit inside the hollowed bolt. If you do, it will be extremely difficult to get the bolt out of the hole. It might also require a specialist drill bit.
Method #6: Pipe Wrench
Pipe wrenches are common household tools and this is one of the easiest ways to extract a stripped bolt. They are ideal if the head of the bolt or nut has rounded slightly. However, it won’t be suitable for rusted screws as they sit flush with the surrounding surface.
Place the head of the pipe wrench over the head of the bolt and tighten it down. As you twist, the wrench will bite down on the bolt head and grip it harder. If the bolt is stubborn and won’t move, try moving the wrench back and forth, increasing the rotation each time.
Method #7: Weld a Bolt
This method requires some welding knowledge and specialist equipment, so it won’t be an option for everyone. Sometimes the bolt head or nut will be so stripped that it can’t be turned, even by locking jaw pliers. To overcome this, you can take a nut and bolt head of a slightly larger size and tack-weld it to the body of the bolt.
Fill the nut with weld and run a bead of the weld where the two parts meet. This welding process has the added benefit of heating the bolt to loosen the rusted grip in the housing. It will also allow you to use a socket on the bolt.
Method #8: Air Hammer/Chisel
This method is similar to using impact as the air hammer and chisel will apply downward force to the stripped hardware to shock it free of the rusted housing. Like similar methods, this has limited success and works better on screws and bolts that are more exposed.
Method #9: Screwdriver
A screwdriver is particularly effective when removing rusted screws, especially Philips or cross-head screws.
You can also use this method on stripped bolts. However, twisting the hardware free from the corrosive seal requires a great deal of force, so it has limited effectiveness.
Cross-head screws can take a lot of torque, but when they rust, they become brittle and strip easily.
There are two ways to use a screwdriver to loosen bolts and screws:
Method #10: Reinstall New Bolts or Nuts
If you have tried all the methods on this list, you might have to accept that you aren’t going to remove the stripped bolt. However, it may be possible to install a new bolt to strengthen the existing one.
First, check that you can install new bolts. Some precision-engineered components, especially in machinery, are designed to have their bolts in specific locations. If you believe it is possible to install a new bolt, you will need some specialist tools.
What you will need:
- Drill
- Various sizes of HSS drill bits
- Protective goggles
- New bolts or nuts
- A tapping tool
- A can of compressed air
1. Drill the Pilot Hole
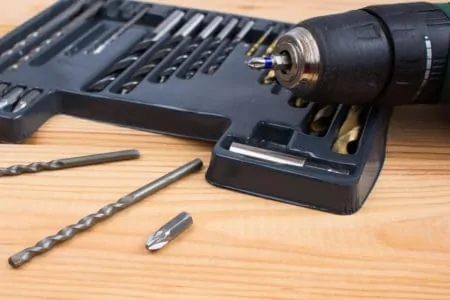
For this example, we will assume the material is metal. Use a drill bit for metal and make a pilot hole in the material. It is important to ensure the hole is as straight as possible, so hold the drill perpendicular to the hole. Once you have reached the required depth, remove the drill bit.
2. Use a Larger Drill Bit
Widen the hole by using a larger drill bit. Make sure it is slightly narrower than your tapping tool so the tool will be able to gain purchase. Remove the drill bit and clean the hole with a can of compressed air.
3. Use the Tapping Tool
Insert the end of the tapping tool into the hole. Keep the tapping tool perfectly straight, otherwise, the bolt will be off-center. While the bolt might still hold, it will result in a worse finish. Gently twist the tapping tool clockwise by the T-bar and let it move deeper into the hole.
When you reach the bottom, turn it counterclockwise to remove the tapping tool. You are now ready to insert the new bolt.
Top Tip
