It can be concerning when you unplug your sink but it doesn’t drain. A clogged pipe can make water drain more slowly, leaving more dirt in the basin or preventing it from emptying at all.
Fortunately, unclogging a sink is very simple and you should be able to do it without the help of a professional. If you have never unclogged one before, it is worth taking the time to learn a little more about the process.
In this article, we will explain how to unclog a sink, using basic tools that you can find in your home or your nearest DIY store. This should help you get your drains flowing perfectly again.
Key Takeaways
- Try boiling water first to unclog the sink, but be cautious with porcelain sinks and PVC pipes.
- Combining salt and baking soda or vinegar and baking soda can help break down clogs.
- Use a plunger, sink auger, or coat hanger to manually remove blockages from the drain.
- Avoid using chemicals for unclogging as they can be harmful to the environment and your health.
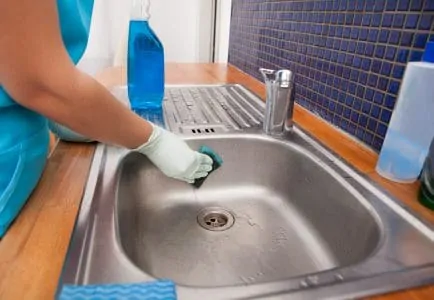
How to Unclog a Sink
If your sink is clogged, you have several methods to deal with it. For your convenience, we will start with methods that only require standard household items, such as a kettle or baking soda.
Boiling Water
The quickest and cheapest method is to simply use boiling water. This should always be the first solution you try, and you can move on to other techniques if it doesn’t work. Here’s what to do:
1. Boil Water
Fill your kettle with water and boil it.
2. Drain Your Sink
While the kettle is boiling the water, try to drain your sink. If the water won’t drain, unscrew the drain trap under the basin. If you aren’t comfortable doing this, you can use a mug or pan to remove the water instead.
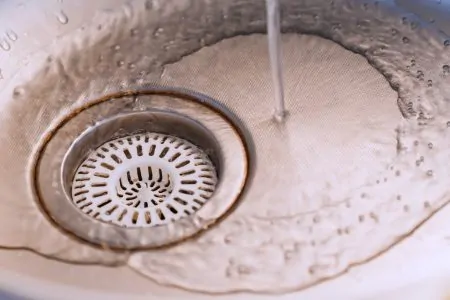
3. Pour the Boiling Water
Once the sink is clear, pour the boiling water into it, aiming for the drain. If it doesn’t drain, let the water cool and remove it before repeating the process.
Be Careful
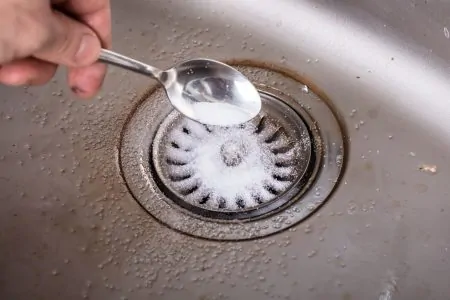
Boiling Water and Salt
After emptying the sink, pour half a cup of salt into the drain. Leave it for a few minutes, then flush it down with boiling water by repeating the steps in the previous method. You don’t need coarse salt; regular table salt should work.
Salt and Baking Soda
1. Mix the Solution
Combine half a cup of salt with one cup of baking soda. Use regular table salt as it will dissolve more easily.
2. Apply to Drain
Pour the mixture into the drain, ensuring as much as possible goes down. Leave it for several hours (at least two).
3. Flush
Boil a kettle of water and pour it into the drain to flush out the mixture. Depending on the blockage, you might need to repeat this process a few times.
Vinegar and Baking Soda
1. Apply Baking Soda
If there is water in the sink, remove it with a cup or jug. Then, pour a cup of baking soda into the drain.
2. Pour Vinegar
Once the baking soda is in place, pour an equal amount of white vinegar or apple cider vinegar down the drain. The solution will bubble at first, before settling.
3. Flush
Wait 15 minutes before opening the hot water tap to flush away the blockage. If the clog is stubborn, you might need to use boiling water.
Unscrew Drain Trap
1. Locate Your Drain Trap
The drain trap should be easy to find under the sink. It is usually located on the curve by the drainpipe.
2. Unscrew the P-Trap
Place a bucket under the P-trap. Unscrew it until it comes off. Rinse the trap under running water, ideally in another sink.
3. Flush the Drain
Empty the bucket and place it under the sink. Pour a kettle or two of boiling water into the drain. If the water doesn’t clear the blockage, use a tool to try and push it out.
4. Refasten the P-Trap
When you are satisfied that the drain is clear, refasten the P-trap. Make sure it is fully screwed on and watertight, then open a faucet to check whether or not the water will drain again.
Plunger
1. Prepare for Plunging
To achieve the best results with a plunger, it is essential to create a tight seal. Place the plunger over the drain and fill the sink with enough water to cover the plunger’s bell. If you have a double sink, seal the other drain with a plug or towel.
When working with a bathroom sink or bathtub, remove the drain stopper and seal the overflow at the top. You can use duct tape or a damp cloth to achieve this.
Which Plunger Should You Use?
2. Plunge
Start plunging by moving the handle up and down firmly; you don’t need to make the water splash. Do it several times until you hear suction in the pipes. This is a sign that the clog has been cleared.
3. Remove and Flush
When you hear suction, remove the plunger and flush the drain with warm water. It can help to keep a kettle of boiling water ready to pour in.
Hopefully, the clog will have been cleared. If it hasn’t, you can repeat the process a few times. It is worth owning a sink plunger as they are a reliable way of clearing blockages.
Sink Auger
A sink auger, also known as a plumber’s snake, drum, or canister auger, is excellent for dealing with stubborn blockages. It is designed to reach deep into the drain, clearing out hair and other debris.
1. Prepare Your Sink
Prepare your sink by removing the drain stopper if you have one. It is also worth boiling some water to flush the drain later.
2. Use the Auger
Insert the auger cable into the drain opening and slide it down. When you feel resistance, tighten the screw on the canister. If you think the blockage is deep in the pipe, open the drain trap and insert the auger from there. Then, you can continue extending it until you feel the clog.
3. Turn the Crank
Start turning the crank handle on the canister — turn it clockwise as you apply moderate pressure. It could get stuck or even bend in the drain but keep turning it. As you turn, the clog should loosen and begin breaking up.
Continue extending the cable until the handle turns easily, which indicates that you have passed the blockage.
4. Pull the Cable out and Flush
Gently pull the cable out — have something ready to catch the debris. Once the auger is out, flush the drain with hot water. You can repeat the process if necessary.
Coat Hanger
If you don’t have a plumber’s snake, a wire coat hanger can work equally well. Make sure it can be bent to fit. It won’t reach as far as an auger, but it should clear the blockage if it isn’t too deep in the pipe.
Start by straightening the hanger, then insert it into the drain or stub pipe to dislodge the blockage. Insert it carefully so you don’t scratch the surface of your sink. Keep moving it back and forth and reach as far as possible.
Once you are satisfied that the blockage is gone, remove the wire and flush the drain with hot water. Repeat the process if necessary.
Wet and Dry Vacuum
A wet and dry vacuum is a possible alternative to a plunger. However, you need to create a tight seal around the drain for it to work. You can use the top of a soda bottle or even a plunger head.
Set the vacuum to its highest liquid setting and use it on the drain. If the clog isn’t too far down, it should work. When you think the blockage has been cleared, flush the pipe with warm water.
Important
Dish Detergent
If the clog is caused by grease rather than solid debris, you might be able to clean it using dish detergent. Pour a generous amount, about half a cup, down the drain, then flush it with hot water. These detergents are designed to tackle grease, so they should break the blockage apart.
Unclogging a Sink Using Chemicals
It can be tempting to pour chemical cleaners down your drain whenever it gets blocked, but this should be your last resort. Cleaning chemicals can be harmful to the environment and your health if overused (1).
They can also damage your pipes and drains. Most chemical cleaners won’t be very effective at removing a blockage anyway, so you should attempt the other methods first.
Common Causes of Clogged Sinks
Sinks are generally blocked by an accumulation of smaller debris that falls down your drain when you empty it. The specific causes differ between kitchen and bathroom sinks, with some of the most common including:
- Food
- Grease
- Hair
- Very small objects, usually dropped by children
Flushing your drains regularly during cleaning will help prevent blockages. You can do this with boiling water or vinegar and baking soda.
If you have a kitchen waste disposal, only discard small amounts at a time to prevent clogging it. Also, avoid using it to dispose of the following:
- Eggshells
- Hair
- Hard food waste
- Oil, grease, and fat
- Condoms
- Rags
- Paper towels
- Feminine hygiene products
- Flushable cat litter
- Coffee grinds
- Food labels
FAQs

Why Does My Kitchen Sink Keep Clogging?
Several factors can cause your kitchen sink to clog. Knowing what kinds of materials you are putting down your drains is important. Wastes like cooking grease or mineral-rich water from faucets with hard water can quickly accumulate inside your pipes and cause blockages.
In addition, old or damaged pipes may not be able to handle the flow of water and debris that passes through them, leading to clogs.
Harsh detergents or chemicals used for cleaning may disrupt the natural balance of bacteria in your drains, allowing organic matter to stick together and form clogs more easily.
Suppose you are experiencing frequent clogs in your kitchen sink. In that case, it is a good idea to take a closer look at the factors contributing to this problem and find ways to prevent it.

How Much Does It Cost to Unclog a Sink Drain?
Prices for unclogging a sink drain start at $100 and go up to $400. When using an electric snake, the national average cost varies from $250 to $400, with most plumbers charging around $300 for this particular service.
Suppose you’re experiencing severe clogs in the main pipeline and make an emergency plumbing call during non-working hours. In that case, you can pay as much as $1,300 for this service.

What Is the Fastest Way to Unclog a Sink?
People use many strategies to unclog a sink, and while some of these methods may be effective in certain circumstances, none is quite as fast or reliable as boiling water.
The intense heat of boiling water can quickly dissolve stubborn clogs, melting them away and restoring free flow to your drain.
Boiling water is a simple option that doesn’t require additional tools or equipment, making it the ideal choice for any busy homeowner looking to get their sink back up and running quickly.
Whether you need to tackle a blockage in your bathroom sink or kitchen drain, boiling water is the fastest way to unclog a sink.

Will Coke Unclog Drains?
Using soda to unclog drains has long been the subject of urban myths and alarming headlines.
While many people may associate cola with a host of health problems, it turns out that these sugary beverages contain some powerful substances that can effectively remove dirt, grime, and hair from drains.
Tannins in colas react with minerals within clogs to break them down over time, while carbonic acid works to accelerate the process. In addition, phosphoric acid helps prevent rusting on metal pipes, making it a useful tool for homeowners looking to end foul odors and clog build-up.
Overall, Coke may not be the first thing that comes to mind when you think about unclogging drains. Still, it does seem like a surprisingly effective solution after all.

What Acid Do Plumbers Use to Unclog Sink Drains?
When faced with clogged sink drains, plumbers often use hydrochloric acid to unclog the pipes. Also known as muriatic acid, this highly corrosive substance effectively dissolves stubborn build-up in plumbing systems.
It works by breaking down the bonds between debris particles and drain pipes’ surfaces, allowing these substances to be flushed out more quickly.
However, hydrochloric acid is not without its risks. In addition to causing serious irritation or burns if it comes into contact with the skin or eyes, hydrochloric acid can also release dangerous fumes.
Because of these safety concerns, plumbers typically take extra precautions when using hydrochloric acid, such as wearing protective clothing and working in a well-ventilated area.
Hydrochloric acid remains the most reliable way to unclog sink drains quickly and effectively for many plumbers.

Does Plunging a Sink Make It Worse?
When you plunge a sink, you may experience mixed results. On the one hand, plunging helps to dislodge clogs and push them through the pipes, resulting in a working sink.
On the other hand, plunging can actually create more blockages in drains by pushing debris further down into the pipes.
To assess whether plunging your sink improves or worsens, it is important to consider factors like how well your drain is maintained and where the clog is located. Ultimately, every situation is different and will require a nuanced approach.
However, with some trial and error and an awareness of potential risks, it is possible to achieve positive results when plunging a sink.