Has your Rheem tankless water heater suddenly stopped working? Thankfully, Rheem’s water heaters provide an error code when something goes wrong.
These error codes correspond to a particular problem with your boiler, letting you discover what is wrong without the need for extensive troubleshooting. However, with so many different error codes, you might have no idea what each code means.
In this article, we will look at the main Rheem error codes, what they mean, and how you can address them. You might be able to fix the issue by pressing a single button, or you might need to call for professional help.
Key Takeaways
- Check the error code displayed: Rheem tankless water heaters provide error codes to help identify the issue. Refer to the error code list in the owner’s manual or online resources for possible solutions.
- Ensure proper power supply: Check if the unit is properly connected to electricity and receiving the correct voltage. If there are voltage drops, consult an electrician.
- Inspect gas supply: Make sure the gas supply is open and matches the requirements of the unit. Check the gas line, regulator, and meter for correct sizes.
- Examine venting system: Clear any blockages in the venting system and ensure it is properly installed.
- Clean and maintain the unit: Regularly clean the inlet water filter, heat exchanger, and air inlet screen. Flush the heat exchanger if there is a build-up of limescale.
Rheem Error Code Breakdown
Rheem water heater error codes are short and simple. They are usually displayed on the screen of the heater unit itself.
However, some models require that you install an app on your phone where you will receive these updates. Consult your owner’s manual to find out exactly where you need to look.
Once you have an error code, take a look at our list to find out what the problem is. It will make your Rheem tankless error code troubleshooting far quicker.
Be Careful
Error Code No Code
What It’s Telling You
- A flow rate or maintenance error: When water flows through the heater, it is not heating but there is no error code. The control board will display the temperature, but no hot water will be produced by the unit.
The Solution
- Adjust flow or temperature: Try to increase the flow rate or the temperature.
- No crossings: Make sure the hot and cold water lines don’t cross each other.
- Check for mistakes: Ensure there aren’t any other plumbing mistakes.
- Wash the inlet water filter: Remove the filter and clean it under running water.
- Check the flow sensor: Ensure the flow sensor is working properly. It might be jammed.
Error Code P1
What It’s Telling You
- Maintenance warning: The water flow rate is too low. The unit may still operate.
The Solution
- Check the flow from the hot water tap: You may need to clean the aerator.
- Wash the inlet water filter: Remove the filter and clean it under running water.
- Adjust temperature or flow rate: Raise the flow rate or increase the temperature.
- Inspect the flow sensor: Ensure the flow sensor works properly. Only do this if you are confident the other requirements are being met.
Error Code 1L
What It’s Telling You
- Maintenance issue: There is a build-up of limescale and scale deposits.
The Solution
- Flush the heat exchanger: Consult your owner’s manual for specific instructions.
- Adjust altitude settings: If you installed the unit at a high altitude, make sure it is configured appropriately.
Error Code 05
What It’s Telling You
- Maintenance warning: There could be a blockage in the vent exhaust or the air intake. The unit should still operate.
- Installation warning: The vent pipes might not be properly connected to the vent terminal. The unit should still operate.
The Solution
Option 1
- Clear the vent: Remove whatever is blocking the vent.
- Check vent installation: Ensure the venting was installed properly.
- Inspect the fan motor: If you meet the maintenance requirements, check the fan motor for errors.
Option 2
- Check the vents: Ensure that all vents are sealed properly and meet venting requirements.
- Inspect blower motor: If maintenance is up to date, check the blower motor.
Error Code 10
What It’s Telling You
- Maintenance error: Blower motor not working properly.
The Solution
- Clear the vents: Remove any blockages from the venting system as well as the blower motor and air intake.
- Inspect blower motor: If maintenance is up to date, check the blower motor for flaws.
Error Code 11
What It’s Telling You
- Gas supply or installation error: Ignition failure.
The Solution
- Make sure the gas pipe is open: Turn the valves to the “On” position.
- Check the gas type, pressure and volume: Make sure they match the requirements of the unit.
- Empty the gas line: Bleed all the air from the gas line.
- Check the size: Make sure the gas line, regulator and meter are the correct sizes.
- Check connections: Make sure the unit is properly grounded.
If you meet the gas supply and installation requirements, check the following:
- Check the gas control valve: Ensure there are no open or short-circuited wires.
- Make sure the igniter rod is working: Check the wiring and connections for any flaws.
- Ensure there is no damage: Check the ignition rod wiring for any damage.
- Check the control board: Make sure the control board is working properly. Check the wiring and connections.
- Check the status of the flame rod: Make sure it isn’t blocked.
Error Code 12
What It’s Telling You
- An issue with the gas supply, installation, or lack of maintenance: Flame failure.
The Solution
- Check gas type and pressure: Make sure they are accurate. Consult your owner’s manual for the correct gas type and pressure.
- Empty gas line: Bleed the air from the gas line. Consult a professional if you aren’t comfortable doing it yourself.
- Check the wiring: Make sure the wires are connected to the flame rod.
- Check for carbon build-up: Inspect the flame rod and make sure there’s no carbon build-up.
- Check the sizes: Make sure that the gas line, regulator and meter are the correct sizes.
- Inspect the wiring: Ensure that the unit is properly grounded.
- Check the power supply: Is the unit receiving enough voltage or does it drop? If it drops, consult an electrician.
- Restart the wiring harnesses: Disconnect and reconnect the wiring harnesses on the gas control valve and the control board.
If maintenance isn’t the issue:
- Inspect the circuits: Check for short circuits in the gas valves.
- Check for any damage: Inspect the wiring harness and the flame rod.
- Check the PCB: Consult your owner’s manual or call a qualified technician.
- Ensure the flame rod’s status is accurate: Consult the owner’s manual for specific instructions.
Error Code 13
What It’s Telling You
- Indoor venting: Flame rod warns of poor or improper combustion.
The Solution
- Check installation requirements: Make sure the intake and exhaust vents meet the requirements for safe operation. Consult your owner’s manual.
If you meet the vent requirements:
- Unblock the vents: Remove any blockages from the venting or in front of the vent.
- Check altitude settings: Double-check that the altitude settings are correct. Consult your owner’s manual.
- Check the flame rod: Ensure that the flame rod is working as it should.
- Examine the blower motor: Look for blockages or broken parts.
Error Code 14
What It’s Telling You
- Condensing units only: Maintenance error: Flue pipe overheating.
- Mid-efficiency and condensing units: Fault in the overheat limiter (OHL).
The Solution
Option 1
- Unblock heat exchanger: Clear the heat exchanger of any blockages.
- Unblock blower motor: Clear out any blockages from the blower motor or vent.
Option 2
- Check the “U” connector: Ensure the “U” connector is properly connected to the control board.
- Inspect wiring harness: Make sure the wiring harness is properly connected to the OHL.
- Inspect the heat exchanger: Ensure there are no cracks or separations in the heat exchanger.
- Check the overheat wrap: If there is a failure, the unit should be replaced.
- If your unit is a condensing model: Check the thermal overload sensor.
Error Code 15
What It’s Telling You
- Maintenance: Heat exchanger overheating — boiling safety device. The heat exchanger exceeded 207 degrees Fahrenheit for more than 15 seconds.
The Solution
- Flush the heat exchanger: Clear it of scale build-up. Consult the owner’s manual for specific instructions.
- Check the inlet valve: Ensure that it is completely open.
- For commercial units: Lower the temperature below 180 degrees Fahrenheit if you’re at a high altitude.
If maintenance is up to date:
- Inspect the thermistor: It should be in the heat exchanger.
Error Code 16
What It’s Telling You
- Maintenance: The outlet water temperature is above the preset thermostat setting.
The Solution
- Examine the heat exchanger: Ensure that it isn’t clogged.
- Remove any airflow restrictions: Make sure there’s sufficient airflow around the unit and vents.
If maintenance is up to date:
- Examine the thermistor outlet: Check for any issues.
- Inspect the heat exchanger thermistor: Consult the owner’s manual for instructions.
- Check the gas valve: Ensure that it works properly and isn’t clogged.
Error Code 24
What It’s Telling You
- Operational switch malfunctioning.
The Solution
- Restart the unit: Turn the water off, disconnect the remote control and try again.
- Check connections: Ensure that the unit is electrically grounded.
- Reset the unit: Try to press the “MIN” and “MAX” buttons on the control board to reset the unit.
Error Code 29
What It’s Telling You
- Condensing units only: Maintenance error: Neutralizer clogged.
- Mid-efficiency and condensing units: Maintenance error: The temperature in the heat exchanger is too low.
The Solution
Option 1
- Check that the drain line isn’t blocked: Ensure that you have removed the shipping cap.
- Clear out: Clean the neutralizer drainage ports inside the unit. Also, clean the outside neutralizer drainage lines.
- Clean the air inlet screen: Remove it and wash it under running water.
- Wash the heat exchanger fins: Consult the owner’s manual.
If maintenance is up to date:
- Check the water inside the neutralizer: Measure the electrode’s water level.
Option 2
- Clean the air inlet screen: Remove it and wash it under running water.
- Clean the heat exchanger fins: Consult the owner’s manual.
Error Code 31
What It’s Telling You
- There is an issue with the inlet thermistor.
The Solution
- Check the wiring: Inspect the wires of the thermistor for any damage.
- Check for scale in the thermistor: If you see any, consult the owner’s manual to learn how to remove it.
- Ohm out the thermistor: Consult the owner’s manual.
Error Code 33
What It’s Telling You
- There is an issue with the outlet thermistor.
The Solution
- Check wires: Ensure there is no damage to the thermistor wiring.
- Check for scale in the thermistor: If there is any, clean it out. Consult the owner’s manual for instructions.
- Ohm out the thermistor: Consult the owner’s manual.
Error Code 34
What It’s Telling You
- Issues affecting the thermistor, such as wiring.
The Solution
- Check the wiring: Ensure there is no damage to the thermistor wiring.
- Ohm out the thermistor: Consult the owner’s manual.
If there are no issues with the wiring and readings are normal:
- Ensure there is enough space: Make sure there are no airflow restrictions around the unit or in the vent terminal.
- Inspect the fan blade: Check that the fan blade is secure on the motor shaft but is still able to spin freely.
Error Code 35
What It’s Telling You
- The connection to the thermistor is incorrect.
The Solution
- Check connections: Ensure all thermistors are fixed to the correct connections on the control board.
- Check connectors: Make sure all the quick connectors between the thermistor and control board are correct.
Error Code 51
What It’s Telling You
- There is a problem with the gas control valve.
The Solution
- Inspect terminals: Check for any loose or broken terminals to the gas control valve wiring.
- Ohm out the gas control valve: Consult the owner’s manual.
Error Code 52
What It’s Telling You
- There is an issue with the PGFR (proportional gas flow regulating) valve.
The Solution
- Check the wiring harness on the PGFR valve: Ensure there are no loose or broken connections.
- Ohm out the PGFR valve: Consult the owner’s manual.
Error Code 61
What It’s Telling You
- Maintenance error: Blower motor.
The Solution
- Check blower motor: Ensure that the blower motor can turn freely. There should only be a slight restriction.
- Check the motor wiring harness: Look for damaged or loose connections.
- Check the length of the venting: This should not exceed the maximum length. If it does, it’s likely bent.
Error Code 72
What It’s Telling You
- An issue with the flame rod: False flame detection.
The Solution
- Inspect the flame rod: Make sure it touches the flame when the unit fires.
- Check for any blockages: Ensure the inside of the burner chamber is clear.
- Check all the wiring: Be sure there is no damage or loose connections.
- Examine the voltage: Ensure the correct voltage is coming through.
Error Code 82
What It’s Telling You
- The control board isn’t programmed correctly.
The Solution
- Check the chip: Ensure that it is installed correctly.
Error Code 99
What It’s Telling You
- The blower motor isn’t venting.
The Solution
- Check the blower motor: Clear any blockages.
- Check if the heat exchanger is blocked: Consult the owner’s manual for how to unblock it.
Why Your Tankless Heater Requires a Reset
If you find that your tankless heater often requires a reset, it might be that it’s overloaded. Even the largest tankless unit could struggle in a high-demand household (1).
While you could continue to reset it every time, the best solution is to either replace it with a larger water heater or install a second one.
If you are confident that you’re not overworking your unit, consult a professional. There could be another issue with the heating elements.
Why Do Water Heaters Have a Reset Button?
Every electric water heater has a reset button, and with good reason. The reset button is there for safety reasons. It will trip as soon as the water is heated to an extreme temperature.
There are a few reasons why the reset button might trip. These include:
- Faulty thermostat: The thermostat isn’t working properly, causing the water to overheat.
- Loose connections: A loose electrical wire is a potential fire hazard. The reset button will trip if it senses an issue with the wiring.
- A poor heating element: If the heating element is faulty, it could continue to send an electrical current through the unit even after you have closed the tap.
How to Re-Light Your Rheem Tankless Water Heater
Fortunately, re-lighting your Rheem tankless water heater is easy. If you want specific instructions, consult the owner’s manual. Here are some general steps:
- Place gas knob in the “Off” position: Turn the knob clockwise until it reaches the “Off” position.
- Set thermostat to lowest temperature: Turn the temperature dial counterclockwise to the lowest setting. Wait at least 5 minutes for the gas to pass through.
- Remove the outer door: After lifting the outer door off, turn the gas knob back to the “Pilot” position.
- Press the ignitor: To the left side of the gas knob, there should be a red button. Hold it down while you press the piezo ignitor striker that’s located to the right of the knob. Continue holding it down until it’s lit — you can check through the viewing window.
- Rotate the gas knob: Turn it counterclockwise to its “On” position and then set the temperature.
FAQs

Why Is My Rheem Tankless Water Heater Beeping?
When there is a problem with your Rheem tankless water heater, it will display an error code, either on the digital display or on a smartphone app. The heater might also make a noise to alert you to any issues. This beeping makes sense, as it is possible that you might not look at your heater’s digital display for a while and a major problem could otherwise go unnoticed.

Why Isn’t My Rheem Tankless Water Heater Working?
Rheem tankless water heaters are among the most reliable you can buy, but like any technology, they will eventually encounter issues. Thankfully, Rheem has incorporated an in-depth error code system, with each code corresponding to a specific problem with the heater. This code will be shown on the heater’s digital display or sent to a mobile app on your phone. You can compare this code to those on our list to find out what is wrong with your heater.

How Long Does a Rheem Tankless Water Heater Last?
A Rheem tankless water heater should last 15 to 20 years, and potentially longer with proper maintenance and a water supply that doesn’t contain too many minerals. Tankless water heaters generally last considerably longer than tank-type heaters, as they don’t hold corrosive water for prolonged periods. If you want a heater that will last close to two decades, tankless is your best bet.

What Is the Most Common Problem With Rheem Tankless Water Heaters?
One common problem with Rheem tankless water heaters is not getting any hot water while showering. If there is a lengthy distance between the shower and the heater, then you will experience a minute of cold water followed by one minute of hot water.
Yes, your water heater will occasionally produce cold water in addition to the hot water it normally produces.
Your water heater may have reached its capacity, which would cause it to turn off unexpectedly in the middle of your shower. Each tankless water heater has a unique flow rate that it operates. If you exceed the limit, the water will no longer be heated.
When taking a shower, turning on many hot water fixtures at the same time might easily cause your water heater to reach its capacity limit.
it comes to homes, an issue that frequently arises is that the unit that is installed is not of the appropriate size for the household’s requirements.

What Does the Red Flashing Light on Rheem Tankless Water Heater Mean?
The red flashing light on Rheem tankless water heaters means that the heater has reached a lockout status and requires immediate repair. It’s recommended that you refrain from using the water heater until the issue with the blinking lights has been resolved.
There is a wide variety of potential causes for the problem, including faults with the supply of gas and electricity, or failure to regulate temperature.

How Do You Troubleshoot a Rheem Tankless Water Heater?
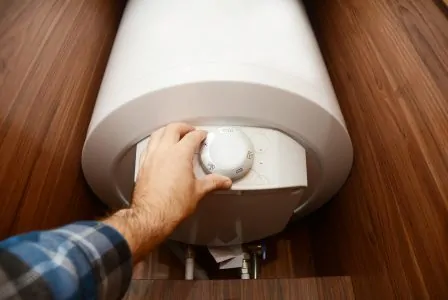
Most of the time, when troubleshooting a Rheem tankless water heater, you will have to reset it. The reset button can be found on most Rheem water heaters either immediately on top of the limit switch, which is positioned next to the thermostat, or it can be found nearby.
To restart the heater, turn off the power by switching the switch that controls the power and the switch that controls the heater at the circuit breaker.
The next step is to take off the heater’s front panel so you can get to the limit control switch. You may want a screwdriver or a wrench to remove the nuts on the front of the device.
After finding the high limit switch, you will need to activate it by pressing the red button that is located in the switch’s center. After that, you should replace the front panel and then restart the heater.