Are you concerned that your water heater is no longer working as well as you remember? There are numerous symptoms of this, such as your water getting too hot, the pilot light not working, or the heat limiter being tripped.
These issues could be a sign that your heater is nearing the end of its life and that it will soon need replacing. On the other hand, it could be that you simply need to replace your water heater control valve.
This might sound intimidating but it is a relatively simple process and one that you can do yourself. In this article, we will look at what a water heater control valve does, signs that it needs replacing, and how to do so.
Key Takeaways
- Water heater gas control valve controls the flow of gas to heat water and can malfunction over time.
- Signs of a faulty valve include pilot light not staying alight, burners running with thermostat turned down, or control knob stuck.
- Replacing the valve involves turning off the gas and water supply, draining the water heater, removing the old valve, and attaching a new one.
- Always remember to check for gas leaks, consult your water heater’s manual, and call a professional if needed.
What Is a Water Heater Gas Control Valve?
A water heater gas control valve, as its name suggests, controls the flow of the gas that is burned to heat your water.
When you press the button on your pilot to light it, a small amount of gas is released to the pilot head. Once lit, it heats the thermocouple (a temperature sensor). This then sends an electrical current to the gas control valve (1).
When the gas valve receives the electrical current, an electromagnet opens a safety valve to allow gas to flow to your pilot. This is what keeps it alight.
At the back of the water heater gas valve, there are two probes. One is a safety device that interrupts the gas flow if your thermostat malfunctions. The other is a temperature probe that has a lever to turn the gas on and off depending on the setting of the thermostat.
Identifying a Faulty Water Heater Control
There could be a fault with your water heater control valve if:
- Your pilot light won’t stay alight. This could be an issue with the thermocouple. However, if your thermocouple is new and it still won’t stay alight, your gas control valve could be at fault.
- Your water heater burners are still running with the thermostat turned all the way down. The gas valve could be the culprit. You might notice this if your water is too hot.
- Your thermostat is turned up to full but your burner isn’t firing. It could be a faulty water heater control. This would be indicated by a lighted pilot but a tank full of cold water.
- Your pilot control won’t pop back out after you press it. You need to change the gas valve control.
- The control knob of your water heater is stuck. Forcing it could cause damage. Replace your water heater gas valve instead.
Something else could be causing your water heater to malfunction, such as a faulty water heater regulator. Issues you should troubleshoot include:
- Poor water flow into the heater, reducing the volume and causing it to overheat.
- A build-up of dirt or debris in the heating chamber leads to poor temperature regulation.
- A faulty thermostat or thermocouple.
You can replace the thermostat, thermocouple, or safety heat limiter. However, it is only slightly more expensive to replace the whole heater control unit.
How to Replace a Water Heater Control
You now know what your gas valve control does and how to recognize when it might be faulty. It’s time to learn how to replace it in the event of failure.
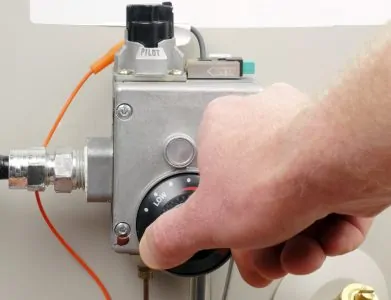
1. Turn Off The Gas Supply
Whenever you repair or replace anything fueled by gas, you must turn off the gas supply. To do this:
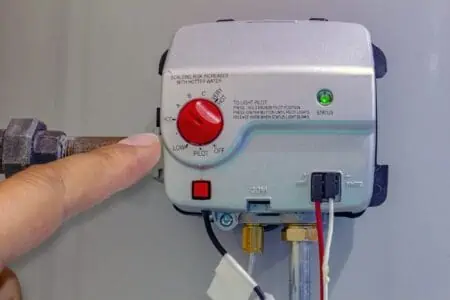
- Locate the thermostat on the front of the gas valve and turn the dial to the off position.
- Follow the gas supply pipe from the water heater control until you find a lever.
- The lever is parallel with the pipe when it’s on.
- Turn the lever so it’s at a 90-degree angle to the pipe.
- This turns off the gas supply to your water heater.
If you smell leaking gas at any time while doing this, call your gas supply company. There could be a problem they need to rectify for you.
2. Turn Off the Water Supply
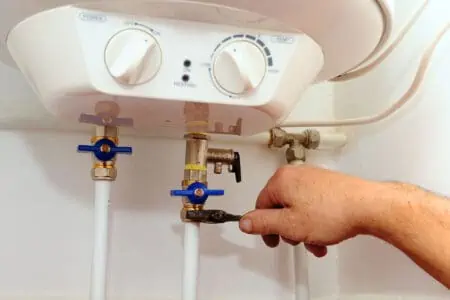
Once the gas supply to your water heater is off, you also need to turn off the water supply. The valve to do this is usually found on the inlet pipe for cold water. This will be located near the top of the water heater.
There are two types of valves: a gate valve and a ball valve. The ball valve has a lever similar to that on the gas pipe. Turn this 90 degrees to stop the cold water supply. The gate valve has a knob or handle that can turn. Close this until it stops.
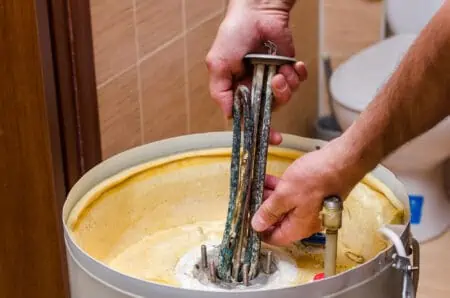
3. Drain your Water Heater
The next step is to drain the water from the tank.
- Open the hot water faucets in your home.
- Find the drain valve at the bottom of your water heater.
- Attach a garden hose to the drain valve or use a bucket to catch the water. Be careful; the water might be hot. Plastic or cheap buckets or hoses might soften and you could get burned.
- Run the other end of the hose to a drain or out onto your driveway.
4. Removing the Water Heater Control Valve
It’s time to remove your faulty gas valve. Before starting, consult your control valve diagram, then:
- On newer models, there may be a pilot wire and thermal fuse wire. Disconnect these first.
- Using a pipe wrench, carefully remove the water heater control from the tank. Some models might require a screwdriver and pliers to remove them.
- Once you have loosened the pipes, use your hands to uncouple them. This makes you less likely to damage the pipes.
- When you are applying torque to the connections to release them, hold the water heater control in place. This will help you avoid any additional damage.
Quick Tip
5. Attaching Your New Water Heater Control
You are essentially going to reverse the steps you took to remove the faulty unit.
There are some important things you should keep in mind when doing this:
- Use Teflon pipe tape to ensure a good seal on the pipes when you reconnect them. The correct color for gas supplies is yellow (2). The tape goes over the thread on the male pipe which then screws into the female pipe.
- Make sure you don’t cross-thread the pipes — you don’t want to damage your new water heater control or the gas pipe.
- Thread the pipes by hand as much as you can and then tighten them with your wrench or pliers. Make sure it is secure and sealed but don’t overtighten it.
- Remember to reattach the wires if they are present.
- Make sure you bleed any air from the system after refilling the tank with water. To do this, open the pressure release valve on the tank and let any air out. Next, turn on a hot water faucet until the water flows freely (the water will be cold at first).
- Don’t relight your pilot and try to fire up your water heater until it is refilled.
- Be aware of gas leaks; check for them before turning on the pilot. You will be able to smell it or you can check by spraying a mix of soap and water onto the connections. If you notice any small bubbles, you have a leak.
If you detect a leak, turn off the gas and either repair it yourself or call out your gas engineer.
FAQs

Are Water Heater Control Valves Universal?
Water heater control valves are not universal and it is important to get a valve that fits your heater perfectly. The easiest way to do this is to remove your old valve and take it to a supplier to ensure you get a perfect match for the existing valve. Even if you have to order the part for delivery, it’s worth waiting to get a valve that fits.

Where Is the Heater Control Valve Located?
The water heater control should be relatively obvious when looking at your water heater, as it is attached to the gas supply into the heater. The control valve itself should also be obvious, as it is a physical valve that can be turned to control the gas flow into the unit. If you’re unsure which component is the control valve, check your heater’s owner manual to see it specified.

What Causes Gas Valve Failure?
Like any valve, gas valves are subjected to constant pressure as they control the flow of gas through your pipes. In time, this can lead to wear and tear, eventually inhibiting the valve’s ability to function properly. It is also possible for environmental factors to degrade the valve more quickly, such as if you have a water leak in your basement or if it has been flooded and temporarily submerged.

How Much Does It Cost to Replace a Gas Control Valve on a Water Heater?
Expect to pay between $150 and $550 if you want to replace a gas control valve on a water heater.

How Long Does It Take to Change a Gas Control Valve on a Water Heater?
Changing a gas control valve on a water heater usually takes about one hour.

How Do You Test a Gas Control Valve on a Water Heater?
The best way to test a gas control valve on a water heater is to check the millivolts using a meter.
Finishing Up
If you can’t find any problems and your water heater fires up, in about 20 minutes you should have hot water.
Remember, if you don’t feel confident enough to replace a water heater control yourself, call a professional to do it for you. Even if you do it yourself, it’s a good idea to check your manufacturer’s recommendations for your water heater.
We hope you found our gas valve replacement guide helpful and are now able to complete the process. Doing so might give your heater a new lease on life.