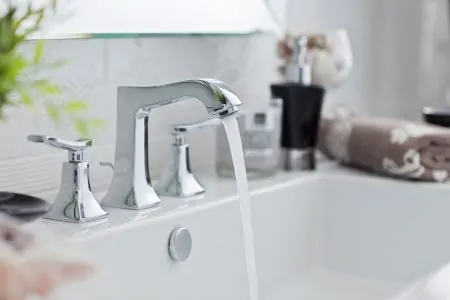
Modern bathroom faucets are designed and manufactured to have the longest lifespans possible but, eventually, every faucet will need replacing. It might simply be that you are redecorating your bathroom and need to update your faucet to match.
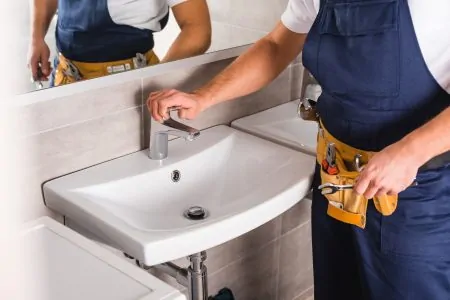
You could pay a professional plumber to complete the work for you, but modern faucets are designed to be easily installed. It should only take a couple of hours but it could be daunting if you have never done it before.
We have written this article to help you decide whether or not you should replace a faucet yourself. If you decide that you should, we will also guide you through how to replace a bathroom faucet step-by-step.
Key Takeaways
- Consider necessary tools: Basin wrench, adjustable wrench, rags, buckets, putty knife, plumber’s putty, silicone caulk, and replacement faucet.
- Turn off water supply: Locate hot and cold supply valves and turn them off before starting the replacement process.
- Follow step-by-step guide: Remove old faucet, clean the area, install new faucet, reconnect supply lines, and check for leaks.
- Measure for new faucet: Ensure the new faucet fits your sink by counting holes and measuring the spread between them.
Things to Consider Before You Start
Consider the following before you attempt a bathroom faucet replacement:
- Replace everything: Some DIYers try to save money by not replacing other parts such as supply lines and drains. However, we strongly recommend you do. Old supply lines may soon fail, so you will ultimately save time by completing the work in one go. Many manufacturers include these other parts in the package.
- Say “yes” to tools: Some manufacturers, such as Moen, include tools to help you complete the work. These can be helpful timesavers, so take full advantage of them.
- Read instructions: Each faucet may require a different installation process. Make sure to read the manufacturer’s instructions alongside our guide below.
What You’ll Need
Before you shut off your water and go to work, it’s important to have everything ready. Being unprepared is a recipe for disaster. Here are the things you will commonly need:
- Basin wrench
- Adjustable wrench
- Rags or towels
- Buckets (one or two)
- Putty knife
- Plumber’s putty
- Silicone caulk
- Replacement faucet
How to Replace a Bathroom Faucet
Now that you have the necessary tools, let’s take a step-by-step look at how to replace a faucet.
These steps may vary depending on the type of faucet you own, but they usually follow a similar path:
Step 1: Clear the Space
Look under your bathroom sink and remove any obstacles. You will need to be able to move around the area freely. Once everything is out of the way, place a rag or towel on the floor to catch any stray water.
Step 2: Turn off the Supply Valves
Locate the hot and cold supply valves and turn them to the “Off” position. Do this by rotating them clockwise until they are tight.
Then, open the tap to make sure no water comes out.
If the water continues to flow, check that the valves are completely shut. If they are, but water still drips, they may also need replacing.
Step 3: Disconnect the Lines and Pipes
Before we explain how to remove a bathroom faucet, place a bucket beneath the lines to catch any trapped water.
Then, proceed to detach the p-trap. This is the gooseneck-shaped pipe under the sink that connects the faucet to the drain. Turn the nuts at the two ends counter-clockwise to separate them — you can use your hands or a wrench if they are tight.
Once the p-trap is off, disconnect the water supply valves from the old faucet. Use a basin wrench or an adjustable wrench to loosen the nuts. You can use your fingers to unscrew them once they have been loosened.
Heads-up
Step 4: Disconnect the Old Faucet
Beneath the faucet, there should be a couple of nuts that secure it in place — usually above the supply line connections.
Unscrew these using either your hand or a wrench. If they are too tight, apply some WD-40 spray.
Step 5: Remove the Drain
This is one of the most complicated steps.
Behind the pipes and sink, there is a long bar. This is called the “clevis strap”. It has a small clip attached to it, called a “spring clip”. Remove the clip and uproot the strap so the drain can turn freely.
Then, remove the drainpipe by unscrewing it using a wrench or by hand. Detach the sink flange (top part of the drain), and pull it out. You should now be able to pull out the entire faucet without much effort.
Step 6: Clean the Area
With the old faucet gone, there will likely be some silicone or plumber’s putty residue left behind. Use a putty knife to scrape it away, then go over it again with a sponge and soapy water.
For stubborn debris, use mineral spirits, but remember to wear protective gloves.
Step 7: Bring in the New Faucet
Grab some plumber’s putty and apply a small amount to the outline of the faucet.
Then, take the gasket and glide it onto the bottom of your fixture. Place the supply lines through the hole(s).
Duck under the sink and use your basin wrench to tighten the nuts. If you have a double-handle faucet, fasten it little by little, so each side is equal. Before it is completely secured, stand up and check that everything is aligned correctly. If everything appears to be in order, tighten the nuts fully.
Some manufacturers require that you install the handles yourself. There should be screws hidden under a small, removable cover. Remove the cover and secure the handles to the faucet. This should be fairly straightforward, but consult your instructions for specific guidance.
Step 8: Install the Drain
Some manufacturers include a partially-assembled drain where the gasket and drain nut are already in place. If this is the case, separate them from the sink flange.
Take a small amount of plumber’s putty or silicone and apply it under the sink flange. Then, from under the sink, position it.
Install the gasket and screw the drain nut into place again. Use your basin wrench to tighten it.
Step 9: Position the Drain Pipe and Rod
There is a small hole at the side for the drain rod. Before you screw the drain pipe in place, ensure that the gap is facing away from you, toward the back.
This is for the rod that controls the drain stopper, which you open and close to fill your sink. Once the hole is positioned correctly, loosen the pivot nut, and pull the rod through. Replace the clevis strap and spring clip.
Then, pull the drain rod through the holes in the clevis strap, and secure it using the screw. Stand back up and tighten the pivot nut.
Step 10: Reconnect Supply Lines
Once your faucet is securely in place, it’s time to reconnect the supply lines. We recommend replacing these as well; most manufacturers include new ones. This will reduce the chances of a burst pipe or leak in the near future.
When you connect the lines, ensure that you attach cold to cold and hot to hot.
Tighten the connections using your wrench until they are snug, but not too tight. Over-tightening could make them more vulnerable to leaks.
Step 11: Install the P-Trap
Place a nut at each end of your p-trap, then connect it to the faucet and drain. Check that the trap sits slightly above the vertical pipe — an inch or two is perfect.
Step 12: Flush the Faucet
Flushing is a vital step before using a new faucet. It removes residue and debris left by the manufacturing process (1). Start by removing the aerator from the nozzle. Some products include a specialized tool for this.
Then, open the valves and levers, and let the water run for a couple of minutes. You can alternate between hot and cold. Turn the water off again, and replace the aerator.
Step 13: Check for Leaks
Return to under the sink with a paper tissue. Run it over the pipes and drain to check for any leaks. If you spot moisture, verify its source and perhaps tighten a screw.
If no leaks occur, congratulations! You have replaced your bathroom faucet.
How to Measure for Your New Faucet
When measuring for a new bathroom fixture, there are a couple of essential pieces of information:
One or Two-Hole Sink?
Count how many holes there are in your sink — try to match that number with your new faucet. If there are two or more holes, you can choose almost any configuration and cover the additional spaces with a deck plate. For double handles, avoid buying a single — drilling new holes is risky and can cause damage.
Measure the Spread
The spread measures the length between the two outer gaps — the spout in the middle and levers to the sides.
For precise measurement, we recommend removing the faucet first. If you have decided on a single-lever fixture, jot down the size of the middle gap.
How Much Does It Cost to Replace a Bathroom Faucet?
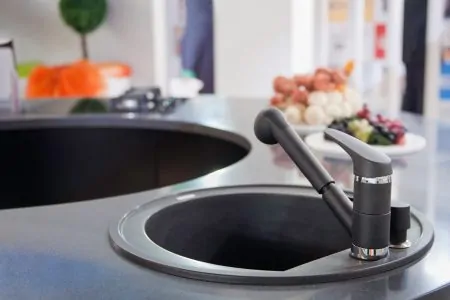
Depending on the brand, bathroom fixtures can be pricey, though they are usually less expensive than kitchen faucets. High-end companies such as Hansgrohe can range anywhere between $100 to $2,000. At the other end of the spectrum is a brand such as Premier Faucet, which varies between $25 to $200.
However, if DIY isn’t for you, expect to pay a plumber between $240 to $550. And that’s only for the installation — if any damage or other issues need to be dealt with, they will add to the cost (2).
Different Types of Bathroom Faucets
The cost and difficulty of installation depend on the type of fixture you choose. Some require special skills.
Here are some common faucet types:
- Widespread: Widespread faucets have two handles sitting separately on each side. They are generally about 7 or 8 inches apart. Some manufacturers increase the distance for larger sinks, sometimes to 10 inches or more.
- Single handle: Single-handle faucets consist of a spout and a lever. They require just one hole for installation.
- Bridge: A bridge brings a classic look to a bathroom. It is a popular design typified by a connecting pipe between the spout and handles. It requires a two-hole sink.
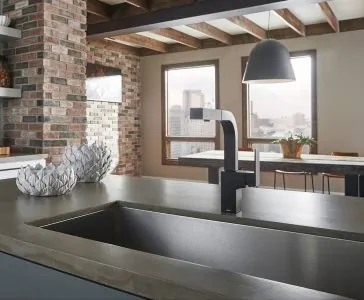
- Deck mount: This type of faucet is installed directly onto a counter or vanity, rather than a sink. Unless there are already holes present, these faucets are challenging to install.
- Wall mount: These faucets sit on the wall behind the sink. They are beautiful but you will probably need a professional to install one. They are generally available as widespread, but you can also find them with a single handle.
FAQs

How Long Does It Take To Replace a Bathroom Faucet?
Depending on the model, it should only take a couple of hours to replace a bathroom faucet, or perhaps even less. This is especially true if the faucet is attached to your sink rather than being a wall-mount or deck-mount fixture. Those types will require extra work due to being installed into the surfaces of your home. A like-for-like faucet replacement should be relatively quick.

Can I Replace a Bathroom Faucet Myself?
You should be able to replace a faucet yourself without too much trouble, particularly if it is installed into your sink rather than into a wall or counter. Many manufacturers design their faucets to be easy to install with just basic tools, and in some cases, your hands will be sufficient. Just make sure you follow the instructions carefully and turn off the water supply first to avoid flooding your home!

What Supplies Do I Need To Replace a Bathroom Faucet?
We have provided a full list of the tools you will need to replace a bathroom faucet in this article. Most are very basic tools, such as a wrench and plumber’s putty to provide a watertight seal. The other supplies you will need, such as a bucket, are to protect your home during the installation. You will probably also need some cleaning supplies to tidy up once the faucet is installed.

Is Replacing a Bathroom Faucet Easy?
Replacing a bathroom faucet is as easy as installing a new one. If you have a few basic tools and a free hour on your hands, you should be able to get it done even if you’re not a professional plumber.
You’ll need an adjustable wrench, a putty knife, a basin wrench, a bucket, and some rags. Make sure you have the replacement faucet at hand because you’ll have to cut the water supply, and you don’t want to leave the house without running water for too long.

Are All Bathroom Faucets the Same Size?
Not all bathroom faucets are the same size, so you should never rely on any faucet being universally compatible with all types of sinks. However, all faucets fall under one of the following categories: wall-mounted, vessel, widespread, center set, and single-hole faucets.
When dealing with the spacing of the faucet holes, most faucets are the same so that they fit. You’ll find either a three-hole or a single-hole faucet.

Do You Have to Use Plumber’s Putty When Replacing a Bathroom Faucet?
Whether or not you have to use a plumber’s putty when replacing a bathroom faucet depends on whether or not your faucet has a gasket. A lot of faucets have a plastic or rubber gasket that’s located near the faucet’s deck plate.
If this exists, then you don’t really need a plumber’s putty. However, if your faucet lacks this gasket, the plumber’s putty is very useful in creating a watertight seal at the base of the faucet.

How Long Should a Bathroom Faucet Last?
On average, a bathroom faucet should last at least 10 years. If you’re not sure whether the faucet needs to be repaired or replaced, look for the following signs.
The faucet is squeaking or leaking (usually, in both of these cases, repairing the faucet should do the trick), or you constantly need to repair the faucet (in which case it might be cheaper to replace it).