Most of us have a basic knowledge of how to use power tools, but do we know the correct techniques? There is a difference between using a belt sander and understanding how to use it expertly.
We show you how to use a belt sander, teaching the correct techniques in a simple-to-follow guide. We also reveal some top safety tips.
Key Takeaways
- Always wear safety goggles, a face mask, and protective gloves when using a belt sander.
- Turn on the sander and let it reach maximum speed before making contact with the wood.
- Keep a firm grip on the sander with one hand on the trigger and the other on the front handle.
- Work in small areas, going with the grain, and use even, backward and forward motions to avoid over-sanding.
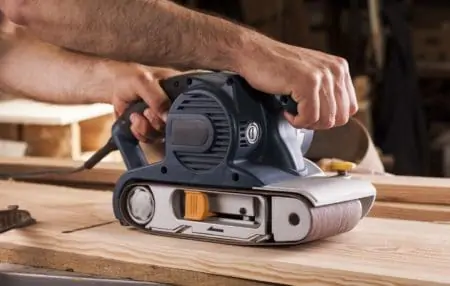
How To Use a Belt Sander by Hand
Before we get to the nitty-gritty, we first need to ensure the proper protections are in place. Have you got the correct PPE? You will need a face mask, goggles, and the right clothing. Don’t have trailing sleeves and if you have long hair, tie it back, so it doesn’t tangle with the sander.
Also, don’t forget safety gloves.
1. Power Up
Turn the sander on and let it reach the maximum speed. Ease it towards the wooden material, keeping one hand on the trigger and the other on the front handle for stability and control.
2. Make Contact
Using a forward motion, make contact with the surface, ensuring that the rear roller touches down first, and then set the sander down flat so that the abrasive belt makes complete contact with the surface.
3. Keep a Firm Grip
The sander will naturally want to pull forward as the sanding belt rotates between the rollers. Keep a firm grip or you will lose control.
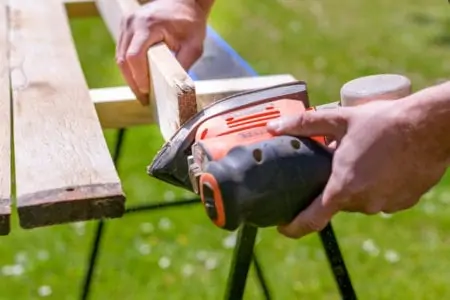
4. Go With the Grain
Work the sander with the grain, where possible, making sure it doesn’t stay in one spot for too long. If you are using a coarse grit belt, it tears through a surprising amount of material, so keep it moving in even, backward and forward motions.
Remember to stop and check the progress at frequent intervals.
5. Work in Small Areas
It’s always better to work in small patches rather than sanding the entire surface in one go. Use gentle but steady pressure to ensure that the sander doesn’t gouge the wood, causing dips in the surface.
6. Repeat
When you have performed the first layer of sanding, use a vacuum and remove the top layer of dust. Give the material wipe down with a cloth, and start all over again, repeating the same process until you are happy.
How To Use a Stationary Belt Sander
It’s not uncommon to flip the sander and secure it to a workbench. It now becomes a stationary sander, which is great for
sanding smaller projects or shaping wood, especially edging.
1. Secure the Sander
Some sanders have brackets that allow you to flip them upside down and secure them to a worktable. Others require clamps that can be purchased cheaply from a hardware store.
Just make sure the sander is secure because if it slips, it could cause you an injury and ruin the workpiece.
2. Power Up
Most belt sanders have a trigger lock facility, which means you can set them going and remove your finger from the trigger. If your model lacks this feature, you will struggle to use it as a stationary sander because you will need both hands free.
3. Get Up To Speed
Let the sander reach the maximum speed before committing the workpiece to the abrasive belt.
4. Start Sanding
Grab your project and ease it towards the abrasive sanding belt. Remember to don your safety gloves to protect your fingers from harm. Move the wood around the surface of the belt, shaping and molding it to your desired shape.
Belt Sander Safety Tips
What are the best ways to keep you safe? We look at the safety tips and tricks to ensure you don’t visit the Emergency Room.
Use a Dust Collection System
You wear a face mask to protect you against sawdust, which is one of the most toxic materials you can inhale in the workshop. It causes untold damage to your lungs and even leads to cancers.
Sanders have an exhaust port to clip a dust collection bag to collect the dust. This keeps it free from the atmosphere and away from your lungs. You still need to wear the face mask as another level of protection.
If you want zero dust in the air, choose a central dust extraction system. You attach a hose to the exhaust port of your sander, and a central canister vac sucks the dust along the tube and stores it for safe disposal.
The advantage of this system is it removes most carcinogens in the air and stores the dust in a location away from the work area. The disadvantage is the hose restricts you.
Sand in a Motion Away from Your Body
Moving the sander away from your body ensures that it remains a distance from you and reduces the instances of clothing snagging in the abrasive belt.
Inspect the Belts Before Use
Make sure there are no cracks or splits in the sanding belt. If there are, swap it for a new one. Also, check that the rollers are moving freely and they spin correctly. Belt sanders move at high speed, and if one of the rollers were to become detached, it could cause a serious injury.
Use Two Hands
Belt sanders wriggle about a lot on the surface of the wood. The sanding belt naturally drives the sander forward, so you need to keep a firm grip to control it. Keep one hand on the trigger and rear handle while gripping the front handle to allow downward pressure.
This keeps the sander under your control.
Always Get Up To Speed
Never allow the sander to make contact with the wood unless it is spinning at full speed. If you start with the sanding belt on the surface of the material, you will experience a kickback, which could be dangerous.
Plus, you also risk over sanding on the spot where you start, causing dips while the sander gets to full speed.
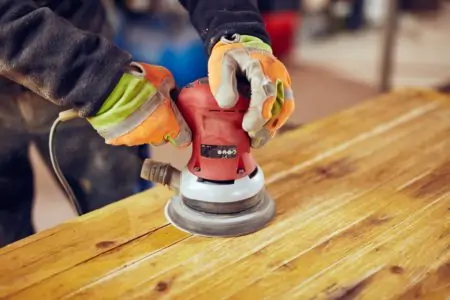
Always Use PPE
It sounds obvious, but always take precautions when using any power tool. Put on eye goggles, a face mask, and protective gloves.
How To Change the Belt on a Belt Sander
Before you start, always make sure the belt sander is switched off and disconnected from the power. Belt sanders typically have a release lever on the side that releases the tension on the front and rear rollers.
Once the belt goes slack, slide it off and grab the new sanding belt and slide it on the rollers, ensuring it is sitting evenly across the length of both. Release the tension lever, and the rollers will snap back into position, and the belt will go taught.
Plug the sander in and switch it on, and you are ready to start sanding again.
When Should I Change the Belt on My Sander?
It depends on how much use it gets, but the general rule of thumb is every 12 to 18 months, provided that the sander is stored in dry conditions. Moisture reduces the lifespan of the sanding belt, perishing the binding glue on the belt.
Safety First
The overriding message when using a belt sander is safety. Wear the proper PPE, and make sure you adopt the safest practices when using the belt sander and changing the belt.
If you follow the steps, you should reap the rewards, both with a great outcome to your project and a safe experience.