Okay, so your new air compressor has arrived, and it is sitting in your garage waiting for you to get started. The problem is, you’ve never used an air compressor before. Want to know how to use air compressors?
Check out our guide to the basics of using an air compressor.
Key Takeaways
- Wear safety gear like goggles and ear defenders when using an air compressor.
- Ensure the air compressor is on a flat surface, check oil levels if necessary, and fill the air tank.
- Adjust the air control valve to match your tool’s pressure, then connect the hose and air tool.
- Always power off the compressor, drain moisture from the tank, and store it properly when not in use.
How To Use an Air Compressor: The Basics
Before starting any project, make sure you invest in the correct protective equipment. The first thing you need is ear defenders because air compressors can be noisy. Second, make sure you wear safety goggles or glasses, especially if you are operating air tools.
If you are spray painting a car, wear a face mask with filters, and if you are using air impact wrenches or air hammers, steel toe capped boots should protect your feet from falling heavy objects.
Now that we have covered all eventualities, let’s begin.
1. Plug in the Compressor
Place the compressor on a flat surface and make sure there are no objects underneath that might topple it during operation. Before plugging in, make sure the power switch is set off. Now plug the power cable into the socket.
2. Check Lubrication Levels
If you have an oil-free compressor, you can skip this part. If you have an oil-lubricated model, make sure there is sufficient oil in the crankcase. You do this by peering into the sight-gauge located at the base of the motor.
If it’s low, remove the filler cap and add some more compressor oil until it reaches the full mark.
Top Tip
3. Fill the Air Tank
Before filling, make sure the drain valve is closed at the bottom of the tank. To do this, tighten it by hand and then use a wrench to seal it shut. Now turn on the power switch and let the compressor run for a few minutes.
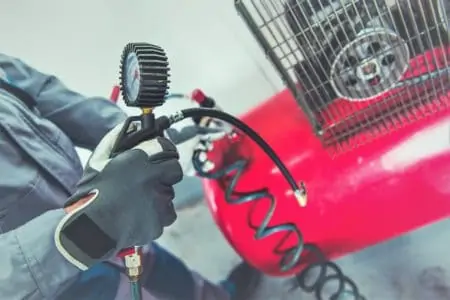
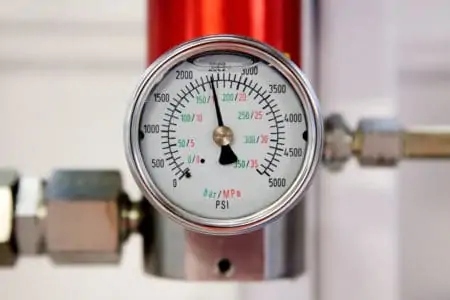
Take regular readings of the pressure gauge to make sure the tank is filling and that the compressor shuts off when it reaches capacity. This should happen around 100 to 115 PSI. However, check your compressor manual to get the accurate values of your particular model, as they vary enormously.
4. Adjust the Air Control Valve
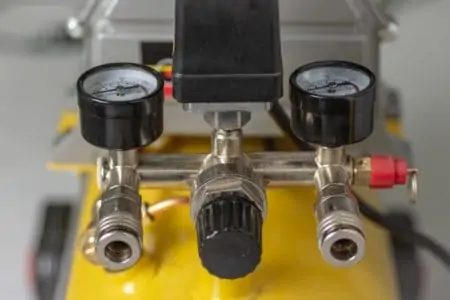
Matching the pressure of your tool with the pressure of the compressor is vital. To do this, turn the air control valve in either direction until the gauge matches your tool’s maximum allowed pressure.
5. Connect the Hose
Make sure the air hose reaches your project. Connect it to the compressor by turning the threaded end clockwise onto the fitting near the pressure gauge. Again, tighten the hose using a wrench to make sure the connection is secure.
Take Note
6. Connect the Air Tool
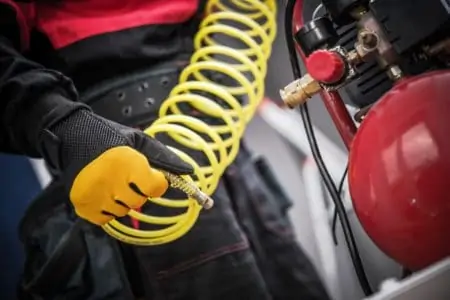
Connect your chosen tool to the other end of the hose. If it has a quick-connect fitting, use that. To do this, you pull back the spring-loaded collar on the hose and push it onto the tool’s air intake.
Make sure you use firm pressure to get the best connection. When you are satisfied, release the collar, and the connection is secure. Now you are free to tackle your project.
Quick Note
7. Power Off
Switch the power off on the compressor and unplug it from the wall.
8. Drain the Moisture
When you have finished using the tool and disconnected it from the air hose, remove the other end of the hose from the compressor. Make sure the pressure gauge reads zero. Grab an adjustable wrench and loosen the drain valve at the bottom of the tank until all the moisture has drained out.
Then tighten the drain valve with the wrench, and you are ready to start again.
How To Use an Air Compressor on Your Flat Tire
You need to know the correct tire pressure before you begin. Consult the owner’s manual, which provides tire pressures for different scenarios. If you are carrying heavy loads or embarking on a long journey with all the family, the tire pressure values will differ.
Avoid the PSI number on the tire wall as this refers to the maximum pressure only. Always try and fill the tires when they are cold because pressure readings increase with heat.
1. Prepare the Tire
Remove the stem cap and place it somewhere where it won’t get misplaced. When the cap is off, air might escape from the tire, so avoid removing it until you are ready to inflate.
2. Turn on the Air Compressor
Plugin the air compressor and turn it on, following the same steps as before. Wait while the tank fills and the air inside reaches the optimum pressure.
3. Attach the Air Hose
Once the compressor reaches the required PSI, attach the air hose to the tire using the quick-coupler at the end. The fastener allows air to flow into the stem of the tire. Now activate the machine.
4. Inflate the Tire
If the tire is completely flat, this may take some time. The air compressor has a gauge to guide you as you fill the tire with air. Some devices have an auto cut-off that reads when the tire is at pressure and switches off.
5. Detach the Hose
Now that the tire is at the correct pressure detach the fastener and switch off the compressor. As before, unplug it from the wall and drain the tank of moisture using the drain valve. Replace the cap on the stem valve.
Top Tips for Using an Air Compressor
There are always things that make using your air compressor more efficient and a better experience. Here are a few to get you started.
Follow the Instructions
It sounds obvious, but you’d be surprised how little people take notice of operating instructions. It’s a small-time investment that yields a big payoff. You’ll learn the operating guidelines and your air compressor’s capabilities, which serve to increase its working lifespan.
Ensure the Correct Operating Temperature
Compressors don’t cope very well in extreme temperatures. They also fare poorly when they are stored outdoors. Wind, rain, and moisture all serve to damage your compressor and shorten its life.
Ensure Correct Air Temperature
Cold air is better to pump into your compressor than hot air because it compresses easier than hot air. Using cold air increases the efficiency of your device, which leads to gains in productivity.
Ensure Correct Moisture Levels
Moisture will rot the components of your air compressor, so try and operate it in a dry environment. If you work in conditions where high condensation levels are present, this will spell disaster for your compressor.
Like For Like Filters
To ensure the air flowing into and out of your air compressor is clean and clear, make sure you change the filters regularly. As the filters clog, the compressor’s performance drops, which takes money out of your pocket.
Use the manual to get the exact specifications of the correct filters.
How To Maintain an Air Compressor
Keeping your compressor in mint condition is crucial if you want to keep it running for as long as possible. The more checks you undertake leads to a more efficient and reliable compressor. It’s better to eliminate downtime now, which increases more profitable up time later. Here are a few maintenance considerations to help you increase the lifespan of your compressor.
Inspect Your Hoses
Keep an eye on them regularly to check for splits and damage. This could lead to a pressure drop and an ineffectual compressor. If you spot any wear and tear, immediately replace the hoses with new ones.
Top Up the Oil
Oil is the amber nectar that keeps your vital moving parts lubricated. Without it, your motor would seize, and that spells the death of your compressor. Every time you use the compressor, check the oil levels by using the sight gauge. If it looks empty, top it up.
Check for Leaks
Always stand your air compressor on dry ground. That way, you can keep a check on any wet patches that might indicate a leak. Leaks start from gaskets, valves and hairline split in the weld line of the tank. Check the hoses and connectors for leaks too.
Replace the Separator Element
This should be replaced every 2,000 to 8,000 hours of use, depending on the make and model. Energy running costs increase by 1 percent for every 2 PSI drop in pressure because of a worn-out separator. It also prevents excessive oil usage.
Clear Intake Vents
Compressors need a clear path for the air to flow. If you have blocked or dirty intakes, it will put the motor under strain and wear it out. It also impacts the performance of the compressor.
Keep It Tight
Excessive vibration can lead to parts working loose, so before you use your compressor, give it a once over to check that nuts, bolts, and connectors are still tight.
Drain Moisture
Always drain away any moisture and condensation that collects inside the tank. It stops the cylinder from corroding and preserves the life of the compressor.
Air Compressor FAQs
Can I Leave Air in My Compressor?
If you plan on using the compressor the next day, it’s fine to leave air in the tank. Just make sure you drain away any moisture after you finish using it. If you have finished with the compressor for the foreseeable future, always empty the tank, as this is safer and stops moisture from settling inside and causing corrosion.

What PSI Should I Set My Air Compressor?
Air tools made for general use are rated at about 70 or 80 PSI, and you should always have a 20 percent variation between the compressor and the tool. So, if you set your compressor for between 90 and 100 PSi, that should suffice for most tasks.
The good news is most newer compressors are geared to be compatible with most air tools.

What Tools Can Be Used With an Air Compressor?
If the compressor has the capacity, you can connect every air tool. This includes spray paint guns, air hammers, pneumatic wrenches, air staplers, sandblasters, and water blasters, as well as reciprocating saws and ratchet wrenches.
Pneumatic drills are a commonly used air tool, along with high-powered water jets used for mining and crowd control.

How Do I Connect My Air Compressor To Air Tools?
You connect the air compressor to your air tool via a hose. The hose screws onto an attachment located near the pressure gauge, and the other end attaches to your air tool using a quick-connector that has a spring-loaded collar that clips in place.

Do Air Compressors Need To Be Refilled?
They do need to be refilled as they have a limited capacity. A 30-gallon air compressor will hold 30 gallons of air. When the tank depletes, the compressor kicks in and fills it. It takes a few minutes, but when the tank is full, you can continue with your project.

When Starting an Air Compressor, What Is the First Thing You Should Check?
If this is your first time starting an air compressor, check its oil. This doesn’t apply to all compressors, as you may not own one that requires oil (like a pancake compressor).
Those who bought a new compressor should know that the unit likely comes without oil, so you must add it yourself. The product’s user manual should thoroughly explain how to check/refill the oil inside your air compressor.

Can You Run an Air Compressor Without a Tank?
While running an air compressor without a tank is possible, there are several reasons you should avoid doing it.
When you use a tank, your air compressor is more capable of keeping a stable pressure. That means you can get more consistent results each time, especially for delicate work such as painting a surface.

What Should You Not Do with an Air Compressor?
Air compressors can be very powerful tools, so it’s important to know what not to do with one of these:
- Always avoid using an air compressor to clean the dust off people and pets.
- Don’t turn on your air compressor if you are not 100% sure all hoses and fixtures are intact.
- Never power your air compressor without making sure it’s properly lubricated.
- Don’t leave the compressor running if you’re not around to supervise it.
- Avoid using an air compressor with a leaking/damaged tank.

Should You Store an Air Compressor with the Valve Open or Closed?
If you plan on using the compressor the next day, you can store it overnight with the valve closed. Should you need to store your compressor for longer periods, it’s best to leave the valve open.
Opening the valve on an air compressor eliminates the moisture inside, which you want for long-term storage. Water building up inside the tank can damage the unit.
Compressed Is the Best
Air compressors are relatively easy to master and simple to use. But that doesn’t mean you shouldn’t treat them with respect. In the wrong hands, an air compressor can be a dangerous device, causing a lot of damage.
Make sure you read the owner’s manual to better understand your new compressor before you start your project. It’s a small investment in your time, but it will be worth the effort.