Knowing how to turn off the water to a toilet is a valuable skill, especially when making repairs. Modern toilet installations have a shut-off valve that enables you to isolate the fixture without shutting off the mains valve.
We explain how to turn off toilet water, drain a toilet tank, and what to do if the isolation valve gets stuck.
Key Takeaways
- Locate the shut-off valve behind the toilet: either a ball-shaped knob, a lever, or a bolt with a slot for a flathead screwdriver.
- Turn the knob clockwise or the lever a quarter turn to cut off the water supply to the toilet.
- If the valve is stuck, use a lubricant like WD-40, wait 10 minutes, and try again with an adjustable wrench or pliers.
- To drain the toilet tank, flush the toilet, mop out remaining water with a sponge and bucket, and use a plunger to empty the bowl.
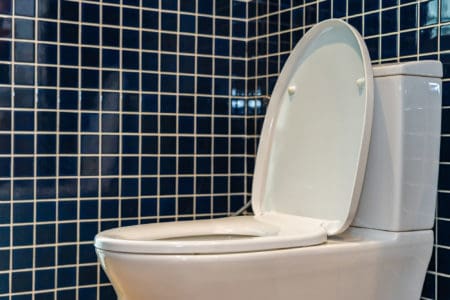
Where Is My Toilet Shut-Off Valve?
As you look at the toilet, follow the water supply line from the tank’s base to the shut-off valve. Most valves are located on the bottom left side of the tank. Some attach to the wall, while others connect to the floor.
Some older bathroom toilets come with no valve. To disconnect the supply, you will have to locate the main shut-off valve either in the basement or outside the house.
How to Turn Off Water to a Toilet
Shutting off water to your toilet is a simple process. If you are going away for extended periods, it is recommended that you isolate the water supply to prevent leaks. You should also do this when making repairs.
What You’ll Need
- Screwdriver.
- Adjustable wrench.
- Pliers.
- WD-40.
- Block of wood.
- Flashlight.
- Old towels.
- Sponge and bucket.
- Plunger.
- Rubber gloves.
Turn Off Toilet Shut-Off Valve
This is the easiest way to isolate the water supply to your toilet. It is convenient and fast and only involves turning off the water to the toilet.
1. Locate the Supply Valve
To locate the valve, look behind the toilet at the base. You will likely find it on the left-hand side (as you look at the toilet), attached to the wall or floor.
2. Turn the Knob/Lever
If you have a valve with a knob, twist it clockwise several times to cut off the water. If you have a lever valve, a one-quarter turn should be enough. Some valves have no handle and operate with a bolt that twists with a screwdriver.
Turning the knob on the wall valve closes a gate inside the mechanism to block water from entering the toilet tank.
3. Use Lubricant
Turning off the water to a toilet doesn’t happen that often, so it’s not uncommon to find your valve stuck. It could be rust, grime, or seized from lack of use. Spray a lubricant like WD-40 onto the valve to loosen it.
Wait 10 minutes, and then try twisting the handle. If it is stuck fast, use an adjustable wrench to give you extra leverage. Eventually, the valve will turn.
Alternatively, you could also try pliers to twist the valve. This Dowell Lineman’s pliers set is an excellent choice.
Take Note
Don’t force the valve, or you risk damaging the threads and causing a leak.
Turn Off the Main Shut-Off Valve
In colder climates, the valve is typically in the basement. If you live in a warmer location, you’ll find it outside next to your home.
1. Look In the Basement
Go down into the basement, look for the foundation wall, and you’ll locate the mains valve. You might also want to check out the crawl space beneath your home if it’s not in the basement.
Top Tip
If the valve is in a crawlspace, use a flashlight to see your way around.
2. Twist the Wheel
You will see a wheel on the top of the valve, located to the left of the dial. Twist it clockwise until it stops turning. That shuts off the water supply to the house.
3. Look Outside
In warmer climates, the shut-off valve is located inside a steel box next to your house. Look for the water pipes entering your home leading to the main valve. Lift the lid of the metal box, and the valve sits inside.
4. Twist the Wheel
Like the basement valve, your outside mains valve has a red wheel on the left side of the water meter dial closest to the house. Twisting it clockwise shuts off the water supply.
Some valves have two handles, and you’ll need to shut them off to isolate the water supply. More modern valves have a lever handle, which you turn right to shut off the water.
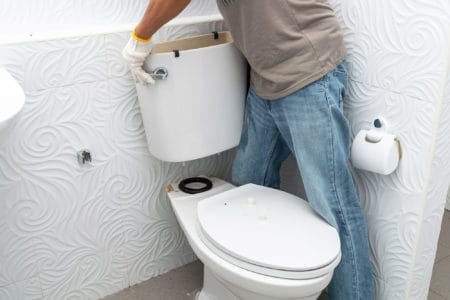
Drain the Water Tank
Shutting off the water to the toilet is only one part of the process. If you want to repair or replace the toilet, you will need to drain the flush tank.
1. Prepare the Toilet
Draining a toilet tank can be messy, especially when mopping out water from the tank and bowl. Lay down the old towels so that you can catch any drips.
2. Flush the Toilet
Pull the flush lever and wait while the tank drains. You will have a small amount of water pooling at the tank’s base. Use the sponge and bucket to mop it out.
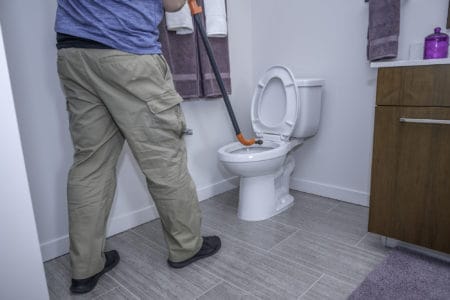
3. Empty the Bowl
You may still have water in the toilet bowl, even if the tank is empty. Using the push-pull method with a plunger forces water down the drain. Mop the residue of water out using the bucket and sponge.
Safety First
Don rubber gloves to protect your hands from contaminated toilet water.
Drain the Tank Without Shutting Off the Water
A quick and easy way to drain the tank is to do it without isolating the water supply. It’s useful for making repairs to the tank rather than draining the entire system. Here’s a handy way to do it:
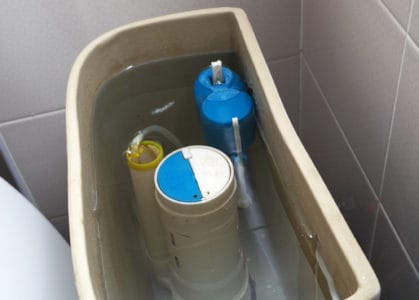
1. Flush the Tank
Pull the flush lever and wait while the tank drains. As the water level drops, the float arm lowers with the water. When it gets to a set level, it triggers the refill valve to allow water back into the tank.
2. Prop the Float
As the float nears the point where it triggers the fill valve, wedge a one-inch block of wood beneath the float. This holds it in position and stops the fill valve from working. Now you can drain the last of the water with the sponge and bucket.
How to Shut Off Water In an Apartment
If you live in an apartment, it will likely have the same conveniences you get in a house. That includes isolating your water supply. But in older buildings, you may need to locate the mains water valve.
Look for the water meter inside your apartment. It may be located inside a box on the exterior in the communal hallways between apartments. Follow the pipes, and nearby there should be a water shut-off valve.
Turn the handle to the right (clockwise) to isolate the water supply.
Take Note
If you need to turn off the main valve to the building, get permission from the landlord or property management company before you do anything. You may need to inform the other apartment dwellers well in advance.
Can’t Turn Off Water to the Toilet
Sometimes, your water supply valve rusts or simply gunks up. You rarely need to use the valve, and inaction causes it to stick fast. The first thing to do is use a product like this B’laster Silicone Lubricant.
It coats the valve and helps to ease the threads. You will also need a pair of pliers, or an adjustable wrench, like this WORKPRO Four-Piece set.
Top Tip
If you want to avoid your supply valve gunking up, give it a regular spray with lubricant at least once a week.
Turned Off Water to Toilet, Still Running
If the water supply is isolated but still running, you will need to investigate further to find the causes. The main culprit is likely to be a faulty supply valve. It shuts a rubber seal that stops water from flowing when you twist it clockwise.
Some come with a plastic valve called a gate that blocks the water flow. These can become brittle and crack.
Sometimes mineral deposits block the seal, causing the water to flow. This is more likely if you live in a hard water area because limescale coats the inner mechanisms of the valve.
How to Turn On Water Supply to a Toilet
Simply reverse the procedure used to isolate the supply to turn the water back on. If you have an isolation valve located at the rear of the toilet, twist the knob counterclockwise, and the water will start flowing.
Turn the lever or wheel handles counterclockwise for mains valves, and the water is back on. Wait a few minutes for the system to refill and turn on a few faucets to draw air bubbles from the pipework.
Take Note
You may hear rattling or banging in the pipes immediately after the water comes back on. This is caused by air trapped in the system. Don’t panic as it is perfectly normal.
Turning Off Water to a Toilet
Knowing how to shut off water to a toilet is ideal in an emergency. Sometimes your toilet springs a leak, pipes drip, and seals fail. When that happens, drastic action is called for, and you don’t have the time to wait for a plumber.
Learning these skills is all part of homeownership. The more you know, the more self-reliant you become, and you spend less on professional fees.