If your old dresser or table needs some TLC, maybe it’s time to consider an overhaul. Stripping furniture revitalizes an old family favorite into an as-new addition to your home.
Likewise, if you have found an unloved item in a second-hand store, restoring it gives it a new lease of life. We show you how to strip furniture in easy steps so that you can smarten up your family heirlooms for future generations to enjoy.
Key Takeaways
- Thoroughly clean the furniture surface.
- Apply paint stripper with safety precautions.
- Remove old layers with a paint scraper.
- Sand the wood to smooth out blemishes.
What You Need
To get the job done, you are going to need some essential tools. But what do you need?
- Paint or varnish remover.
- A paintbrush.
- A metal tray.
- A paint scraping tool.
- A power sander.
- A sanding block.
- High and low grit sandpaper.
- Tack cloth.
- Soap and water.
- Dry towels or paper towels.
- A facemask.
- Goggles.
- Safety gloves.
How To Strip Furniture
For this method, we will include the use of a paint stripper. It removes several layers at once and is the easiest way of getting to the bare wood beneath the layers of paint or varnish.
1. Clean the Furniture
Before you start removing the old layers from the surface of your furniture, you need to give it a thorough clean to wipe away grease and grime. This is especially important if you are sanding old paintwork because it stops the sandpaper from gumming up.
2. Apply the Stripper
Put on your facemask and safety gloves. Paint stripper contains several ingredients that could cause harm to your skin, and the fumes could exacerbate health problems. Some brands of paint stripper claim to be “safe,” but they still burn to the touch. If it blisters and lifts years of paint and varnish, just imagine what it will do to your skin.
Remove the lid and gently pour out some of the contents into a metal tray. Using the paintbrush, apply a generous layer to the area you want to refinish. Brush it on thick, in 0.25-inch layers if possible.
Add a second coat if you feel it is necessary. Leave it for 20 to 30 minutes before attempting to strip. If you see the paint begin to bubble, it’s ready.
3. Remove the Old Layers
Grab the paint scraper, gripping it with both hands. Hold it at an angle of 45 degrees and gently push the scraper forward through the varnish or paint. If the remover has done its job right, it will come off in thick strips.
Continue this task until all the coating is off and the wooden surface beneath is revealed. Allow a few hours for the surface to dry. It might be an idea to have a trash bag handy to deposit the old paint and the residue of the remover.
It’s worth remembering that if you intend to paint the furniture rather than stain it, you really only need to lightly sand.
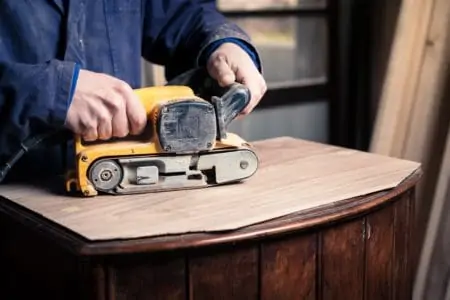
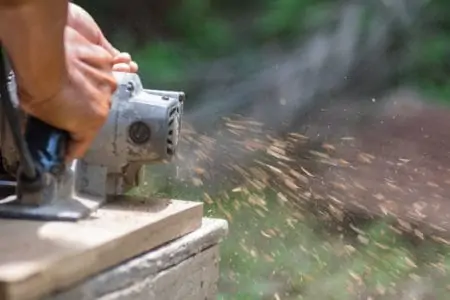
4. Remove Blemishes and Smooth Surfaces
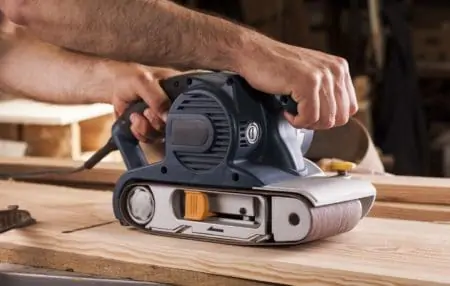
Grab either the power sander or the sanding block. It depends on what type of furniture you are restoring because a power sander is more effective on a tabletop but less so on a dresser with curved or intricate edges.
Choose a low grit paper at first, especially if there are still varnish or paint patches that need to be sanded away. 80-grit should do the job admirably. If the wood is blemished or scratched, smoothing with a low grit paper removes the material quickly.
Take Note
5. Swap To High Grit Sandpaper
Now that you have successfully dealt with the rough surfaces and removed stray patches of paint, swap the low grit paper for a higher grade sheet. Something like a 260-grit or above will remove any straggling rough edges and leave you with a super-smooth surface.
You could also try 300-grit sandpaper if you plan to leave the natural wood grain exposed as a feature. Work with the grain and never against it, or you risk scratching the wood so that when you apply a light stain, it shows all the imperfections.
6. Wipe Clean
Between each stage of the sanding process, use either a tack cloth or towels to wipe the surface clean of debris. You might want to wet the towels to make them damp, so the dust sticks to them.
Allow the table to dry before continuing with the sanding, as wet dust collects and thickens into a sticky paste.
7. Have an Eye for Detail
Once you have removed all the old coatings, take the time to give your furniture a once over. Cast your eye over the edges and hidden corners to make sure all the old layers are gone.
If you are happy, the table is now ready to stain or oil.
Top Tips for Stripping Furniture
What are those techniques used by the professionals that make life a whole lot easier when it comes to stripping furniture? Let’s find out.
Carpet Your Workbench
Adding a soft carpet layer to your workbench stops the surface of your furniture from becoming scratched accidentally. Hard workbenches are not the most forgiving surfaces for wood. If you don’t have any spare carpet, an old dust sheet will do.
Work In Zones
This is especially useful if you are stripping a large piece of furniture like a kitchen table. If you work in zones, only apply the remover to the patch you are focussing on.
Keep the Remover Wet
Don’t let the paint stripper dry out. If you have several stubborn layers to remove, it may be that you have to wait a bit longer than the recommended 20 or 30 minutes. To stop the stripper from drying out, cover your piece with a plastic trash bag to trap the moisture.
Use a Box
When you need to scrape off the excess paint stripper, use the edge of an old cardboard box. The stripper sits in the box, and when it dries, you can toss it in the trash. You can dispose of hardened chemicals in the normal way because it represents zero threat.
Strip Painted Hardware
If you have paint-encrusted hardware like hinges and handles, place them into a slow cooker with some water and detergent and switch it on low. Leave it to cook overnight, and the next morning the paint should lift right off.
Don’t Strip When Painting
Save yourself the headache of stripping if you intend to paint your furniture. Grab some fine sandpaper and gently run it over the surface, making sure you remove any blemishes. The sandpaper roughs up the wood enough so that the new paint will stick and become harder wearing.
Paint usually chips off when it is improperly bonded due to a lack of keying.
Fill Small Cracks
It’s not unusual to find small cracks and gaps when you take off the old layers to expose the wood beneath. In the main, they are treatable with a simple wood filler or putty. They dry the color of the wood and, with the right blending and sanding, should vanish to the naked eye.
Take the time to check over the quality of the wood before applying a stain or you risk highlighting the blemishes when it’s too late.
Remove White Rings
White rings happen because wet cups and glasses sit on the surface of your table. The varnish dulls as a reaction to the moisture. Mix a bowl of equal portions vinegar and olive oil and rub it gently on the white ring with a soft cloth until it disappears.
When you are satisfied, use a dry cloth to bring back the shine.
Use a Spoon for Tricky Areas
A great tool to use for concave and convex areas is a teaspoon or a dessert spoon. They make light work of hard-to-reach spots, and everyone has a spare spoon lying around.
Old Credit Cards
Refashioning an old credit card to match the contours of the surface you are scraping is an excellent and easy way to reach tricky spots. You can cut them to fit the shape, and they are ideal scrapers.
Put Down a Dust Sheet
A dust sheet is a great way to protect your surroundings from dirt or dripping paint stripper. And when you are done, you can roll up the sheet and dispose of it in the trash for the easiest cleanup in history.
Clean Off the Remover
Mix up a combination of vinegar and water and apply it to the surface of the wood. Wipe clean with a cloth. It should remove any residue from the paint stripper. Be careful to keep the chemical remover away from your eyes and skin.
Stripping Furniture FAQs

Is It Better To Sand or Strip Furniture?
It depends on the kind of finish you want. If you have light blemishes or a very thin layer of varnish, you could get away with sanding, but in the main, stripping it back to bare wood is better for staining or oiling the furniture.
If you want to paint the surface, then sanding is the best policy because you don’t need such a high degree of detail. You just need to lightly rough the surface with sandpaper for the paint to adhere to.

What Grit Sandpaper To Use for Stripping Furniture?
It’s always better to start with a lower grit, say 80, and then increase as you work towards the finish. In the end, a 200 to 300-grit will provide the smoothest results, removing any blemishes.

How Long After Stripping Can I Sand?
Give it between 30 minutes and an hour, depending on the type of wood. Softwoods are more porous and soak up more of the stripper, so it may take a little longer to dry.

How Long To Let Wood Dry After Stripping?
You should leave the wood to dry between 3 and 24 hours, depending on the type of wood. Hardwood soaks up less moisture and so dries quicker. Softwoods are the opposite and need thorough airing before you consider staining.

Is It Worth It to Strip Paint?
Stripping paint is essential in some situations, but it shouldn’t always be your go-to-choice. If you have paint peeling due to moisture, scraping, sanding, and priming might be better.
But, when the paint layer is very thick, you might have to strip it. A good way to do so is by using a heat gun and scrapers.
Place the gun a few inches away from the surface and turn it on. This will cause the old layer of paint to heat and lift. You can then use a putty knife or a scraper to remove paint from the surface.

Can You Use Vinegar to Strip Wood?
Vinegar is not a paint solvent, but you can soften dry paint layers you want to get rid of. Its composition will soften paint bonds, causing any old paint to lift so you can strip it off faster.
You won’t be able to remove the paint off a surface entirely just by using vinegar, but it is a non-toxic way to get rid of the paint. Simply boil the vinegar in your microwave or on the stove.
Take a brush, dip it in vinegar, and apply it on the painted surface you want to strip. Leave it for a few minutes and scrape the paint once you see it lift.

How Long Does Paint Stripping Take?
For any paint stripping solution to make its way into the old paint and make it suitable for stripping, you need to leave it on the desired surface for 10 to 30 minutes. This depends on the type of stripper, so always check the labels to see the exact time.
As for the duration of the entire stripping process itself, it depends on what you’re looking to strip. It will take less time to strip a small bathroom cabinet than a large wooden door or a wardrobe.

Do I Have to Sand After Stripping the Wood?
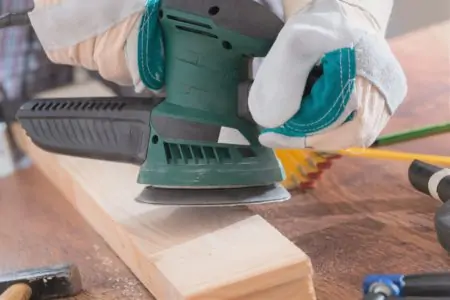
Sanding after stripping wood is essential to remove any blemishes and make the surface smoother. How much you need to sand depends on your plans for the wood. If you only plan to apply stain, then light sanding is enough. For painting, you have to really get in there.
The easiest way to sand wood is by using a power sander, but you can also use a sanding block if you don’t have such a tool. It also depends on what you’re sanding. It will be challenging to use a power sander if you have a piece of furniture with many curves and carvings.

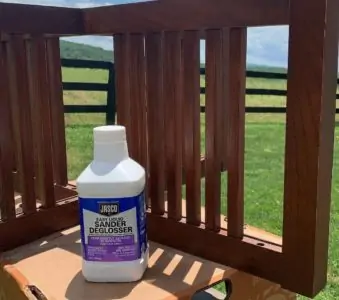
What Is the Best Product for Stripping Furniture?
Citristrip QCSG801 is one of the best products to consider for stripping furniture. It can remove various types of paint and varnish and leaves behind a pleasant and non-chemical citrus scent.
One of the things I love about it is that it works on more than just wood. It also works if you want to remove paint from masonry or metal. The only downside is that, while the product begins to strip paint fast, you should wait a few hours before removing the entire paint.
No More Strip Tease, Please
Stripping furniture is a combination of patience and technique. The great news is there is room for error. Wooden furniture is forgiving and if you make a mistake, repeat the process until you get it right.
Remember that while perfection is the goal, you are unlikely to produce as-new results, so set a target and when you reach your desired results, pat yourself on the back and admire your handy work. You have just preserved that piece of furniture for years to come.