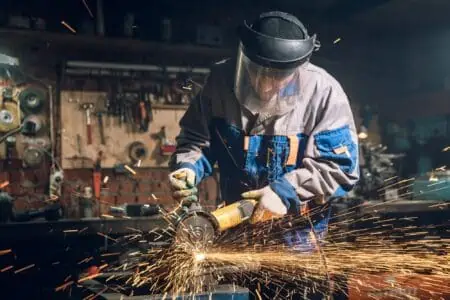
Stick welding is a popular method of welding. It is cheap and accessible to most welders and is effective in most outdoor weather conditions. This is because it requires no shielding gas.
We show you how to stick weld with all the hints and tips you need.
Key Takeaways
- Stick welding is a versatile and cost-effective method, ideal for outdoor conditions and various metals.
- Practice is key to mastering stick welding, focusing on weld joint preparation, electrode selection, and proper technique.
- Understanding and adjusting the five operating variables (CLAMS) is crucial for achieving better welding results.
- Always prioritize safety when stick welding, using proper personal protective equipment and following safety guidelines.
How Does Stick Welding Work?
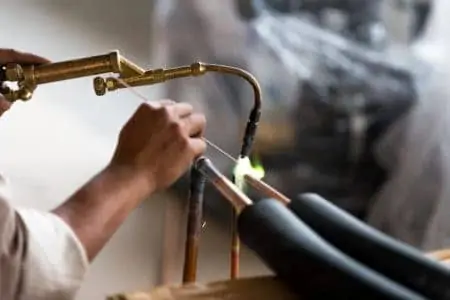
Stick welding, also known as Shielded Metal Arc Welding (SMAW), is a welding method that uses an electrode and an electrical current at the weld pool to join different metals. It gets its name from the solid metal rod or stick that makes up the electrode. The stick is coated with metal compounds and binding agents to get it to stick. This is known as flux-coating.
Electrodes come in 3 categories, and they obtain their name thanks to the material they are coated in. The different coating types help optimize performance in applications by how they react to slag freeze, penetration and deposition rate. The coating also enhances the quality and stability of the arc.
What Can I Weld With a Stick Welder?
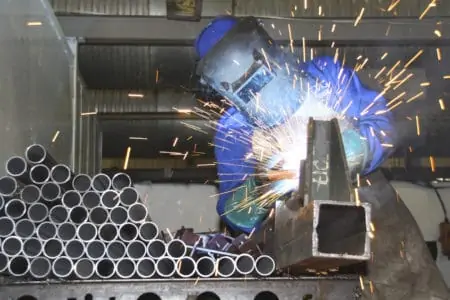
It can weld cast iron, mild steel, stainless steel, aluminum, magnesium, and other non-ferrous metals. It can also weld nickel and copper alloys. Stick welding is better suited to thicker materials and even works on painted or rusted surfaces. It is the ideal method of welding for performing on-site repairs to machinery and infrastructure.
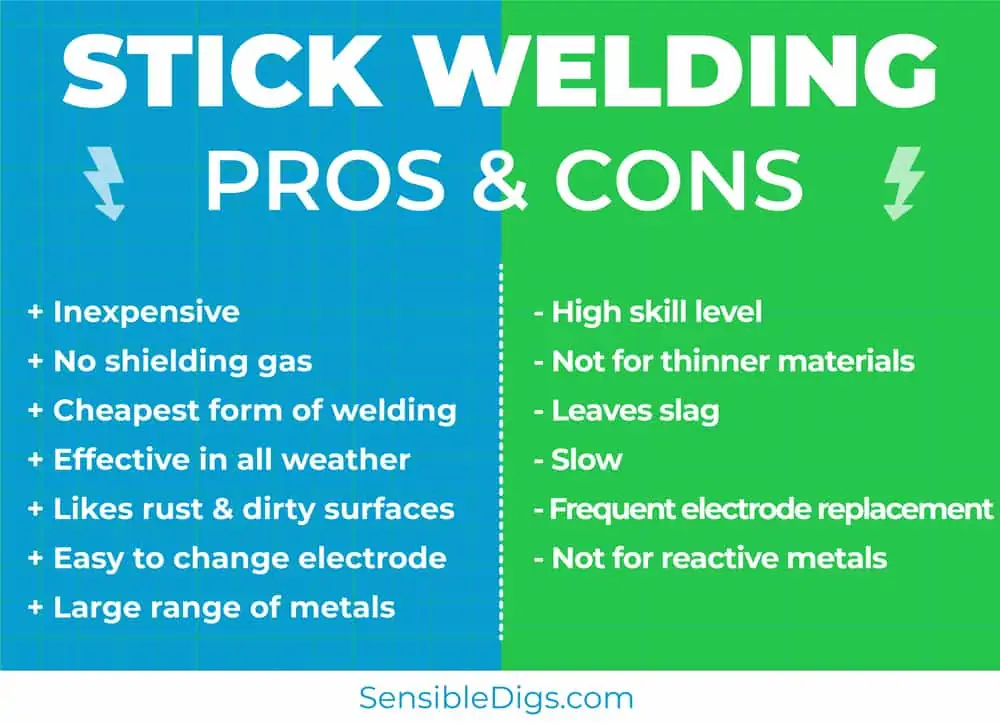
Advantages of Stick Welding
- Inexpensive equipment and set-up.
- Doesn’t require shielding gas.
- Cheapest form of welding.
- Effective in all weather conditions.
- Likes rust and dirty surfaces.
- Easy to change the electrode.
- Works on a large range of metals.
Disadvantages of Stick Welding
- Requires a high level of skill.
- Not great with thinner materials.
- Leaves slag to chip off.
- Stick welding is slow.
- Electrodes need replacing frequently.
- Not suitable for reactive metals like titanium.
What You Need
There are a few basic elements you are going to need to stick weld successfully.
- Power supply.
- Stick welding machine.
- Electrodes and spares.
- Rod holder.
- Ground clamp.
- Safety glasses.
- Face shield.
- Welding gloves.
- Welding jacket or protective sleeves.
- Face mask and an extractor if indoors.
- Wire brush.
- Small hammer to chip off slag.
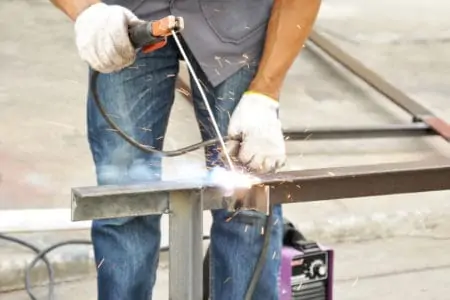
How To Stick Weld
Stick welding may be popular, but that doesn’t mean it’s easy to master. It requires dedication, skill, and patience to get it right.
Weld Joint Preparation
The weld area should be as clean as you can get it. Remove mill scale, paint, oil, rust and water, as a minimum standard. Stick welding is effective at welding joints that are rusty and painted, but if you want the best results, always have a clean weld area.
You can do this with a grinder. Grind the metal surface so that the metal underneath is shiny. If you are unsure if you have achieved the right level of cleanliness, grind back by 1-inch.
Electrode Selection
Back in the day, all electrodes were stamped with an “E” for electrodes. These days, they get graded using numbers. The first two digits refer to the strength of the welding rod. A 6010 electrode shows that the joint’s tensile strength is 60,000 pounds per square inch of weld, hence the 6 and the 0.
Steel has a tensile strength of around 36,000 pounds per square inch, meaning that the electrode is typically twice the strength of the steel it is welding.
The last two numbers refer to the quality of the flux shielding on the rod. Generally, the higher the number, the better quality of the shielding. It’s at this point we should also mention budget electrodes. They appear to be good value on the surface, but with lesser tensile strength and a lower quality flux coating.
The 3 most common types of electrodes are:
1. E6010
This is perfect for welding rusty and dirty metal. It has a deep penetration grade and welds well in all positions and settings.
2. E6013
This is a great all-rounder, excellent for welding cleaner and smoother joints. It has a superior penetration level, but not quite the same as the E6010.
3. E7018
If you want a neat and clean weld, this is your electrode of choice. You need to ensure the surface is free of blemishes and completely clean. It is the industry standard.
Stick Welder Setup
1. Set the Polarity
Choosing the right electrode is only half the battle; getting the welder set up correctly is the other half.
Set the polarity according to the manufacturer’s guidelines. When done, set the amperage. Now fine-tune the welder to cater to the metal you are welding. This is important because different metals require different settings.
You can stick weld using AC and DC, although most industrial and commercial applications use DC. It’s better for welding steel, creates a more stable arc, is easier to get the arc started, and has less spatter.
2. Set the Arc Length
The arc length should be no longer than the diameter of the electrode. For example, a 6010 electrode should have a corresponding arc of around 0.125 inches.
3. Set the Sound
Most experienced welders can tell you whether a welder is set correctly by the sound it makes. The sound should be akin to eggs frying in a pan. If the rod glows red, you have the settings too high, and if the rod is too cold, it will stick.
Once you’ve tuned your ears to the correct sound, feel the rod’s vibration, as this will tell you a lot about your set-up.
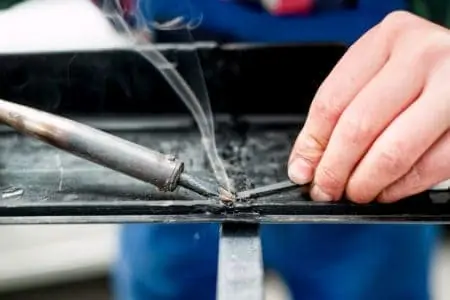
Stick Welding Technique
Now that you have the welder set correctly, it’s time to focus on the actual welding technique. Before starting, learn to hold the stick the correct way, using two hands. Control is everything when it comes to welding, so get comfortable and brace yourself for every eventuality.
1. How To Strike an Arc
Starting an arc is not easy. As you learn the technique, you will likely chip the rod and damage it in small parts. This happens to the best welders out there.
If you are wearing the correct welding gloves, you could hold the rod like a pool stick and strike it. Once the arc strikes, place your hand with the other one on the welding handle. The other technique is to start the arc-like striking a match against the base metal. This is effective, but keeping the arc is more of a challenge.
2. Moving the Electrode
There are different welding techniques for different welds.
3. Whipping the Electrode
The backward and forward motion works well if you are trying to weld a dirty or rusted surface. It also works well on thinner metals and fillet welds (joining two metal pieces in an L-shape).
4. Circle Welding
This is an excellent technique for beginners. Move the electrode forward slightly with every new circle. It is slower than other methods, but it does help you control the speed of travel.
5. Weaving the Electrode
Moving the electrode from side to side is perfect for wider welds and is the method most experienced welders use. It adapts to smaller welds, but the weave size and thickness need to be adjusted.
Stick Welding Position
The electrode changes angle depending on the position of the weld.
1. Flat
Drag the rod at an angle of 10 to 30 degrees in the direction of travel. It might be easier to work from left to the right.
2. Horizontal
Position the rod upwards at an angle of 30 to 40 degrees. Now tilt the rod by 10 to 30 degrees as you drag it in the direction of travel.
3. Vertical
Angle the rod upwards between 30 and 40 degrees. There are two ways to travel, depending on the amount of flux on the electrode. E6010, E6011 and E6013 are better for vertical down, while E7018 electrodes prefer the other direction because slag gets caught in the weld.
4. Overhead
Use the same technique as working on the flat, except you point the rod upwards. The direction of travel should also be the same, from left to right.
5 Important Operating Variables (CLAMS) for Better Results
Get the 5 operating variables right, and you will be welding like a pro in no time. But what are they?
Current
This is set by the welding machine at the power source control. You can choose between AC and DC, although most welding tasks call for DC. It’s better for creating a stable arc and provides less spatter.
Length of Arc
The arc should be no longer than the diameter of the electrode. You should aim for an arc length of between 0.063 inches to 0.094 inches. The voltage varies depending on the size of the arc. Push it close to the weld pool, and it cools, while a longer arc creates more heat.
Angle of Travel
Depending on your position, place the electrode at the correct angle. On the flat, it should be between 10 and 30 degrees, horizontal between 30 and 40 degrees, and vertical should be 30 to 40 degrees. Overhead is the same as working on the flat.
Manipulation of Electrode
Experienced operators have many ways to manipulate the electrode, but the methods vary depending on the electrode, amperage, position, joint configuration and weld type. First, start by practicing the drag technique on a flat, straight piece of metal, and step it up a little by adding a circular motion.
Speed of Travel
Travel speed dictates the puddle width. Adjust the speed to create puddles that are no more than 1.5 to 2 times the diameter of the electrode.
Stick Welding Safety
Unlike other professions, when it comes to welding, you cannot take chances with safety. One mistake could be disastrous, leaving you seriously hurt or even maimed for life. Follow a strict safety code every time you pick up a stick to weld.
Here’s a list of the PPE that you will need:
- Goggles.
- Face shield.
- Leather gloves.
- Welding sleeves or a protective leather jacket.
- Welding respirator or extractor if indoors.
- Leather work boots or fire-proof shoes.
- Long-sleeved, non-flammable shirt.
- Non-flammable trousers.
- Fire extinguisher.
When welding, you should never act recklessly. A moment’s lapse in concentration can be treacherous. You will struggle to find a welder who hasn’t suffered from flash burns, or worse, eye flash from the arc.
It feels like you have grit in your eye, and it can take a few hours to manifest, so you generally don’t know you have it until a few hours after you have stopped welding.
Common Mistakes and Troubleshooting
As with all methods of welding, some mistakes happen that affect the overall result. Here are some common ones and how to correct them.
1. Spatter
Spatter is a common issue with stick welding. They are droplets of molten metal that deposit near the welding arc. To reduce the instances of spatter, reduce the current and the length of the welding arc. The longer the arc, the higher the heat produced. You could also check you are using the correct polarity, as this increases the chances of spatter.
2. Porosity
Porosity starts with contamination of the weld pool. Moisture is the biggest culprit, as is rust, dirt, grease and paint. To resolve this, always ensure that the weld area is spotlessly clean. Stick welding is great for welding in all types of conditions, but the cleaner the weld area, the stronger the weld.
Contamination can seriously compromise the quality of your work.
3. Undercut
Undercut occurs when the voltage is too high, or you have the wrong electrode for the thickness of the metal. It also happens if the welding speed is too rapid. If the electrode is too big, the amount of molten metal accumulates, causing undercut.
The way to avoid this is to lower the voltage, check you are using the correct electrode, and employ a weaving technique when laying down the weld.
4. Deformation
Deformation is common and occurs as the metal contracts as it cools. It happens when the metal hardens too rapidly, poor plate fit-ups and insufficient clamping, and too many thin beads. To avoid this happening, try welding from the center out, or weld both sides of the joint.
Also, try a larger electrode and reposition the weld line, or lay fewer beads.
5. Cracks
Cracks can be dangerous, no matter how small they are. In construction, they are a sign of a defect and weaken any structure. You cannot simply refill the gaps with new material. The cracks need to be ground out completely and rewelded.
Check you are operating the stick using the correct heat setting. Also, reheat both sides of the joint before welding so that they are the same temperature. Spend time deburring and cleaning the edges of the joint, so you get the neatest possible fusion.
Stick Welding FAQs
Is Stick Welding AC or DC?
Stick welding is primarily DC. It creates a neater finish and increases the type of applications. Most industrial and commercial welders operate in DC, as it produces a more stable arc that is easier to control. You can weld in AC, but it is less common.

Do You Push or Pull When Stick Welding?
The golden rule is: if it produces slag, you drag. You always drag the stick with stick welding. If you want to push the torch, take up MIG welding.
Can You Touch the Electrode While Stick Welding?
The electrode is always electrically hot, so you shouldn’t touch the stick with your bare hands. Use welding gloves that are completely dry and in good condition.

What Causes a Welding Rod To Stick?
Several factors cause your rod to stick. The first and most obvious reason is low voltage. Make sure you have the voltage set correctly. Other culprits could be the wrong type of electrode for the base metal, flux problems, and the incorrect welding technique.

Is Stick Welding the Easiest to Learn?
Stick welding is easy to learn but challenging to master, so it’s not the easiest method to learn (that would be MIG welding). These two welding methods are often compared, and many people can’t agree on which is most accessible. Let’s take a look at the facts.
MIG welding is faster and more efficient, but it takes more time to set up everything you need to start welding. Once you have everything in place, it’s easier to master a clean weld.
On the other hand, stick welding is affordable and easy to set up, but your welds will likely be sloppy at first (unless you’re a natural welder). Once you master stick welding, it can be gratifying, as it has a lot of practical applications. It works on metals like copper, nickel, or steel.
Aside from mastering proper stick welding techniques, you might spend a lot of time wrapping materials and cleaning up the mess afterward. That makes stick welding less time-efficient compared to other welding types.

Do You Stick Weld Uphill or Downhill?
There is not a one-size-fits-all answer to this question because it depends on what you’re welding and what you prioritize in the process. Many welders will tell you that downhill stick welding is faster and a good option when you prioritize speed.
Others specify that welding downhill using a stick welder will create a lot of inclusions, and the end result isn’t as strong.
It’s best to weld uphill when working with thick materials and downhill when you have a thinner metal sheet. You can practice welding uphill and downhill first with a few test materials. It should also help you master stick welding.

Is Stick Welding Stronger Than Wire Feed?
Stick welding is regarded as being stronger than wire feed. Stick welding produces stronger joints, is affordable, and doesn’t need any extra gas shield.
Wire feed is another term used to describe MIG welding, a type I’ve tackled in another question. The difference between these two welding types is the filler material. With stick welding, you use a rod, while MIG welding uses a wire.

What Should You Not Do When Stick Welding?
As with every other welding process, there are certain things you are not supposed to do when stick welding.
Don’t start welding in areas without proper ventilation. Some materials can produce toxic fumes, which are detrimental to human health when inhaled.
And even when you’re not working with such materials, it’s always a good idea to have some ventilation system in your garage or workshop.
Never weld on surfaces that aren’t stable. You risk injury or could start a fire hazard if your welding equipment slides off the surface and lands on something flammable.
This brings me to my next point: avoid welding near flammable materials. Clean your workspace, and don’t weld next to anything that can catch fire.
One of the common stick welding mistakes that people make is not cleaning the welder. Every power tool you use needs proper maintenance for durability and safety reasons. If your stick welder gathers dust or debris, you must remove it to prolong its lifespan.
Don’t use your stick welder without preheating the material first. This is one of the main reasons materials can crack, and the solution is as simple as preheating.

What Is the Best Beginner Stick Welder?
When choosing the best beginner stick welder, the Hobart 500570 Stickmate 160i takes home the cake. Thanks to its dual-voltage features, you can pair this with a generator and get surprisingly powerful results (consider it is, after all, a tool for beginners).
You can adjust the amperage from 20 to 160, translating to a versatile product for different welding projects. Bear in mind this is not a tool for heavy-duty application, as it works better for at-home welding jobs for the rookie welding enthusiast.
Stick To The Facts
Stick welding is popular, but that doesn’t make it easy to master. It is notoriously challenging to get right, but you will be able to weld outdoors in all weather conditions when you do. Stick is the cheapest to set-up, the least expensive to operate, and the most cost-effective for beginners.
What are you waiting for? Get stick welding, and never look back.