Saws have been used in various forms for thousands of years, enabling people to cut material quickly and accurately. Today, there are more saw types than ever before, designed for a wide range of cutting tasks.
If properly maintained, you will be able to continue using a saw blade for months or even years. This includes sharpening your blades so they can slice through material smoothly and accurately, which can be daunting if you have never done it before.
To keep your saw cutting properly, this article will explain how to sharpen saw blades. This includes which equipment you will need and how to use various sharpening methods to extend the lives of your blades.
Key Takeaways
- Signs of a dull saw blade: Difficulty cutting, wood discoloration, chipping, and longer cutting time.
- Sharpening methods: Taper file, crank sharpener, automatic sharpener, and diamond wheel sharpeners.
- Using a file: Secure the blade, inspect and set the teeth, and file at the same angle as the teeth.
- Keep blades sharp: Use the correct blade, align your saw, oil regularly, and remove rust with a razor.
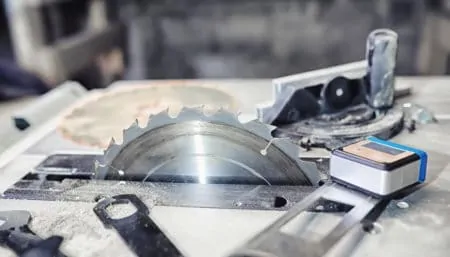
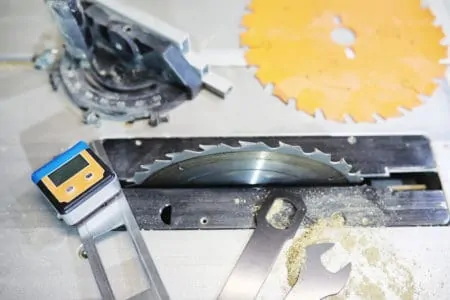
When Does a Saw Blade Need Sharpening?
You will usually be able to tell when a saw is becoming blunt if it becomes more difficult to cut with, but there are some other telltale signs. The wood may discolor when you use the saw. You may notice chipping or small pieces of sawdust. Other hints that your blade is dull include a smell of burning and the blade taking longer to cut.
Are Saw Blades Worth Sharpening?
It is well worth sharpening your blades, as you won’t need to replace them as frequently, which will save you money. Keeping your cutting tools sharp will improve your accuracy, speed, and the quality of your finish.
High-quality saw blades maintain their sharpness well, but they will dull eventually. How long the blade lasts will depend on both the material of the blade and the stock you are cutting. Hardwood and other robust materials will dull your blade faster than softwood and plastic.
Another major influence is how often you use your saw. If you use it daily, you will probably need to sharpen it weekly to keep it in optimal condition. On the other hand, if you are an occasional DIYer, you should enjoy years of use before you need to sharpen the blade.
A high-quality carbide-tipped blade can usually be sharpened between 15 to 20 times before it needs to be replaced.
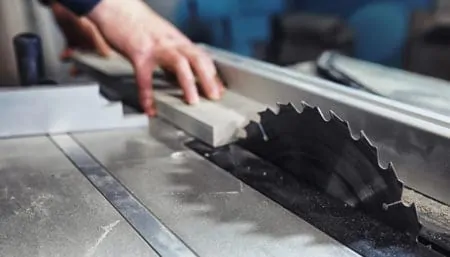
Even the most reliable saws dull over time. Each time the teeth make contact with the material they are cutting, they dull slightly. In time, this narrows the teeth, causing them to bind more. You will notice this with a hand saw when you make a downward stroke and the blade sticks.
You should also familiarize yourself with what each saw excels at. There are general hand saws, which are suitable for various cutting tasks, and there are specialist saws that are designed for particular jobs. Using the wrong saw will also dull the blades faster.
Determining whether or not to replace a saw is a personal choice but a good rule of thumb is to consider it when the maintenance cost exceeds 50% of the saw’s price.
Best Ways to Sharpen Saw Blades
There are several tried and tested methods of sharpening saw blades.
Method #1: Taper File
Taper files are effective tools for sharpening hand saw blades. Depending on the size of your saw’s teeth, you will need a specific file size. You can use either a single or double-cut file as they are equally effective at sharpening saw blades.
The file will have a triangular shape, regardless of its size, with each angle at 60 degrees. This is known as an equilateral triangle. This design means the file will simultaneously file the front of one tooth and the back of another.
Filing a Saw Blade With a Taper File
Secure the blade in a vice. Hold the file with your dominant hand at the base and your other hand on the tip. Use two strokes in the gap between the teeth. This will ensure consistent results. Make sure you hold the file at the same angle as the saw teeth.
Pros
- Precise
- Simple method
- Inexpensive
- Easy to learn
Cons
- Time-consuming
Method #2: Crank Sharpener
Crank sharpeners are devices primarily for sharpening chainsaw blades. The sharpener straddles your blade and is operated by cranking the handle. They are lightweight and ideal for quickly sharpening your blade when you are on the job away from your workshop. One of the most popular crank sharpeners is the Timberline chain sharpener.
Using a Crank Sharpener
Using a crank sharpener doesn’t require existing skills, so it is very beginner-friendly. Place the crank sharpener over the chain. Wind the crank handle and the sharpener will grip the chain, pulling it toward the cutting tools. Most crank sharpeners cut the chain at 25 to 35 degrees, which is the standard setting.
Pros
- Easy to use
- Effective
- Fast, individual blade sharpening
Cons
- Expensive
Method #3: Automatic Sharpener
Like crank sharpeners, automatic sharpeners are for sharpening chainsaws. They work by the chain running along a sharpening block inserted at the tip of the sharpener. Much like a crank sharpener, this method can be used almost anywhere, so you won’t have to worry about being stuck with a blunt chainsaw while working on a job.
Using an Automatic Sharpener
Insert the chainsaw into the sharpener and shut the lid. Switch on the chainsaw and rev it. Then, push the tip of the sharpener against a solid, flat surface to bring the semi-circular sharpening block into contact with the saw’s teeth.
Work in 5-second bursts with a maximum of 3 contacts and your blade should be sharpened. This isn’t the most accurate way to achieve a sharper cutting edge but you should still notice a difference when cutting.
Pros
- Fast
- Easy to use
- Can be taken anywhere
Cons
- Not very precise
- Doesn’t produce the sharpest cutting edge
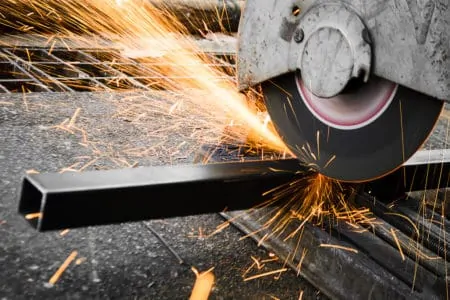
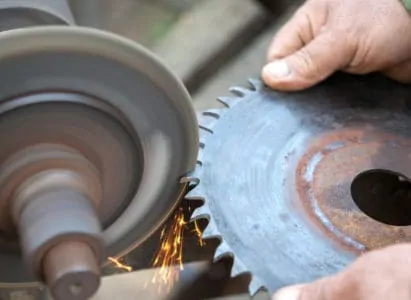
Method #4: Diamond Wheel Sharpeners
These sharpeners are similar to grinders as they spin at high speeds when you press the saw blade against the surface. They are typically coated with a 400 diamond grit to sharpen carbide-tipped saw blades.
Using a Diamond Wheel Sharpener
As the wheel spins, apply the saw blade to the surface and start to grind it. The 400 grit will hone the teeth back into shape. Don’t press too hard or you will get an uneven finish. Do this gently and try to grind at the same angle as the teeth on the blade.
Pros
- Fast results
- Efficient
- Super-sharp finish
Cons
- Expensive
- Could damage the blade
- Difficult to master
How to Sharpen Saw Blades Using a File
Using a file to sharpen a saw blade is one of the easiest ways to achieve good results. Here’s what you will need.
What You Need
- A couple of taper files
- A saw set
- Goggles
- A vice
- A strip of wood
1. Inspect the Blade
Examine the blade’s teeth. Are they all the same height? If you notice that some aren’t properly aligned, clamp the blade into a vice with a wooden strip to keep the blade rigid in the vice. Use a double-cut smooth metal file to reduce the height of any teeth that stick out too far.
When you have done this, examine the blade for any other damage. Rust and blemishes can cause the blade to bind in the stock, making rougher cuts.
2. Set the Teeth
Check that the kerf is the correct width. Misaligned teeth will cut unevenly, regardless of how sharp they are. A saw set makes this job much easier and will ensure the teeth are properly aligned.
A saw set resembles a pair of pliers with a pivot, long handles at one end, and a set of teeth at the other. Clamp the saw blade in the saw set and adjust the circular hammer disc. This tightens and puts pressure on the teeth to bring them into closer alignment. Squeeze the handles to bend the tooth. Each tooth should be bent into the right shape from the midpoint, with the sets on each side matching.
Saw sets are best suited for blades with fewer teeth. For blades with a higher tooth count, it is usually best to pay to have them sharpened by a professional.
Simply start at one end, positioning the saw set over the first tooth, and squeeze. The tooth is now set. Work along the saw and repeat this process, skipping a tooth each time because it faces in the opposite direction. Flip the saw blade and start the process again, this time working on the teeth you skipped previously.
3. Filing the Teeth
Choose an appropriate taper file. Small files suit finer blades with a higher tooth count, while larger files are better for a lower tooth count blade. We recommend trying a single or a double-cut file for saws with 5 to 7 teeth per inch (TPI).
For medium-coarse blades with 8 to 10 TPI, try a regular taper, and for 15 teeth or more, try an extra-slim taper.
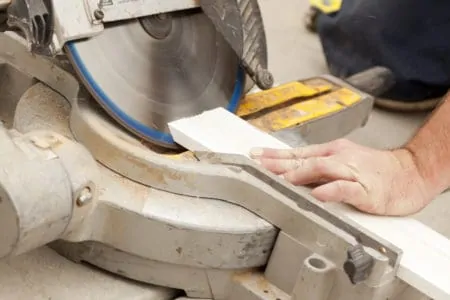
4. Secure the Saw Blade
Clamp the saw blade in a vice with wooden strips to protect the blade and increase its rigidity. Working at the same angle as the teeth, move the file’s 60-degree angle across the teeth, making sure the file works the front and rear of the teeth. Use two strokes per tooth to achieve an even finish.
How to Clean a Saw Blade
Depending on the type of saw blade, you can probably just fill a bucket with some warm soapy water, submerge the blade, and leave it to soak for 5 to 10 minutes. Then, carefully lift the blade out, avoiding the sharp teeth, and use a cloth or small soft brush to wipe away any blemishes and stains that might cause the blade to bind to the material you are cutting.
Submerge the blade back into the water and shake it to dislodge any remaining debris from its surface. When you are satisfied that all the dirt has been removed, remove it from the water again and dry it with a cloth.
Top Tips for Keeping Saw Blades Sharp
There are some simple guidelines that will help you keep your blades sharper for longer, so you won’t need to sharpen them as frequently:

Use the Correct Blade
Always make sure you use an appropriate blade for whichever task you are working on. Nothing will dull a blade more quickly than using it to cut a material that it is unable to cope with. As a general rule, the harder the material you need to cut, the higher quality and more expensive the blade will need to be.
Align Your Saw
Always ensure your saw is properly aligned so the blade runs true. Any misalignment will cause the blade to cut unevenly, which places additional strain on the teeth. It is also crucial that your blade is parallel to the fence, or it could cause back cutting.

Oil Regularly
Moisture in the atmosphere rusts metal blades. Before you store your blade, wipe it with some oil to protect its surface. Applying oil to your blades also lubricates them and helps them move through the material you are cutting more easily, easing the strain on the teeth.
Remove Rust With a Razor
Remove the blade and lay it flat. Run a razor blade along the surface of the saw blade, keeping the razor at a low angle. This will scrape away any rust blemishes. You can also use sandpaper or wire wool to remove rust and extend your blade’s lifespan
FAQs

How Do I Know If My Saw Blade is Dull?
Knowing when to replace or sharpen your saw blade is important for getting the best finish when using a saw. Pay attention to how it cuts to tell if your saw blade is dull. You might also notice wood discoloring when using a dull blade.
If your saw blade begins producing burn marks on the wood as it cuts, this is a sign that the blade is dull and needs sharpening.
Additionally, watch for chipping along the edge of the cut, as this can indicate a dull blade. If you notice that it takes a lot more pressure than usual to get the blade moving, then chances are it has become dull from regular use and should be replaced or sharpened.

How Much Does It Cost to Have Saw Blades Sharpened?
On average, it will cost between 20 and 40 dollars to get your saw blade sharpened professionally by a reputable shop.
Sharpening a saw blade is an important maintenance task that can help keep the blade performing in top condition. You should plan to sharpen your saw blade anywhere from every few days to once a month, it just depends on how much you use it.
However, if you want to save money and are willing to take the time, you can learn how to sharpen your own saw blades at home using various tools like files and sanding belts.

How Many Times Can You Sharpen a Saw Blade?
Depending on the quality of the blade, you can typically sharpen the blade three times before you need to buy a new one. This should give plenty of time to get the most use out of one blade.
When sharpening, always pay attention to how your blade reacts, as this can help you monitor its condition.

Can You Over Sharpen a Saw Blade?
Yes, it’s possible to over-sharpen a saw blade. It actually causes it to become brittle and less efficient when cutting. Over-sharpening can also decrease the life of your saw blade, as the edges will start to wear out more quickly due to the extra wear.
To avoid over-sharpening, only sharpen your blade when it doesn’t cut as easily or smoothly anymore. Use the correct tools for sharpening and follow any instructions given by the manufacturer carefully.

How Long Does a Saw Stay Sharp?
The amount of time a saw blade stays sharp depends on the quality of the blade, how often it’s used, and how well it’s maintained. Generally speaking, good-quality blades can stay sharp for up to three good sharpenings.
But, if your saw is used heavily, you may need to sharpen it more often. To increase the lifespan of your saw blade, only use the best-quality blades and keep them properly lubricated and clean.