The working parts of your toilet are robust, but things go wrong now and then. Knowing how to replace a toilet fill valve is a valuable skill, especially as it saves you money on plumber costs.
Replacing a toilet fill valve is a simple job and relatively inexpensive if you do it yourself. We show you the best toilet float replacement techniques in easy-to-follow steps.
Key Takeaways
- Signs of a failing toilet fill valve include humming sounds, a running toilet, ghost flushing, and long refill time.
- There are four types of toilet fill valves: ballcock, diaphragm, floatless, and float cup valves.
- Replacing a toilet fill valve is a simple and inexpensive DIY task, requiring basic tools like pliers and an adjustable wrench.
- Most toilet fill valves have a lifespan of around five years, but mineral deposits in the water can shorten this.
When to Replace a Toilet Fill Valve
Performing a toilet fill valve replacement is one thing, but knowing when it needs to be done is another. What are the tell-tale signs that your fill valve is dying? Let’s take a look.
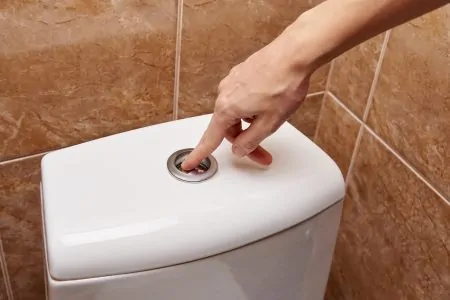
Humming or Whistling Sounds
If you have an old ballcock-style fill valve, the metal parts start to wear out. When that happens, they vibrate during operation. The water pressure causes the components to make low humming sounds as the tank fills.
In extreme cases, your toilet could scream louder than Janet Leigh in that famous Psycho shower scene.
Running Toilet
Another red flag is when your toilet flush won’t shut off, even when idle. This indicates that the flapper is leaking. The flapper is attached to the lift chain and seals the opening between the tank and the toilet bowl.
When you engage the flush valve, the flapper lifts, and water washes the waste matter down the drain. As the tank refills, the flapper closes the hole.
Flappers are robust, but continued exposure to hard minerals in the water makes them brittle. Eventually, they break. Luckily you can pick up flapper and chain kits for a small amount of money.
You can test to see if the tank is leaking by adding food dye to the tank. Wait to see if the water in the bowl changes color. If it does, you have a leak.
Ghost Flushing
Ghost flushing is a symptom of a running toilet. As the tank empties, it sets off the refill tube, and the tank starts to refill. Weaker flushing could also be part of the same problem.
Long Refill Time
If the toilet tank takes longer to refill than usual, it could indicate a problem with the refill valve. The float could be misaligned or incorrectly set, or the valve is nearing the end of its useful life.
Toilet Fill Valve Types
Before installing your new refill valve, you need to identify which type you have. Ballcock floats are more common on older toilets, and floatless fill valves are more typical in modern versions.
Ballcock Fill Valve
A ballcock fill valve consists of a large round ball float attached to a metal arm. As the water level rises or falls inside the tank, the valve moves to adjust the flapper.
The assembly also has a bottom-fill discharge tube and a hinged lever.
Take Note
Ballcock valves don’t comply with current plumbing codes, so you should consider updating to a newer refill valve even if yours is still working.
Diaphragm Fill Valve
Diaphragm valves contain metal and plastic elements. It resembles a ballcock valve, but they are entirely different in how they operate. An adjuster component screws a plunger inside the valve as the float and arm rise.
It then closes the valve nozzle as the diaphragm presses against the plunger in a process known as “pinching.”
Floatless Fill Valve
A floatless valve uses a diaphragm weight rather than a float to control the water flow. You are more likely to find these valves in low-profile toilets designed for smaller spaces.
These fill valves are less reliable than float-operated versions and are prone to problems.
Float Cup Valve
A float cup valve uses a small cup attached to a spring to control the fill valve. As water levels change, so does the position of the cup, telling the valve when to let water out and when to shut off.
Thanks to their predominantly plastic construction, you are more likely to find this valve in modern toilets because they are cheap and easy to replace.
How to Replace a Toilet Fill Valve
So, you finally lost patience with your toilet fill valve and decided it has to go. Here’s a handy guide to help you do it, but you’ll need some tools before we begin.
What You’ll Need
- Bucket and sponge.
- Towels.
- Pliers.
- Adjustable wrench.
- Scissors (optional).
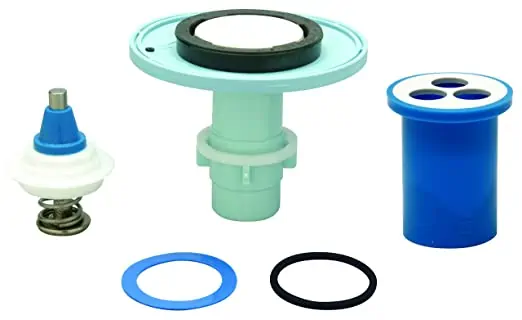
- New toilet fill valve.
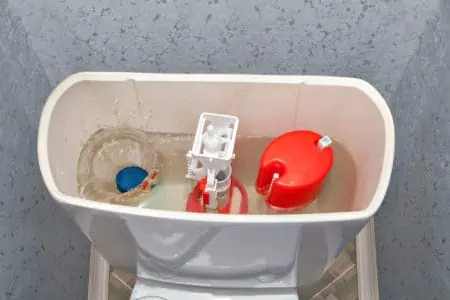
Removing the Old Valve
Before installing the new fill valve, the old one needs to be removed. Here’s how to do it:
1. Drain the Water
Turn the water supply valve to the off position. You can find it behind the toilet, attached to the water supply hose. Empty the tank by flushing the toilet.
Lift the lid and mop up the water residue with the sponge and bucket.
Take Note
If your toilet flush is broken, you can use a hand pump to remove the water.
2. Disconnect the Water Supply Pipe
Remove the pipe that connects to the base of the fill valve using a Workpro adjustable wrench. You can unscrew the mounting nut that secures the fill valve to the tank’s bottom.
3. Remove the Toilet Fill Valve
Reach into the toilet tank and grip the valve with the adjustable wrench while unscrewing the nut from the thread. Remove the nut, and the fill valve will lift free.
Top Tip
Lay old towels around the toilet’s base to catch drips. There is still some water residue in the bottom of the tank.
Installing the New Valve
With the tank drained and the old valve removed, the time has come to install the replacement model.
1. Prepare the Valve
Your new fill valve comes as a kit with washers. Slide the washer onto the base of the valve to seal the bottom of the tank when the nut is tightened.
Adjust the height of the valve by screwing the stem so that it extends or retracts. This helps you set the float to get the correct water levels.
Take Note
The fill valve should sit just above the overflow tube. Any higher, and you risk the tank’s lid not closing.
2. Install the Valve
Insert the threaded end of the fill valve in to the opening at the tank’s base. Position the valve so that the water outlet faces the overflow tube.
Hold the fill valve steady and reach below the toilet to thread the mounting nut. Use the adjustable wrench to tighten the nut, ensuring that the valve doesn’t twist out of position.
Once the nut is tight, reconnect the water supply line, wrapping the threads with Teflon tape for a better seal.
3. Connect the Valve
Attach the rubber water tube to the nipple at the top of the fill valve. The other end clips to the overflow tube using a metal bracket. If the tube is too long, consider cutting it to size with scissors.
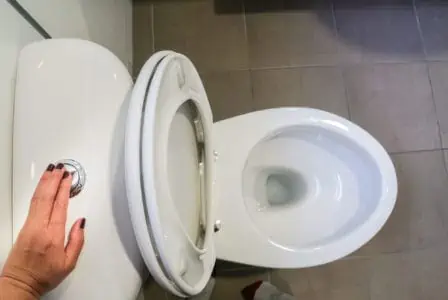
4. Turn On the Water
With the new valve installed and connected, you’re ready to switch the water back on. Reach behind the toilet and turn the isolation valve back on. Wait while the tank fills, checking around the tank’s base for leaks.
If everything is dry, congratulations on a successful installation. All that’s left is to flush the toilet to check the new fill valve works.
Is Replacing a Toilet Valve Easy?
It is easy and only takes about thirty minutes to complete. And best of all, it will cost you less than $20 if you do the work yourself. You can do it without removing the tank, but you do have to drain the water from the toilet.
Hiring a plumber increases the costs massively. They will charge a minimum call-out fee to cover their expenses for such a small job.
FAQs

How Much Does It Cost to Replace a Toilet Fill Valve?
A toilet valve costs about $10 to $20, making it inexpensive to replace. If you hire a plumber, the price rockets because they will charge a minimum call out-fee because the job is so small.

Can a Toilet Fill Valve be Repaired?
You can repair a fill valve, depending on the type you have. Ballcock valves are the easiest to fix. Floatless and cup valves are more complicated because most of the working parts are concealed inside a canister.

How Long Do Toilet Fill Valves Last?
Most fill valves last for five years, although the hardness of the water in your area makes a massive difference. Heavy mineral deposits can reduce the lifespan considerably.
How to Change a Toilet Fill Valve
Don’t panic if your toilet fill valve malfunctions. It is easy to fix, inexpensive, and takes no longer than thirty minutes. You won’t need expensive tools, and you can save a packet on plumber costs.
So, the next time your toilet fails to flush, don’t reach for the phone. Instead, reach for an adjustable wrench and get the job done.