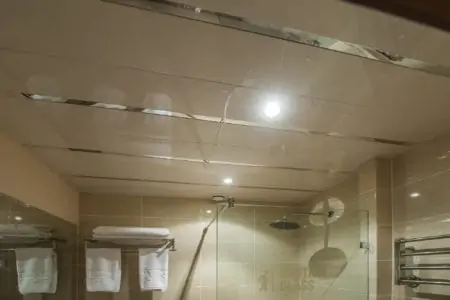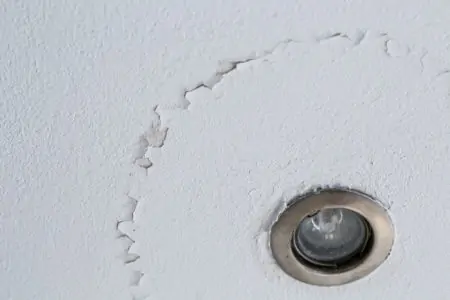
Got an outdated popcorn ceiling that suffered water damage or has holes in it? Some people think they have to pay hundreds of dollars to fix their acoustic ceiling professionally. But I will show you how to repair a popcorn ceiling for less than $50.
Key Takeaways
- Identify the right product: Choose between a popcorn ceiling patch or a textured spray for repairs.
- Prepare the area: Cover furniture and light fixtures, and wear protective gear before starting the repair.
- Fix water damage: Dampen the spot, scrape off damaged bits, spray primer, and apply the texture.
- Repair holes: Find the framing, patch the hole, and apply the texture to blend with the existing ceiling.
Popcorn Ceiling Patch vs. Spray
Part of knowing how to repair a popcorn ceiling is identifying the right products for the job.
Popcorn Ceiling Patch
This product is basically a mixture that allows you to patch holes in your acoustic ceiling. They are usually made using polystyrene chips to mimic the texture of the original popcorn ceiling.
With a popcorn ceiling patch kit, you can repair your textured ceiling when dealing with water damage, holes, cracks, or peeling.
They are available in multiple size containers. Some are really small and perfect for repairing small flaws or holes. When dealing with large holes, the popcorn ceiling patch will eliminate the need to add extra materials into the repairs.
I’d recommend this container of Popcorn Ceiling Patch if you’re looking for one.
Pros
- End results are close to flawless.
- Mimics the texture of the original ceiling.
Cons
- Not always easy to work with.
Textured Spray
Popcorn ceiling sprays come in three textures: fine, medium, and coarse. Selecting the appropriate texture is important if you don’t want your repair to be noticeable. However, you must also understand how to fine-tune the texture’s density and properly spread it to achieve the ideal popcorn appearance.
Spray texture is a far superior option if you’re a novice DIY enthusiast. One thing to keep in mind is that these products are intended for minor repairs only.
Simply shake the spray can for the duration suggested in the instructions and spray the area. Matching the current texture is a trial-and-error process. So, you might want to experiment with various application techniques before putting the product on the ceiling.
Try this Homax textured ceiling spray if you’re thinking about going this route.
Pros
- Very easy to apply.
- Good for inexperienced DIYers.
Cons
- Good only for small repairs.
How to Repair a Popcorn Ceiling
Often referred to as a “sleeping monster,” asbestos found in construction materials does not pose a problem until disturbed. It can become exceedingly toxic, placing anyone who inhales it at risk of contracting fatal diseases such as mesothelioma.
If your popcorn ceilings are in good condition, they are unlikely to produce harmful asbestos fibers. However, if you spot damage, you must act immediately.
Popcorn ceilings made of asbestos are likely fiddled with natural calamities and even typical wear and tear during renovations.
Dealing With Asbestos
Always wear protective gear when dealing with asbestos. And, if need be, hire a professional to keep yourself safe.
With Water Damage
Wondering how to fix a popcorn ceiling with minor water damage? Then follow these steps.
What You’ll Need
- Spray stain-block primer.
- Two or three cans of textured spray.
- Cardboard.
- Drop cloth.
- Plastic sheeting.
- Spray bottle with warm water.
- Dust mask.
- Ladder.
- Safety goggles.
- Putty knife or spackle.
- Paintbrush.
- Drywall joint compound.
- Sander.
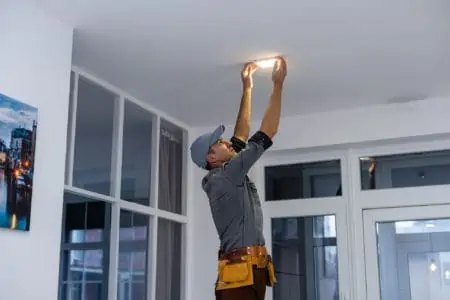
1. Prepare the Area
Make sure you’ve stopped the water leak and cover your working area using a tarp or drop cloth. Make sure you cover all the furniture, wrap some plastic around your light fixtures, or take them down. Be prepared to make a mess.
2. Dampen the Spot
Safety First
Be sure to put on a dust mask and your safety goggles.
Put some warm water in a spray bottle and dampen the textured area you want to remove. Spray and wait for about five minutes.
3. Scrape the Bits
Hold the cardboard piece underneath the area you want to scrape and use your putty knife to scrape it. This will remove flaky, stained, or loose ceiling bits.
4. Spray the Primer
Spray a special primer like this Zinsser Covers Up Ceiling Paint & Primer. This will block stains over the ceiling area that has suffered water damage. Allow it to dry completely.
5. Spray the Texture
Take the spray texture can and shake it for a few minutes. Hold the can nine to 14 inches away from the ceiling.
Squeeze the trigger in short, half-second bursts while sweeping it over the damaged area. Leave it to dry for at least 24 hours if you plan to apply paint.
With a Hole
Small to medium-sized holes are actually pretty simple to fix with these easy steps.
What You’ll Need
- Spray texture.
- Drywall tape.
- Drywall screws.
- Drywall compound.
- Drywall.
- 1×2 boards.
- Utility knife.
- Taping knife.
- Safety glasses.
- Dust mask.
- Mud pan.
- Drywall sander.
- Cordless drill.
- Drywall saw.
1. Find the Framing
Use a nail to probe the ceiling with the goal of finding the framing.
Make a mark between the frame and then cut between those two lines until you reach the framing. Then, cut parallel to the framing along the sides.
2. Patch the Hole
Screw ¾-inch cleats to the side of the trusses. This will help repair the vapor barrier and give the new drywall something to attach to.
Put in a fresh piece of drywall using black drywall screws. Make sure they’re inset into the drywall just a bit, rather than sticking out. Otherwise, you’ll risk them poking through the tape.
3. Apply the Texture
Wet the edges of the drywall patch and allow it to soak for a few minutes. This will help it adhere.
Tape the joints using drywall tape and ensure it’s nice and flat. Then proceed to apply the texture application of your choice.
Take Note
This tutorial also works if you’re trying to fix a crack in your popcorn ceiling.
Popcorn Ceiling Repair Cost
The average cost of supplies to repair a popcorn ceiling in the United States is $16.05 per patch, ranging from $15.02 to $17.08. The total cost of labor and materials for each patch is $339.89, ranging from $302 to $377.58.
Your real cost may vary depending on your location, the size of the job, the conditions, and the finish options you select.
For a DIY project, you only need to factor in the cost of the materials you buy for repairs.
FAQs
You don’t want to mess this up. So, if you’re looking for some extra info on this topic, check out these answers.

How Do I Fix a Peeling Popcorn Ceiling?
Peeling popcorn ceilings are repaired by removing the damaged sections and reapplying a new texture coat. The procedure utilizes inexpensive items readily available online or found at home improvement shops.

How Do I Know If My Popcorn Ceiling Has Asbestos?
Visual examination of a popcorn or stucco ceiling does not reveal whether it contains asbestos. The most accurate approach to establishing whether asbestos is present in your ceiling is to get it tested professionally.

Is It Worth Removing Popcorn Ceiling?
If you plan on selling/renting the place anytime soon, it’s surely worth removing a popcorn ceiling. Doing so can increase the home’s value.
Final Words
It feels less of a challenge once you know how to repair a popcorn ceiling. Repairing popcorn ceiling surfaces is mostly a matter of having the time and the patience to do so. Learning how to fix a popcorn ceiling by yourself can end up saving you hundreds of dollars.