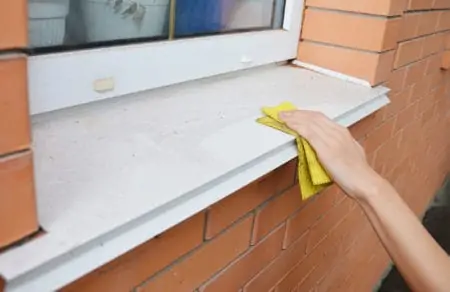
When you think about the amount of punishment your door frame gets, is it any wonder it weathers, splits, and rots? Endless rain, sun, and wear and tear take their toll, making door frame repair necessary.
Luckily, repairing a door frame is not as challenging as you might think, especially thanks to our detailed “How to repair a door frame” guide. We even show you how to protect your door from future damage.
Key Takeaways
- Repairing a door frame: Locate and assess the damage, remove any damaged sections, and replace with new wood or filler.
- Protecting a door frame: Use anti-pet sprays, install metal plates, apply cat training tape, or use a pet shield to prevent future damage.
- Fix a broken door frame latch: Adjust the strike plate to align with the latch and ensure the door is not sagging.
- Fix a rusted door frame: Remove rust with a wire brush and sandpaper, then apply primer and paint for long-lasting protection.
Can a Door Frame be Repaired?
A lot depends on the extent of the damage. Surveying the door frame is an excellent way to determine if it is repairable. There are two areas to consider:
Depth of Damage
If the damage runs too deep, restoring the door frame to its original condition could be tricky. If you have a dog, chewed door jambs present a particular challenge because the wood will be sheared and splintered.
The gouges may also run deep. However, the beauty of working with wood is you can cut away damaged sections and replace them with new wood. And sanding and painting hide a multitude of sins.
Area of Damage
If more than 50 percent of the door jamb is damaged, it is probably better to replace the frame. This is especially true if the damage is severe enough that a repair is near impossible. Assessing the area of damage helps you determine the eventual solution.
Making extensive repairs is possible, but what’s the point when replacing the frame is easier?
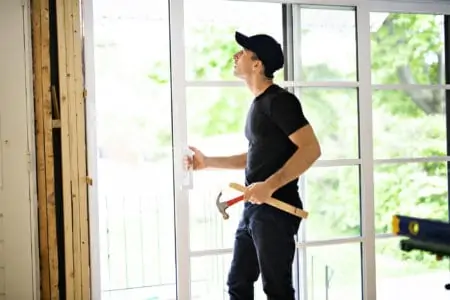
How to Repair a Door Frame
Once you’ve decided that repairing the door jamb (the proper name for the frame) is possible, it’s time to get started. However, not all the solutions are the same. The type of damage makes a difference.
Split Door Frames
Splitting may occur because the door has been kicked in. Another reason could be the wood cracking and splitting in direct sunlight. In some instances, it could just be surface damage, and other times, it runs deeper.
What You’ll Need
- Hammer and chisel.
- Tape measure.
- Pencil.
- Saw.
- Jigsaw.
- 2×4 timber.
- Wood glue.
- Screws.
- Nails.
- 120-grit sandpaper.
- Wood filler.
- Putty knife.
1. Locate the Damage
Examine the door frame for splits. You may have multiple areas of damage, and more than one section needs attention. The frame and door sustain considerable damage whenever a door is kicked in.
You will most likely discover the split on the middle of the frame, where the strike plate sits. This is the obvious point of impact to try and dislodge the latch.
2. Remove the Door Strip and Molding
Use the hammer and chisel to pry away the door strip and molding. Take care not to damage it because you will need it later.
Use the claw end of the hammer and pull out any finishing nails. You can also use the claw if you have any stubborn areas of molding that need extra persuasion.
3. Time to Measure
Grab the tape measure and mark six inches above and below the split with the pencil. Use a spirit level to draw a straight line across the width of the door jamb.
4. Start Cutting
Insert screws into the door jamb, an inch above and below the cut lines. It secures the door frame when you remove the section in the middle. It also helps to keep the new section of wood flush with the rest of the door frame.
Now use the saw and make the cuts above and below the split.
Take Note
Don’t cut too deep, or you may damage the fabric of the wall. When the saw goes slack, you know you have cut through the 2×4. To be certain, inspect the cut regularly.
5. Prepare the Replacement Timber
Measure the damaged section of the door jamb and mark the same dimensions on the strip of replacement 2×4. You can buy door frame kits, like this Fix-A-Jamb Kit, which comes with pre-cut wood and added security features.
Cut the wood to size using the jigsaw or the handsaw and smooth any rough edges with the 120-grit sandpaper.
Be Aware
Weather-treated timber is the best type for door frames. Never use pressure-treated wood as it will warp when it dries out.
6. Attach the New Piece of Timber
Place the new piece of timber in the gap to see if you have the correct measurements. If it fits, run three lines of wood glue along the back of the wood and press it into position.
Hammer two nails into the replacement wood to hold it firm while the glue sets. Wood glue sets thin, so it doesn’t interfere with the wooden pieces sitting flush. You can also buy waterproof wood glue for exterior frames.
7. Time to Sand
Once the glue dries, sand the door frame to smooth the join lines and remove excess wood glue.
8. Wood Filler
Use the wood filler to cover the gaps. Smooth it in with a putty knife and wait while it dries. Sand the areas covered with wood filler so you can’t see the joins, and apply two coats of primer and two coats of topcoat.
Rotted Door Frames
When water penetrates your door jamb, it swells the wood. Unless you deal with it quickly, the wood fibers become saturated and start to break apart. Rot can be a devil to cure because it spreads.
What You’ll Need
- Tape measure.
- Pencil.
- Dremel or chisel.
- Wire mesh.
- Screws.
- Wood filler.
- Putty knife.
1. Locate the Rot
The most common location for wood rot is at the base of the door, where the jamb makes contact with the wet ground. Plus, water runs down the frame and pools, causing the wood to rot.
Measure the affected area and draw an outline with a pencil.
2. Cut the Rot Out
Fire up the Dremel and cut along the pencil line to remove the rotted area of wood. You can use a chisel, but it will take longer. Take care to cut all the rot out; even the smallest piece could cause the fungus to spread.
If the rot goes deeper than the door jamb, you will need to make further investigations. Also, check the door for rot because anything that comes into contact will cause the fungus to spread.
3. Insert the Wire Mesh
Push the wire mesh into the carved-out area and hold it in place with screws. The wire mesh is the base to get the wood filler to adhere.
4. Fill the Mesh Cavity
Use the putty knife to fill the mesh cavity with wood filler. Keep adding filler until all the mesh is covered. Wait while the filler dries according to the manufacturer’s specifications, then remove excess filler with the chisel before it dries.
Epoxy-based fillers, like this Woody Wood Epoxy Paste, are better for exterior door frames because they cope better with moisture.
Top Tip
Work quickly because once mixed, epoxy filler dries fast.
5. Allow the Epoxy Filler Time to Dry
Leave the epoxy-based filler overnight to allow it time to cure, and once dry, sand with 120-grit paper. To get a smoother finish, use 240-grit to remove any surface blemishes. Once dry, the filler is often harder than the wood surrounding it.
Slightly Warped Door Frames
Interior frames are just as likely to warp as exterior jambs. This is because your heating dries the wood, causing it to twist. The repair involves straightening the wood to solve the issue in most cases.
Warping is only a problem if it affects how the door operates. There are many old houses where the frames, walls, and floors have warped over the years, and yet the doors are still operational.
What You’ll Need
- Chisel and hammer.
- Mallet.
- Putty knife.
- Tape measure.
- Spirit level.
- Utility knife.
- Nail gun.
- Pry bar.
- 2×4 timber
- Miter saw.
- Pencil.
1. Remove the Door Stop and Molding
Using the hammer and chisel, gently tap the door stop and molding free. Try not to damage them, as you will need to use them later to reattach to the frame.
Always start at the bottom and work towards the top, applying firm pressure. Use the claw hammer to remove any finishing nails.
2. Remove the Shims
Pull out the concealed shims from between the wall and the frame. Door shims help to square and level the door frame. You cannot adjust the warped frame with the shims in situ.
Take Note
Make a note of the shim locations because they need to return to the same position. Ensure that there is a shim next to each hinge on the hinge side of the door.
3. Straighten the Frame
Use the mallet to force the frame in the direction needed to sit straight. Ensure that the door is closed to give the frame additional support when you do this. It also helps you check that the door is level with the jamb.
Top Tip
Don’t hammer directly onto the door frame as this will damage the wood. Use a small but thick off-cut to sandwich between the mallet and the jamb.
4. Measure Frequently
Check the measurements at regular intervals to establish that the frame is square and straight. Measure the door gaps on both sides and from top to bottom to check the door and frame are straight.
5. Reinsert the Shims
Replace the shims once you are happy that the frame is straight. Check the measurements of the door gap again after you have done this. Also, don’t push the shims in all the way because you may still need to remove some as you make adjustments.
Wooden shims work best on internal doors, but plastic ones are better on exterior frames. This is because they won’t rot when they make contact with moisture.
Use the spirit level to ensure the frame is upright, and open and close the door several times to check it operates as it should. If the door still seems to be misaligned, keep adjusting with the mallet and the shims.
Add more shims if necessary to brace the door and hold it square. Don’t forget to nail the shims in place once you are happy with their placement.
6. Replace the Door Moldings
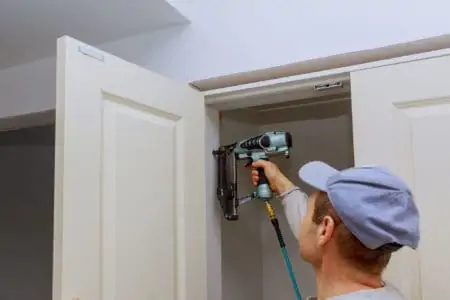
Grab the nail gun and reinstate the door stop and moldings. Don’t forget to score the shims with the utility knife and snap off the excess.
Severely Warped Door Frames
Sometimes your door frames are too far gone, and the warped wood needs to be removed. It does involve more work and takes longer, but the final result is a straight frame.
What You’ll Need
- Pry bar.
- Screwdriver.
- Hammer and Chisel.
- Weather-treated 2×4 timber.
- Miter saw.
- Nail gun.
- Pencil.
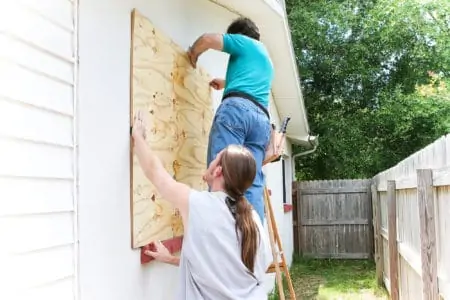
1. Remove the Molding
Start by removing the doorstop and molding with the hammer and chisel. Take out the screws and finish nails. Using the pry bar to pull the frame from the wall, start at the bottom, working towards the top plate.
Once the jamb is almost removed, pull the frame away from the top plate with your hands. You may need to wiggle it to work it loose.
Don’t forget to note the shim locations before removing them. If you only remove one side of the frame, you can leave the top plate and non-warped side in situ.
2. Repeat the Process on the Other Side
If the damage is so severe that the other side of the door frame is warped, you will need to remove that side too. Use the same technique as before. If the hinge-side of the jamb is affected, you will also need to remove the door after removing the hinges.
3. Cut the Timber to Size
Fire up the miter saw and let it reach full speed. If you are only replacing one side of the frame, grab the 2×4 and make the appropriate cuts. Weather-treated wood is the most commonly used for door frames.
If you replace the entire frame, use the old jambs and top plate as a template. Cut your wood to size and glue the pieces together. Wait while the glue sets. You can use the nail gun to help secure them.
4. Replace the Door Shims
Reattach the door shims with the nail gun in the same location as before, using a spirit level to ensure the shims are level. If the shims are damaged and not usable, purchase some new ones from the hardware store. You can use as many shims as you like.
5. Insert the Frame
Push the frame into the gap and ensure it is level with the shims. Hammer two nails through the frame and each shim to help secure the frame to the wall stud.
Top Tip
Don’t insert the nails fully because you want a bit of wiggle room if you need to make adjustments.
6. Level the Frame
Use the spirit level to check that the frame is level with the wall. Use the nail gun and secure the frame to the studs. Now reattach the door stop and molding with the nail gun.
Damaged Door Frame
Your door frame gets damaged from door keys, bumps and scrapes, and animal bites. Luckily, most of this type of damage is minor and pretty straightforward to correct. The work is a little fiddly, but it doesn’t involve removing large jamb sections.
What You’ll Need
1. Identify the Damage
Examine the door frame, looking for nicks and scuffs. A great way to find minor damage is to shine a flashlight over the surface. Also, run your fingers over the door jamb and feel for imperfections.
Use your fingernails and pick at the nicks to see if any wood comes away. It helps because you want a secure base for the filler to adhere to when it sets.
2. Use Wood Filler
Grab the putty knife and apply the wood filler to the affected areas. An ordinary wood filler is best for lighter cosmetic damage because it is easier to work with. If the jamb gets more wear and tear (like in areas near the lock), it is better to use epoxy-based filler.
Epoxy filler dries rock hard and is more robust than the wooden door jamb. Alternatively, for minor imperfections, grab the 120-grit sandpaper and smooth the surface. Wait while the wood filler dries, and then sand smooth any imperfections.
3. Prime and Paint
Once the filled section has dried, apply two coats of primer. Wait while it dries, and then apply two coats of paint. For the smoothest results, it is better to sand between each coat.
How to Protect a Door Frame from Future Damage
Fixing the damage on your door frame is one thing, but what if you could prevent it in the first place? You can take steps to deter pets from chewing or scratching your wooden frames and general wear and tear.
Use Anti-Pet Spray
You can buy specialist pet sprays that deter would-be vandals from damaging your wooden frames. Dogs love to chew, especially when they are puppies, as it’s a great way for them to relieve teething pains.
Products like this Stop the Chew Spray Deterrent work by coating the wood in a bitter solution that your pet hates.
Install Metal Plates
Covering your door frame in a thin metal plate protects the wood below. This is especially useful in areas of the jamb that get the most wear and tear, like the lock. Inaccurately placed keys scratch and dent the wooden surface.
Cat Training Tape
Like this JXSelect Anti-Scratch Tape, cat training tape applies easily and protects your door and frames from sharp claws. It is non-toxic to the cat and leaves no damage to surfaces.
Pet Shield
Door guards keep your pet’s claws from scratching your doors and frames. Products like this Heavy-Duty ClawGuard create a barrier to preserve your door frames. It installs in seconds, and you don’t need adhesive or stickers to secure it.
FAQs

What Causes a Door Frame to Split?
The most common reason why your door frame splits is a hard impact. The wooden frame gets busted when the door slams or someone tries to gain entry by kicking the door.
It could also be caused by the wood drying out, although that would typically result in warping too.

How Do You Fix a Broken Door Frame Latch?
The easiest way is to adjust the strike plate to align with the latch. Sometimes, the door’s weight causes it to sag, which means the latch and the strike plate no longer match up. Shut the door and note the latch location to adjust the strike plate.

How Do You Fix a Rusted Door Frame?
After removing the hinges, remove the rust with a wire brush and clean out any dents using coarse-grain sandpaper works best. Take the frame back to the bare metal, then apply two coats of metal primer. Wait while it dries, and then apply two coats of paint.

Will Painting Over Rust Stop It?
If you are just painting over rust with standard metal paint, it won’t stop the rust from spreading. It will look better cosmetically, but you should remove the rust first and then use a primer for the best results.
You can buy products like this Black Star Liquid Rust Converter that turns rust into a paintable surface.
In the Frame
Your door frames get a lot of abuse, so is it any wonder that they bear the scars of daily use? Showing your door frames the love they deserve is the best way to preserve them in good condition.
Most damage is minor, but those little nicks and scuffs accumulate over time, making your door jambs look unsightly. So, what are you waiting for? Let’s get started.