Knowing how to repair ceiling cracks is crucial if you want to keep your ceilings in pristine condition. Ceiling crack repair should be high on your agenda because cracks appear for several reasons: house settlement, water damage, and sagging.
This article looks at how to fix ceiling cracks, the root causes, and the cost of ceiling repair.
Key Takeaways
- Causes of ceiling cracks: excess pressure on floor joists, water damage, house settlement, and sagging.
- Hairline cracks can be fixed using crack cure products, patching filler, decorator’s caulk, or textured paint.
- For larger cracks, use mesh drywall tape, drywall mud, or instant patch to repair the damage.
- When fixing textured ceilings, use a mini texture gun, popcorn ceiling patch, or plaster over the popcorn ceiling.
What Causes a Ceiling to Crack?
Several factors can damage your ceiling. Excess pressure on the floor joists above can cause cracks to appear. Maybe you’ve installed a gym in the spare bedroom, and the extra weight of the equipment is adding strain to the floor?
Look for obvious signs like water stains. Even the smallest leak can make the wood and plaster swell and become waterlogged. When that happens, cracks appear.
If you spot hairline cracks like an intricate spider’s web, it could be shrinkage of the joint compound when it is applied too thick.
For those living in new properties, cracks appear as the house settles. Newly plastered ceilings shrink as they dry when the heating comes on.
When to Worry About Cracks In the Ceiling
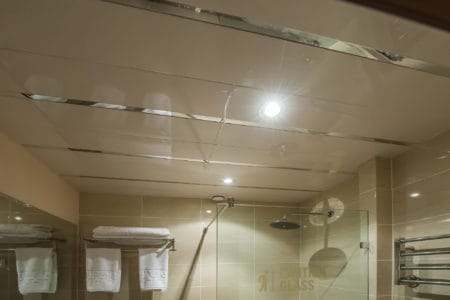
Hairline cracks are one thing, but when you realize that the white flecks in your hair are plaster and not dandruff, it’s time to worry. Falling plaster could be a symptom of a sagging ceiling. If left unchecked, the entire thing could come down on top of you.
Another cause for concern is a growing crack. “I’ll sort it out at the weekend,” you tell yourself, and by Friday, it’s increased in size. An expanding gap means that whatever is causing it is still active. The most common culprit is a water leak and should be fixed ASAP.
Repairing Hairline Cracks in the Ceiling
Hairline cracks may be less evident to the eye, but when they spread, your ceiling looks like an old painting by a Dutch master. Luckily, hairline cracks are a lot easier to deal with than other cracks.
Crack Cure Products
One of the most straightforward solutions for treating hairline cracks is to buy a ready-made crack cure, like this Leak Stopper Rubber Flex. It works by forming a waterproof seal over leaks and cracks and flexes when the ceiling moves to prevent further cracking.
Simply point and spray and wait while it cures. When dry, you can coat it with latex-based paints. It doesn’t contain any solvents and is UV-resistant, so it won’t perish in the sun.
Patching Filler
Filler comes in several forms, from compounds to powder that requires mixing. Ready-mixed products, like this DAP ElastoPatch, are ideal for skimming hairline cracks. You will need a plastic knife set, like this Red Devil Three-Piece Set, to smooth the compound.
Simply scoop the filler onto the plastic knife, and rub it over the hairline cracks. For the smoothest finish, consider fine-grit sandpaper to remove rough edges.
Decorator’s Caulk
No tool kit would be complete without caulk. It is the answer to a thousand prayers, including hairline cracks in your ceiling. Snip the end of the nozzle, load the tube into a caulk gun, like this Newborn model, and squeeze the trigger.
The caulk can be spread into the cracks with a plastic knife. It is also useful for fixing more significant gaps in your ceiling.
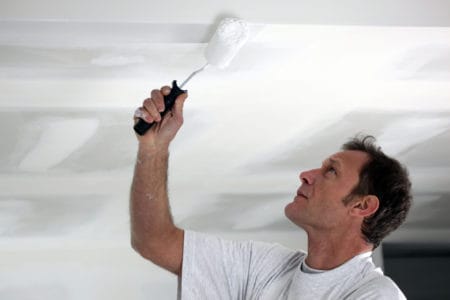
Use Textured Paint
Ceiling paint is smooth and ineffective at covering cracks, but a textured additive gives it similar qualities to a popcorn ceiling. This Additive by Zinsser transforms regular paint, making it easier to cover minor gaps.
The great news is you can pour the paint into a tray and apply it with a roller.
How to Fix Cracks In the Ceiling
Dealing with more significant cracks in your ceiling is challenging. The effort to conceal the patch repair is more thorough and requires a robust solution.
Mesh Drywall Tape
Drywall tape is usually reserved for drywall seams. It has a highly adhesive backing that bonds to drywall and other surfaces to conceal cracks. This Mesh drywall joint tape is cheap to buy and bonds to wood, plaster, drywall, cement, plastic, and rubber.
Ensure that the ceiling is free from dust and completely dry before applying. The tape peels away from the surface if dirt weakens the bond.
Press it over the crack and smooth it with your fingers to remove air bubbles. The high-density weaving technology gives the tape a high-tensile strength, and it has a strong alkali resistance.
Top Tip
Use a rolling pin or a tin can to roll over the tape’s surface and seam to get it smooth.
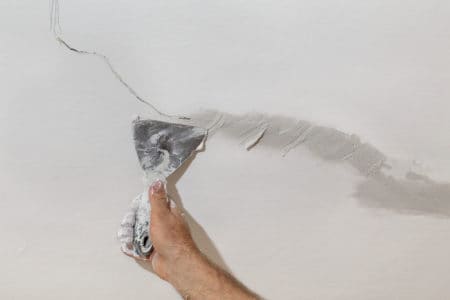
Drywall Mud
Drywall mud or spackling compound, as it’s otherwise known, is a ready-mixed filler ideal for deeper and more expansive cracks. It smooths on like a putty with a plastic spreading knife and dries hard.
Once dry, it can be sanded smooth and painted with a topcoat. The key is to allow the mud to dry rock-hard and apply primer before painting.
Instant Patch
Instant patch, like this 12-piece sheetrock repair kit, is ideal for covering broader and deeper cracks. It works by creating a bridge across the gap with a mesh surface to help the filler grip.
These patches are a repair person’s dream because all you do is stick it to the ceiling and apply a filler layer.
How to Fix Ceiling Cracks In a Textured Ceiling
Safety First
Popcorn ceilings installed before 1978 may contain asbestos, which is highly toxic and can cause cancer if inhaled. If you suspect you have this problem, you should take precautions if you intend to remove it. Seek the advice of a professional before attempting a DIY removal of your textured popcorn ceiling.
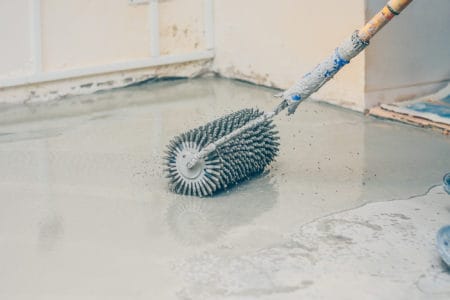
The easiest way to solve this problem is to plaster over the popcorn ceiling, concealing it beneath a smooth layer.
If you decide to remove the ceiling, wear an N95 face mask, goggles, and a disposable bodysuit, like this YIBER Disposable Hazmat Suit. Dampen the ceiling to reduce dust particles, and use a heat gun to strip away the layers.
You will need to consult with your local building department to ensure you are compliant with the rules.
Mini Texture Gun
Your textured ceiling discolors, cracks, and gathers dust as it ages. A great way to refresh your ceiling and cover over cracks is to apply a new layer of texture. Using a tool like this Wagner Spraytech Textured Paint Sprayer gets the job done faster.
Simply load the one-gallon hopper with your chosen textured coating, point it at the ceiling, and spray.
Popcorn Ceiling Patch
A Popcorn ceiling patch is useful for making minor repairs to your textured ceiling. It comes in ready-mixed tubs and spreads like drywall mud. You apply it with a thick paintbrush rather than a putty knife, and it dries to match your popcorn pattern.
It’s a great way to repair cracks and blemishes from water damage, and when it dries, you can coat it in your favorite color paint.
Take Note
Before painting, allow the popcorn ceiling patch to cure fully. For the best results, leave it overnight.
FAQs

How Much Does It Cost to Fix a Cracked Ceiling?
Depending on the size and scale of the cracking, it could set you back between $150 and $400 if you get a professional in to complete the work. They charge between $50 and $100 per hour, and the project will take between two and four hours.
The cheapest option is to do it yourself. You only shell out for the materials, which could be as little as $10.

Why Does My Ceiling Crack Keep Coming Back?
A recurring ceiling crack could be the result of something more serious. The crack comes back because you are applying a sticking plaster to a more deep-set problem. It may be better to opt for a complete ceiling restoration.
It’s better to find the root cause of your ceiling cracks so that you can correctly deal with them.
The Last Word on Ceiling Cracks
When your ceiling needs a makeover, don’t put it off. Unsightly cracks detract from the overall appearance of your room and could be a precursor to a more serious problem. Repairing ceiling cracks isn’t complicated or expensive and is within the skill set of average DIY enthusiasts.
Just remember to take precautions when repairing a popcorn ceiling. It may contain asbestos if installed before 1978.