We’ve all been there. The water in your sink starts to drain away slowly, and then eventually, it stops altogether. Your sink stopper is a prime candidate to gunk up, leaving you wondering what to do. Well, wonder no more!
We show you how to remove a sink stopper in easy-to-follow steps so that you can wave goodbye to blocked sinks for good. And the good news is it’s easier than you think.
Key Takeaways
- Slowly draining water indicates a blocked sink, requiring sink stopper removal.
- Essential tools include a wrench or pliers, flashlight, old toothbrush, bathroom detergent, vinegar, bucket, and hair clog remover.
- Remove the sink stopper by lifting it by hand, then unscrewing the pivot nut and removing the stopper from above the sink.
- Clean the sink stopper and drain hole with detergent and vinegar before reassembling the stopper assembly and testing its function.
Tools Needed To Remove a Sink Stopper
Before you leap in with both feet and get started, we need to run through the list of tools you will need to perform the task successfully. While some are essential, like the wrench or pliers, others are advisory and open to your discretion.
Wrench or Pliers
This is to help you remove the nut if it is tightly fitted. Reaching into the stopper hole can be fiddly, so the pliers will help you grip.
Flashlight
Trying to see what you are doing beneath the sink might be difficult. There isn’t a lot of light under there, so a flashlight is perfect for the task.
An Old Toothbrush
This won’t help you remove the stopper, but it will help you to clean it once you remove it from the hole.
Bathroom Detergent
The reason why your sink stopper is blocked is because of dirt and grime, and detergent helps to clean it before you put it back in situ.
Vinegar
Vinegar is an excellent cleaning solution, especially when added to a bucket of water. If you have some to hand, give it a try.
Bucket
Placing a bucket under the sink stops any leaks from damaging your floor. It’s also useful if you need to soak the stopper in vinegar and water to remove stubborn grime.
Hair Clog Remover
Once the stopper is out, you will need a tool that can reach in and pull out any matted and clogged hairs inside the sink. If you don’t, the problems come right back to haunt you.
How To Remove a Sink Stopper
So, you’ve gathered the necessary tools, and you’re raring to go. Let’s get started then.
1. Lift It by Hand
Sometimes the easiest solution is the obvious one, so before you start delving into your toolkit, try and lift the stopper by hand. As you pull it up, twist it to see if it comes free.
If not, you need to move to plan B.
2. Clear Under the Sink
You need access under the sink, so clearing away any stored items is essential. It also makes it easier for you to get access to the working end of the sink.
3. Look for the Plunger Rod
Grab the flashlight and look for the horizontal plunger rod. It’s the small stick that attaches to the stopper and the strap, which is a long piece of metal with holes.
4. Unclip the Rod From the Strap
The rod attaches to the strap via a small clip. Remove the clip and place it somewhere safe, and the rod should detach from the strap.
5. Unscrew the Pivot Nut
At the other end of the bar is a pivot rod that allows the stopper to lift and lower when you operate the lever. Place the bucket under the sink to catch any water residue and unscrew the pivot nut.
Remember that your drain is blocked, so you are likely to get dirty, slushy water dripping into the bucket. It might also smell.
Try and get it loose by hand, but use the wrench or pliers for extra leverage if it is stuck. When it starts to move, continue loosening it by hand.
6. Remove the Stopper
You are now free to lift out the stopper from above the sink. While it is out of the sink, it’s a good idea to give the drain hole a really good clean. You can use the bathroom detergent for this. The sink stopper is likely to gunk up, so fill the bucket with water and vinegar and soak it for 15 or 20 minutes.
7. Use the Hair Remover
While the stopper is free, grab the hair remover and insert it into the hole. The beauty of this tool is it reaches deep into the drain to capture stubborn hairs. It will also lift out the gunk matted with the hair.
When you remove the hair extractor tool, be careful because it might flick gunk into the air.
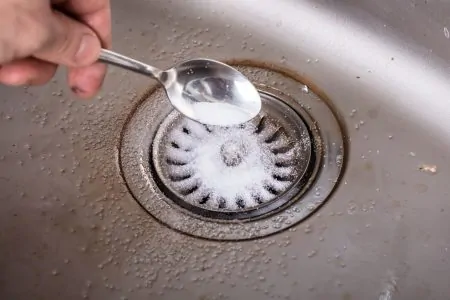
8. Clean With Vinegar
Again, as a precaution, once you’ve removed the blockage of hair and gunk, you might want to pour some of the vinegar down the drain to give it a thorough clean.
The more cleaning you do before returning the stopper, the less likely it is you will suffer blockage issues later on.
9. Replace the Stopper
Push the stopper back into the drain hole and make sure it is fully closed. Now crawl under the sink with the flashlight and do everything you did before, except in reverse.
Screw the locking nut back into place using the pliers or the wrench, then reattach the clip that connects the lifting rod to the strap, making sure that you connect it to the same hole as before.
10. Test the Stopper
Now it’s time to test that the stopper opens and closes when you push or pull the lever. If it does, everything is as it should be and you can congratulate yourself on a job well done.
Tips for Removing Sink Stoppers
There’s the easy way, and there’s the hard way. We show you all the best hints and tips to make removing your sink stopper easier.
Use Your Camera Phone
This tip applies to so many DIY tasks around the home. How many times have you stripped something apart and then forgotten how to put it back together?
Grab your cell phone and take a few pictures of the stopper assembly beneath the sink. That way, when you come to reassemble it, you’ll know which hole the lift rod attaches to.
Use Matching Parts Where You Can
The easiest way to a successful outcome when removing the sink stopper is to try and replace like for like. That way, you know the spare parts will fit, and you don’t have to spend extra time working out a solution.
Replace the Entire Stopper Assembly
While this is a more costly approach, if you have an older model sink and stopper, you may struggle to get the spare parts. Instead of wasting precious time trying to get a square peg to fit into a round hole, why not consider replacing the stopper assembly inside the sink.
That way, when you experience future malfunctions, the spares are always available.
Use a Tray
When you disassemble plumbing like the sink stopper, you often have small items that need to be safely stored until you are ready to reassemble. The small clip that connects the lift arm with the strap is a good example.
Use a wooden or cardboard tray to place these items. That way, you will always have them to hand.
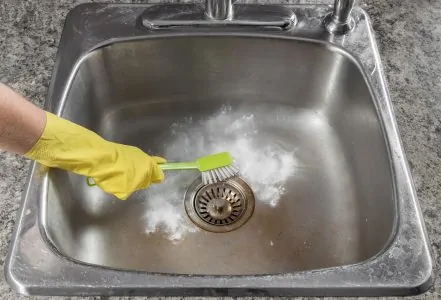
Use Rubber Gloves
Rubber gloves are not just for washing up. They actually give you extra grip when things are wet, which helps when you are unscrewing fiddly components from your sink stopper assembly.
Plus, with all that dirty gunk inside the stopper, including matted hair, it makes removing it all a far more pleasant experience.
Deal With the Problem Early
It’s always the best advice to tackle any blockages early. The longer you leave it, the harder the task will be. What might be a small issue now could become a major repair if you try to ignore it.
It’s Easier Than You Think
Hopefully, we have demonstrated that removing the sink stopper is easier than you might think. The aim is to get you to roll up your sleeves and get stuck in rather than calling in a plumber and incurring huge labor costs.
Plus, you get the satisfaction of knowing that not only did you successfully fix the problem, you also have the confidence to tackle other plumbing jobs.