Do you still have a popcorn ceiling that just makes your house look old and outdated? Not only does it look old-fashioned, but it might contain asbestos, which is a danger to your health.
Let’s learn how to remove a popcorn ceiling. We’ll share what the scraping and no-scraping methods are, and some tips on how to do it easier.
Key Takeaways
- Test for asbestos before removal, as older popcorn ceilings may contain this harmful substance.
- Protect surroundings with drop cloths, and wear safety gear including a dust mask and safety goggles.
- Wet the ceiling with a garden sprayer to soften the texture, then gently scrape it off with a wide putty knife or drywall taping knife.
- Alternative methods include covering the popcorn ceiling with tongue-and-groove planks or a new layer of drywall.
- Why Should I Remove My Popcorn Ceiling?
- Can I Remove a Popcorn Ceiling Myself?
- Textured Ceiling Removal Before and After
- Removing and Refinishing a Popcorn Ceiling
- How to Remove a Popcorn Ceiling Without Scraping It
- How to Cover Popcorn Ceiling Without Removing It
- Tips For Popcorn Ceiling Removal
- FAQs
- The Wrap Up
Why Should I Remove My Popcorn Ceiling?
Textured ceilings were popular decades ago. These days, removing popcorn ceilings might be a wiser idea for various reasons.
To Get Rid of Asbestos
There is a substantial risk of asbestos and lead contamination in some older homes with popcorn ceilings. If dangerous compounds are found in the popcorn ceiling, specific equipment must be used to remove them.
Safety First
Do not attempt to remove asbestos yourself until you’ve read up on the dangers and safety precautions. If you’re unsure, hire a professional.
In this case, scraping popcorn ceilings can be dangerous.
To Make a Room More Elegant
Having a popcorn ceiling can diminish the value of a home because most purchasers and renters don’t like it. Removing a popcorn ceiling completes a remodeling job by giving the house a more modern and well-maintained appearance.
For Better Paint Results
Rather than a crater-like surface, removing the popcorn grain from ceilings gives a smooth flat surface. It doesn’t matter if you’re painting a whitewashed ceiling or a custom color if you don’t remove the popcorn ceiling first.
Makes the Ceiling Easier to Clean
The rough, bumpy texture of popcorn ceilings makes them difficult to clean. Since they are prone to dust, debris, and even insect gatherings, popcorn ceilings can eventually lead to poor indoor air quality.
To Eliminate Falling Ceiling Texture
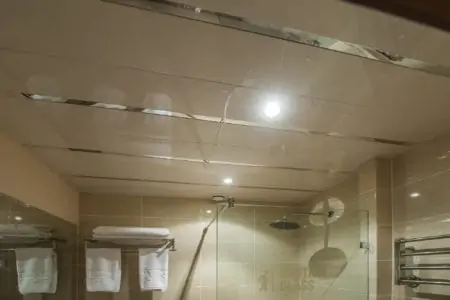
Moisture and popcorn ceilings don’t mix well. Popcorn ceilings in kitchens and bathrooms are more likely to loosen and fall due to the moisture present.
To avoid having chunks of popcorn texture fall on you when you get out of the shower, it’s best to remove the popcorn ceiling.
Can I Remove a Popcorn Ceiling Myself?
Yes. Once you learn how to get rid of a popcorn ceiling, you’ll feel much more confident about getting rid of it without calling in a professional. Certain methods allow you to hide popcorn ceilings without scraping, simply by covering them.
Textured Ceiling Removal Before and After
Removing and Refinishing a Popcorn Ceiling
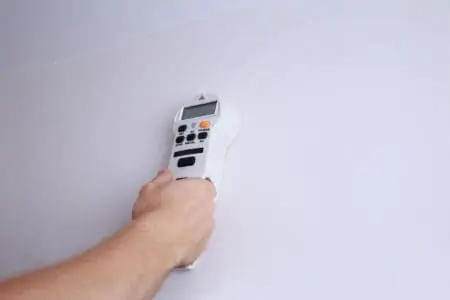
Asbestos was a common element in textured popcorn ceilings before the early 1980s. Homebuilders relied on the fire retardant and sound-absorbing properties of the popcorn texture. But, when asbestos dust is inhaled, it can have significant health implications.
So, before removing a popcorn ceiling, you need to ensure it doesn’t contain the substance. You should have the surface tested professionally. Or, at the absolute least, purchase a DIY test kit from your local hardware shop and send it to a lab for testing.
If your ceiling is positive for asbestos, you should have the texture removed or the entire ceiling covered in paneling or drywall by a professional licensed in asbestos removal. Asbestos should be left in place if the ceiling is in good shape, as there is no significant hazard.
What You’ll Need
- Safety gear.
- Ladder.
- Painter’s tape.
- Drop cloth.
- Wide putty knife tool.
- Garden sprayer.
1. Protect the Surroundings
Cover everything underneath the ceiling using drop cloths or plastic sheeting.
Safety First
Use a dust mask and safety goggles. Open windows to make sure the area is properly ventilated.
2. Spray the Ceiling
Take a garden spray and wet a small ceiling area. This will help remove the popcorn ceiling.
Be careful with how much water you spray because overwatering can damage the sheetrock underneath. Allow about 15 minutes for the ceiling to absorb the water.
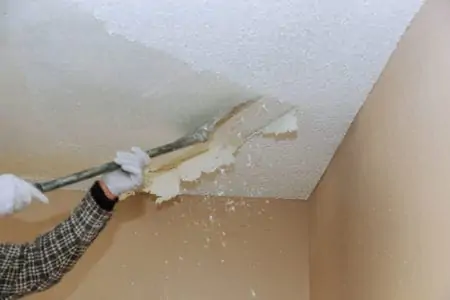
3. Scrape the Ceiling
Use either a drywall taping knife or a wide putty knife for this step. Gently run it across the wet ceiling. This will help remove the popcorn texture.
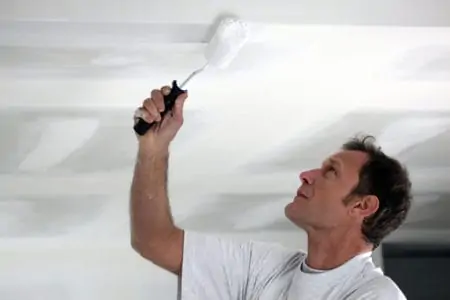
4. Refinish the Ceiling
Sand the surface of the ceiling. If there are any holes to patch or damage that needs fixing, now is the time to do so.
You can use joint compound to repair flaws, but you have to do this before sanding. When you’re done sanding, give your ceiling a fresh coat of paint. You can use a roller for faster results.
Remove all the drop cloths or plastic sheeting and vacuum the room to eliminate any dust and debris.
How to Remove a Popcorn Ceiling Without Scraping It
Regardless of how you choose to remove a popcorn ceiling, there will be some level of scraping involved. But if you’re looking for ways to remove it without creating all that dust, here’s how.
Lay down a drop cloth or some sort of tarp to cover the floor.
Get a spray bottle or a garden pump sprayer and fill it with warm water. Spritz the popcorn ceiling until it looks damp. This takes about fifteen minutes.
Once the popcorn texture has soaked in the water, use a putty knife or scraping tool to slide it off the ceiling. This will cause the material to just fall to the floor in solid, wet clumps. Thus, avoiding all that dusty mess.
Keep In Mind
Don’t wet too much, as you could damage the drywall or materials underneath. Plus, avoid wetting down a power line or other electronic equipment by mistake.
How to Cover Popcorn Ceiling Without Removing It
If you don’t want to remove your popcorn ceiling, you can still make it appear brand new without having to spend a lot of money or time on the removal process.
Many alternatives are available, including textured and painted surfaces, metal tiles, and more. Regardless of the solution chosen, you can do this in a single weekend without additional help.
Since there are many methods on how to cover a popcorn ceiling without removing it, let’s take a look at how to do it using tongue-and-groove planks.
What You’ll Need
- Screwdrivers.
- Circular saw.
- Brad nailer.
- Carpenter’s level.
- Chalk line.
- Screwgun.
- Utility knife.
- Tape measure.
- Drywall saw.
- Caulk gun.
- Stud finder.
- Stepladder.
- Wood putty.
- Crown molding.
- Tongue-and-groove planks.
- 1×2 furring strips.
- Drywall screws.
1. Find the Ceiling Joists
Grab your stud finder and locate the ceiling joists. Use a pencil to mark their location by extending the line down the walls.
Optional: If you want, you can also install insulation panels, which are typically made out of foam.
2. Snap the Chalk Lines
Take a swab of chalk and draw lines across the ceiling joists’ centers. Furring strips will be located at 18-inch intervals along these lines.
3. Install the Furring Strips
Cut your 1 x 2 furring strips and use drywall screws to install them on the ceiling joists. Use a carpenter’s level to make sure they are properly attached. Take your time checking and adjusting them because this will impact the installation of planks.
4. Install the Planks
Cut your tongue-and-groove planks to size. Use a brad nailer to attach them to the furring strips. The end joints should be staggered from row to row. There should be a slight gap around the walls for expansion.
5. Add the Trim Molding
Use crown molding to cover the gaps around the planks. Use a brad nailer to attach the molding to the walls.
Tips For Popcorn Ceiling Removal
The entire process can be tedious, so here are some extra tips on how to remove a popcorn ceiling quickly, safely, and more efficiently.
Always Test for Asbestos First
As mentioned before, popcorn ceilings made before 1980 likely contain asbestos. Before removing any popcorn ceiling texture, speak with your local health department to see if a sample may be tested for contaminants.
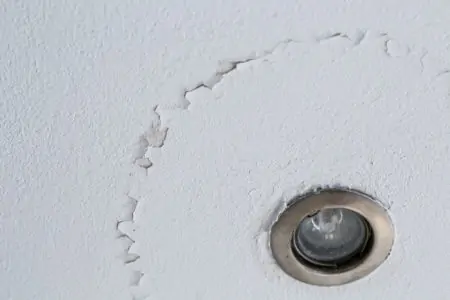
Get Rid of Lighting Fixtures
To remove the popcorn ceiling, take down ceiling fans and lights because they’ll get covered with damp ceiling bits and become a hazard.
Cover Electricity Boxes
When attempting to remove popcorn from a ceiling, be sure to cover any electrical junction boxes with painter’s tape to prevent water from getting into the wiring. Use a tool knife to trim the edges of the junction box, making sure to avoid nicking the wires as you go.
Wear Safety Gear
Grab at least a dust mask and safety glasses to protect your breath and eyes. You might want to consider using work gloves as well, especially if you’re going to repaint the ceiling after.
Use a Mud Pan
Make sure the wet popcorn doesn’t fall on the floor using a mud pan. When you walk and move the ladder around, you won’t leave a trail of it behind.
When your scraper becomes clogged with a soggy popcorn ceiling, wipe it off with the pan’s edge. This makes stripping the ceiling a lot easier and cleaner.
FAQs
There’s so much to know about installing and removing popcorn ceilings. Here’s some extra info.

Are Popcorn Ceilings Coming Back in Style?
Popcorn ceilings have become somewhat obsolete in new homes. Current homeowners find them unappealing because they also impart an aged and worn impression on the residence.

Will Removing a Popcorn Ceiling Increase Home Value?
Removing popcorn ceilings nearly always add value to a home. Not only is the design style unattractive, but it also raises safety issues for prospective homeowners.

How Long Does It Take to Remove Popcorn Ceilings?
If you use traditional methods and employ a professional, you can expect around 20 hours of work to remove and replace a 500-square-foot popcorn ceiling.

How Do You Modernize a Popcorn Ceiling?
Three popular methods include scraping, covering with a new layer of drywall, or skim coating with plaster.

Is It Worth It to Remove Popcorn Ceiling?
Removing the popcorn ceiling is well worth the effort if you want to give your home a more modern appearance. It also creates the illusion of raising the ceilings and adding more natural lighting to the room.

What is the Cheapest Way to Remove Popcorn Ceilings?
The cheapest, easiest, and best way to remove popcorn ceilings is the wetting method. Simply spritz the ceiling with warm water and wait fifteen minutes. The material should come off pretty easily after that.

How Messy is Popcorn Ceiling Removal?
Since you mostly have to scrape it off, popcorn ceiling removal can be quite messy. You can avoid making a mess by spraying texture over the old ceiling.
The Wrap Up
There are multiple methods for those interested in how to remove a popcorn ceiling. Just make sure to use protective gear at all times. If the ceiling tests positive for asbestos, it might be a better idea to call in a professional to help.