Painting wood paneling walls may be the cheapest and easiest way to brighten up dark and faded walls. You could cover them with veneer or drywall, but that leads to unnecessary expense.
Unless you want to make your life difficult, painting paneling could be your only option. We show you how to paint wood paneling walls using the best techniques. Plus, we offer pro-level tips for an excellent finish.
Key Takeaways
- Painting wood paneling is a cheap and easy way to brighten up walls.
- Properly prepare the surface by cleaning, sanding, and applying primer.
- Choose the right type of paint for indoor or outdoor use.
- Follow a step-by-step process for a professional-looking finish.
Can You Paint Paneling?
Painting old wood paneling is pretty straightforward. If you’ve ever painted wooden furniture, the process is similar. Painting your interior wooden walls is the simplest and cheapest way to give your room a complete makeover.
So, what are the pros and cons of painting your wooden paneling, and how does it compare to ripping it out or covering it with drywall?
Pros
- Cheaper option.
- Instant impact.
- Easy to execute.
- Requires zero skills.
- It’s a weekend job.
Cons
- Only changes color, not the feel of the wood paneling.
- Wood paneling may need some attention before painting.
- Lengthy prep work.
Replacing Vs. Painting
Not everyone can pick up drywall and simply stick it to the front of their rough paneling. Replacing the paneling is a viable option when you have a bigger budget and more time. It is also a great choice if you possess a higher skill set.
Then there is the question of whether you rip the paneling out or lay the new finish over the top? The latter is easier and cheaper, but it will encroach on your floor space because the wall is thicker.
Painting is the novice’s best answer. If you lack the necessary skills, knowledge, or cash to replace the paneling with wallboard, it’s time to break out the paintbrush. If you commit to painting your paneling, remember to do the prep work.
Here’s a handy list of what you need to do:
- Remove old paint, varnish, or finish.
- Sand rough planks smooth.
- Fill any gaps, cracks, or holes.
- Replace rotten sections with fresh wood.
- Apply two coats of primer.
If you skip any of these steps, it will impact the quality of your finish and leave you wishing you’d invested more time doing the basics.
What Kind of Paint Do You Use on Wood Paneling?
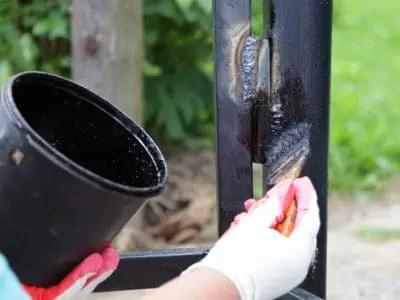
There are several options when it comes to painting wood paneling. First, if the paneling is outdoors, you may want to use an oil-based paint, like this Rust-Oleum Marine-Grade Gloss paint.
Marine paint is excellent at repelling moisture and damaging UV rays, so it should keep your external woodwork looking good for longer.
For internal walls, try this Rust-Oleum Painter’s Touch Latex Paint. It is water-based, emitting fewer VOCs (volatile organic compounds), which is better for your health and the environment. It also cleans up with water, which is also an environmental bonus.
Alternatively, you might want the shabby-chic look. Use chalk paint to achieve it, with several layers of protective lacquer. Once again, we feature a Rust-Oleum product as our top pick, but you can see it’s popular when you look at the sales figures alone.
And last but not least, why not try a paint-and-primer-in-one. It saves you time and money and speeds up the painting process. The One Primer and Paint Matte Finish is a great example.
Word Of Caution
Self-priming paint is better for internal surfaces. When painting external wood surfaces, choose a separate primer because it creates a stronger bond for the color, increasing its longevity.
How to Paint Wood Paneling Walls
The devil is in the detail, and when it comes to painting wood paneling, having a critical eye is vital for the best results. Every blemish, fingerprint, and brush stroke will scream “amateur paint job.”
Before we start, it’s time to take stock of the tools and materials needed.
What You’ll Need
- Trisodium phosphate (TSP).
- Respirator.
- Protective glasses.
- Rubber gloves.
- Bucket.
- 220-grit sandpaper.
- Shop-vac.
- Painter’s tape.
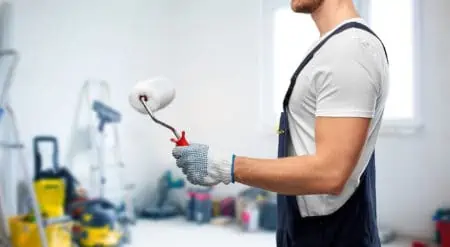
- Foam roller cover.
- Paint roller.
- Paintbrush.
- Paint.
- Stain-blocking primer.
- Sponge.
- Tack cloth.
- Drop cloths.
1. Clean the Walls
You will need to remove dust, grease, and fingerprints from your wood paneling because it prevents the paint from adhering.
Safety First
Don your safety gear before mixing up your TSP because it is a highly-toxic solution. Also, when treating wood paneling painted during the 1970s, there is a high chance that the paint contains lead. This makes it even more toxic and is another reason for taking safety precautions.
Open all the windows and doors if working inside, and always wear long-sleeved clothing. Dilute the TSP in a bucket of water and soak the sponge. Wipe the sponge over the wall surface, focusing on heavily grimed areas.
Top Tip
Remove all furniture and floor coverings before starting your DIY task. It makes it easier to paint and gives you better access without obstacles.
2. Sand the Wood
Once the TSP has dried, grab the 220-grit sandpaper and work in circular motions, scuffing the wood surface. The idea is to create a strong bond between the primer and the wood.
Modern primers are so effective that it is possible to prep the wood without sanding, but you should still perform this task for the best results. You get a better bond against chipping and scratches for such a small amount of effort.
Also, sanding is necessary if you have fake wood like melamine.
3. Protect the Floor
Splatters are almost inevitable when painting walls with a brush or roller. Lay down the drop cloths to protect other surfaces. You could use old newspaper if you lack the drop cloths, but any old sheet will suffice.
4. Time to Prime
Once you’ve completed the sanding and removed the sawdust with the shop-vac, it’s time to lay down the primer. If you still have stubborn dust deposits, use a tack cloth.
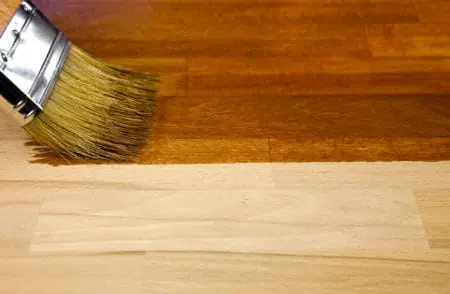
Primer improves the bonding surface, hides grain imperfections, and gives a better finish. It also means you use fewer coats of paint. Plus, if you are changing from a dark to lighter color, white primer neutralizes the old paint, so it blends better.
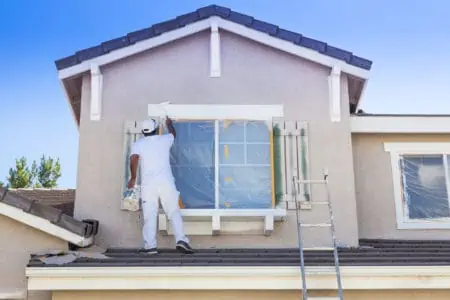
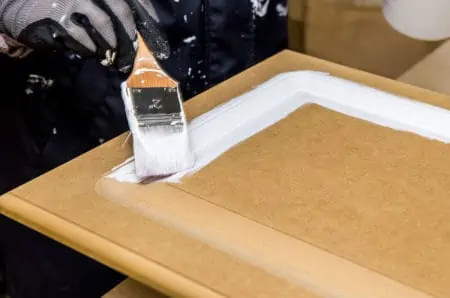
Start by covering edges and corners where the paneling meets baseboards, windows, and door frames with painter’s tape. Do the same where the wall joins the ceiling.
Use an angled brush like this Wooster Angled Brush to paint along edges and corners. Then fill in the center surfaces with the roller. Using a foam roller cover reduces orange peel textures and air bubbles.
Wait until the first primer layer has dried, and then apply a second coat. Follow the primer guidelines to get the drying times.
Pro Tip
To get the smoothest possible finish, lightly sand between each coat of primer.
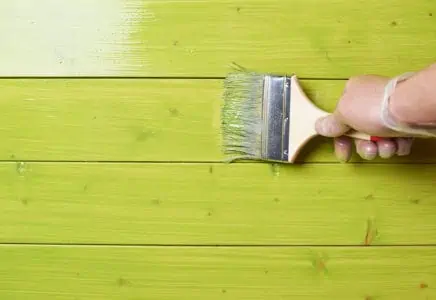
5. Time to Paint
Following the same technique for priming, start by filling in around the edges and corners with the brush, then load the foam roller and cover the center sections.
Apply two coats of paint, waiting for the appropriate drying time between each layer. As before, lightly sand between each paint coat for the smoothest finish. Sanding removes air bubbles and brush marks.
Tips for Painting Wood Paneling with Grooves
Painting grooved panels present different challenges. Loading too much paint causes the paint to run, while too little means the grooves remain untouched. It’s a balance between forcing the paint into the grooves without creating drips and streaks.
Fill the Grooves
The obvious remedy is to remove the grooves. Use drywall mud or wood filler and a putty knife, like this Bates Variety Set to get the filler really smooth. Once dry, sand until flush and the lines have disappeared.
Use a Roller and Brush
A roller will cover the flat sections while the brush gets paint into the grooves. It’s best to paint the recesses first and finish it off with a roller to minimize brush marks.
Use Caulk
Caulk is an excellent and efficient way to conceal grooves on your finished walls. You can get into the tightest spaces thanks to the thin and easy-to-control nozzle, and the caulk dries fast.
Cover Knots
Use drywall mud or wood filler to conceal natural knots in the wood. Sand them to remove accentuated ridges or lumps, and then smooth the wood filler with a plastic putty knife.
Can You Paint Over Wood Paneling Without Sanding?
You can paint wood paneling without sanding because modern primers are excellent at sticking to rougher surfaces. However, if you want a pro-like finish, you should sand as part of the prep work.
Sanding removes uneven surfaces, including old paint, and helps the primer bond better. This protects your panels from scuffing and scratches.
Painting Wood Paneling Ideas
So, what are the latest trends for painting wood paneling? What’s hot and what’s not? Let’s look at some design ideas you might want to adopt.
Shabby-Chic
French farmhouse and colonial are terms that encapsulate that shabby-chic look. Shabby-chic colors include grays, sage greens, and light blues. Chalk paint is a game-changer because it dries matte flat and can be distressed easily.
Shiplap
Go for that classic white shiplap look. You can use gloss or matte paints, but if you cover exterior wood, glossy paint containing resins and binders improves UV protection.
White is ageless and always looks classy. Just remember that it will highlight every handprint, greasy mark, or blemish.
Regency
Embrace the past by adopting a classic regency look using blues, golds, greens, and pale colors. Regency period paintwork was always precise, striking, and about creating moods within the room.
With soft lighting, your wood-paneled room could look very cozy indeed.
Break the Rules
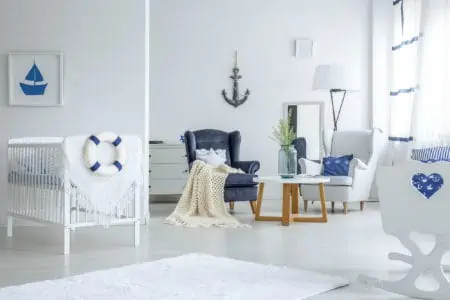
If you have a collection of half-empty paint cans, try mixing and matching the colors to create a fun and vibrant interior. This might be an interesting color choice if you have a nursery or playroom.
Stark White
Basements are dark spaces, so use white paint to reflect limited natural light. It also makes the basement more inviting. You will be amazed at the before and after look of the room.
FAQs

Is Wood Paneling Outdated?
It all comes down to taste. Some people love wood paneling, while others hate it. Wood paneling is just another wall finish like drywall, plaster, or tiling. It is mainly found in older houses and buildings, but that doesn’t mean we can’t embrace it in modern homes.

How Do You Paint Over Fake Wood Paneling?
You need to sand the surface to create a scuffed surface for the primer to bond with. The paint will peel off a lot sooner and chip easier if you skip this stage.

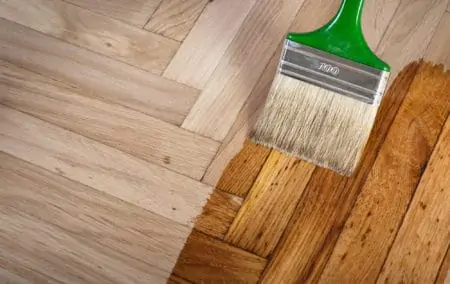
Should You Paint or Stain Wood Paneling?
Wood Is Good
Knowing how to paint paneling opens up a world of possibilities. No color is too bold, no shade too dark. Let your imagination run riot to create an immediate impact. Or maybe you prefer a more traditional appearance.
It’s time to transform your dark and faded spaces and bring your wood paneling into the 21st century.