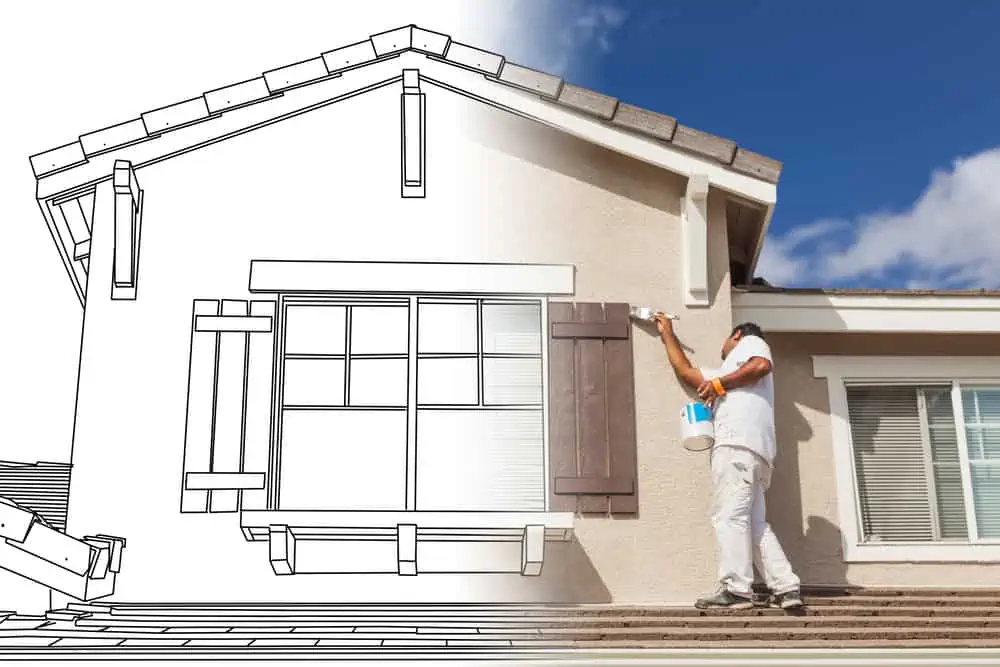
Are your vinyl shutters in desperate need of a paint job? Vinyl tends to fade over time and can show wear and tear from weather damage. But, before you head out and replace your vinyl shutters, consider giving them a new paint job.
It’s not hard if you know what to do, and it can save you a ton of money. I’ll show you how to paint vinyl shutters so you can give your home a facelift and improve curb appeal.
Key Takeaways
- Painting vinyl shutters is a cost-effective way to improve your home’s curb appeal.
- Use latex exterior paint or spray paint designed for plastic, like Krylon Fusion, for the best results.
- Remove and clean shutters before painting, and use a paintbrush for even application.
- Consider trendy shutter colors like navy blue, red, green, dark brown, purple, gray, or earth tones for a fresh look.
Can You Paint Vinyl Shutters?
You certainly can!
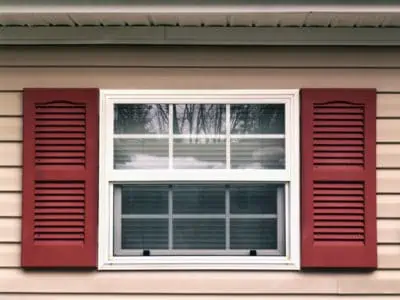
Both decorative and practical, shutters are often added on either side of a home’s windows. They can add complementary colors to your home’s facade and protect your windows in case of inclement weather.
But shutters (even those made from wood) can crack, chip, or peel and will require a fresh coat of paint now and then. You can top up using the original color or opt for something new and fresh.
It’s not a difficult job to do yourself. It just takes some patience, free time, and the right tools. It’s best to remove the shutters, but you can do it with them still attached. We’ll show you both ways.
Best Paint for Vinyl Shutters
Latex paints are recommended for vinyl shutters. Oil paints adhere poorly to the surface of the shutter and are prone to peeling or cracking when the material expands or shrinks.
Spray paints are also an excellent alternative for vinyl, as long as the composition is designed to adhere to plastic. One of the best products you could use is Krylon Fusion.
Spray paints frequently produce overspray, which is finely misted paint that adheres to everything for a few inches around the object being sprayed. Painting vinyl shutters with a spray gun or spray paint is a sure-fire way to wreck siding or window frames.
Pro Tip
I would recommend taking the time to line the perimeter and cover any areas you don’t want to get with overspray.
Generic enamel spray paints on vinyl will have the same issues as oil paints.
Some people recommend using acrylic paint. The chemical inside it gives it elasticity, making it contract and expand better than latex paint.
How to Paint Vinyl Shutters
Painting vinyl shutters is no more complicated than painting a kitchen cabinet. Don’t be intimidated by the list of tools and materials needed, as the process is straightforward.
What You’ll Need
- Latex exterior paint or spray paint.
- Primer.
- Degreaser.
- Silicone caulk.
- Caulk gun.
- Plastic mounting nails.
- Painter’s tape.
- Bucket.
- Soap.
- Safety gear.
- Ladder.
- Drop cloth, plying tool, microfiber cloth.
- Paintbrush.
- Soft bristle brush.
- Pliers.
- Garden hose.
With a Brush
A brush can make it easier to get into those hard-to-reach areas that shutters usually have.
1. Remove the Shutters
While this step is optional, it will be easier for you to paint shutters that are not mounted to the wall. It also makes far less of a mess when applying the paint.
The shutter removal will depend on the mounting mechanism that’s keeping them in place:
- Secured with Metal Mounting Clips: Just go around the house and lift the shutters to release them from the mechanism.
- Installed with Shutter Loks: Shutter Loks are small plastic bolts used to secure the shutter in place. Use a flathead screwdriver or plying tool to pluck the Loks off.
- Plastic Buttons: Use a utility knife or hacksaw to cut through the button. Once the top pops off, use pliers to pull out the plastic bolt that’s inside.
Important For Homeowners
After removing the Loks and freeing the shutter, use pliers to remove any plastic pieces. Use silicone caulk to fill in holes, as these are potential homes for insects.
2. Clean the Shutters
Preparing the surface for painting means making sure the shutters are clean before proceeding. To do this, mix soap and water, and use a soft-bristle brush to clean the shutters. This way, you have a higher chance for the paint to adhere to the surface properly.
When you’re done scrubbing, rinse the soapy water off the surface. They also have to be fully dry before proceeding. It’s best to use a microfiber cloth and speed up the process.
3. Prep the Area
Whether you’re painting vinyl shutters without removing them or after they’ve been taken down, some prepping is required before proceeding.
For vinyl shutters that have been removed, lay down a drop cloth or a piece of plastic on the ground or the workbench you’re using to paint.
If you didn’t take the shutters down, add painter’s tape around the area. And make sure to lay something down on the floor and furniture for protection.
4. Apply the Primer
If your shutters show severe signs of deterioration, applying a coat of primer is a good idea. It’s recommended to use a paintbrush because rollers aren’t very effective, considering the slatted nature of the surface.
Read the label on the primer you’re using and allow it to dry for however long the manufacturer says so. This could be anywhere between one and four hours.
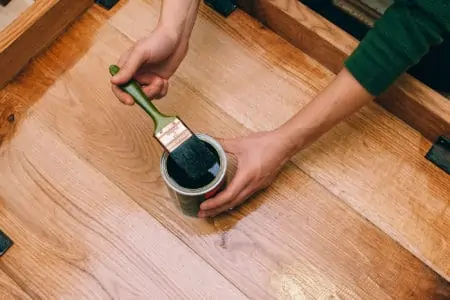
5. Apply the Paint
Ensure the primer is fully dry before applying the paint. Exterior latex paint is best for these types of projects. It has a high UV resistance, making it ideal for shutters that face the sun constantly.
Once again, it’s best to use a paintbrush to ensure an even application of your paint. It typically takes a full two days for latex paint to fully cure.
6. Reinstall the Shutters
This should be fairly straightforward if the shutters were originally installed with metal mounting clips. Simply slide the shutters into place by hooking them onto the clips.
For shutters hung using plastic mounting nails, you have to drill fresh holes for the new Shutter Lok fasteners. After you drill the holes, put the fasteners in place by tapping them with a hammer.
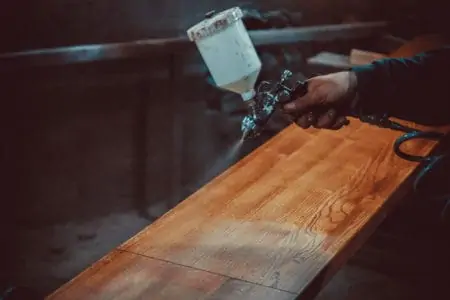
With Spray Paint
Learning how to repaint vinyl shutters with spray paint isn’t very different from painting with a brush.
1. Remove the Shutters
Remove the old shutters from the window and place them flat on the drop cloth. Wipe the shutters down with an all-purpose cleaner/degreaser to remove all dirt and grime. Thoroughly rinse with water and pat dry.
2. Apply Painter’s Tape
Always use painter’s tape for areas that you don’t want to be stained or painted over.
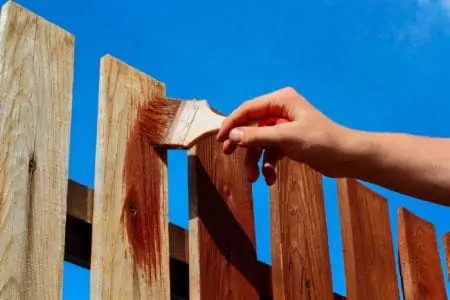
3. Apply the Paint
Hold the nozzle six to eight inches away from the shutter surface. Then spray the sides and ends of the shutter in a sweeping side-to-side motion with minor overlap. Let that layer dry for about a minute.
If you’re looking for a good brand of spray paint to use, I recommend Rustoleum. They specialize in paints for various surfaces.
Apply another light layer of paint and wait for it to dry. Repeat until you’re happy with how it looks. Allow the spray paint to fully dry overnight before putting them back on the house.
Can You Paint Vinyl Shutters Without Taking Them Down?
Yes, you can paint the shutter without taking them down. However, you are going to have to put in a lot more effort when it comes to prepping the area. There’s a lot of stuff that could get paint on it, from the window sill to the walls, to the actual window.
Can’t take your shutters down, or you simply don’t want to? Then be sure to use plenty of painter’s tape. Add drop cloths or plastic sheets underneath the shutters, on the window, on house sidings, and all surrounding areas.
Trendy Shutter Color Ideas
Now you’ve got everything you need to paint vinyl shutters; the question is: what paint color should you opt for? Here are some trendy suggestions for people who don’t know where to begin their paint search.
Navy Blue
Dark blue shutters are a terrific way to differentiate from the standard black shutter while still maintaining a traditional aesthetic.
Dark blue shutters stand out against tan siding or stone. A monochromatic appearance with a light blue exterior is also possible. Naval by Sherwin Williams is an excellent navy-blue color choice.
Red
Red shutters are a classic choice that makes a statement. Red doors are popular, and many homeowners want matching shutters. Colors that complement bright red shutters include light blue, pastel yellow, and white. Heartthrob by Sherwin Williams is a sure win.
Green
Green exterior shutters are very popular, especially deep shades like hunter green and Charleston green.
These traditional greens have been popular since colonial times. More recently, lighter sage green has become trendy on earth-toned homes and natural materials like stucco.
Dark Brown
Dark brown shutters are very popular, especially in earth tones. This is a fantastic alternative for homeowners who want a natural color and texture palette yet want it finished.
Purple
Purple shutters are ideal for people seeking a strong color that complements their home’s exterior. Dark purple shutters, especially plum, go with more. Sherwin Williams’ Concord Grape would look amazing on vinyl shutters.
Gray
Gray is a color that will never go out of style when it comes to exterior paint choices. You can give your shutters a modern yet classic look with gray paint. They would go well with various colors, including muted neutral or jewel tones.
Earth Tones
When you use a light earthy tone, your shutters will give you that window-enlarging effect. You can use Plantation Tan by Behr.
Is It Better to Paint or Replace Vinyl Shutters?
Replacing or painting your vinyl shutters can completely transform the look of your home. But, as a homeowner, you may not know when to paint and when to replace them.
Consider painting vinyl shutters that are in decent repair but appear faded. If they have cracks, show visible signs of wear and tear, or are broken, replace them.
Paint Lifespan
A paint job on vinyl shutters should last between seven and 10 years. Aside from their low cost, vinyl shutters are low upkeep. Using the appropriate paints and hues will prevent your shutters from deteriorating for almost a decade.
The paint may not last as long if you live on the seaside or in heavy humidity. Humidity erodes paint faster than dry weather.
The Costs
The cost of installing shutters varies from $1100 to $3500 in the US. Since vinyl is not an expensive material, your replacement expenses will be lower. These include the location (inside or outside), size, and labor (professional or DIY).
Exterior vinyl shutters cost between $40 and $60 per pair, but some retailers charge up to $100. Interior vinyl shutters range from $100-$300. Since the specialists will have to remove the old shutters and reinstall the new ones, the labor charges are the majority.
Vinyl paint costs between $40 and $70 per gallon, plus the cost of priming. Most pros charge $30 to $45 per hour for labor, and it takes about an hour to paint one shutter.
FAQs

Should the Shutters and Door Be the Same Color?
The shutters and doors do not have to be identical in color. They do, however, need to coordinate their efforts. Shutters can be painted in a lighter or darker shade of color.
You can also choose complementary colors that are opposed on the color wheel.

Can You Paint Vinyl Shutters a Darker Color Than Previous?
When painting vinyl shutters, it is generally recommended that the color not be significantly darker than the original. This is to avoid a buildup of heat that could result in warpage.

How Long Will a Paint Job Last on Vinyl Shutters?
If you’re using quality outdoor latex paint that can resist UV damage, it should last around seven to 10 years.
In the End
Even if you know how to paint vinyl shutters, is it worth it in the long run?
Take care of your vinyl shutters. Yes, they’re built to last, but nothing lasts forever. Regular maintenance and cleaning can go a long way. A paint job can freshen them up.