Have you ever wanted to paint a popcorn ceiling but were intimidated by all the information about how easy it is to weaken the texture and cause it to fall? Painting popcorn ceilings is indeed messier compared to painting regular ceilings, but it’s not rocket science.
We’ll teach you just how to paint a popcorn ceiling without making a mess, giving it the facelift it deserves.
Key Takeaways
- Prep the area by covering walls, floors, and fixtures to avoid a mess.
- Choose the right paint and tools, such as acrylic latex paint and a thick nap roller or a spray gun.
- Apply paint consistently in one direction and avoid using too much paint to prevent weakening the texture.
- Allow the first coat to dry completely before applying a second coat in the opposite direction.
What is the Best Way to Paint a Popcorn Ceiling?
There are two common methods to paint a popcorn ceiling, also known as an acoustic ceiling, and we’re going to take a look at the pros and cons of each.
With a Paint Roller
The most common method used by homeowners for its ease of use.
Pros
- Very affordable.
- Can achieve different kinds of finishes.
- Can hold a lot of paint at once.
Cons
- Heavy nap rollers can exaggerate the texture.
- Can be difficult to get the right amount of paint on the roller.
- Requires putting in some elbow grease for paint applications.
With a Spray Gun
A spray gun takes some skill, but it’s not impossible for a beginner. Here are some things to consider.
Pros
- Makes painting easier and faster.
- Easier to apply a consistent amount of paint.
- Easier painting of nooks and crannies.
Cons
- More expensive compared to a paint roller.
- Acrylic paint might require thinning.
- Airless sprayers use a lot of pressure and can be dangerous if mishandled.
Best Paint to Use
You want to go with acrylic latex paint for painting popcorn ceilings because it’s easier to apply and dries quickly. Flat paint (also known as matte paint, has a flat finish) is best unless the ceiling is in the bathroom or kitchen. Flat paint conceals uneven texture and other flaws.
You can also use special vinyl paint to spray the ceiling. Vinyl paint has certain resins added to the mixture, making it easy to spray onto surfaces such as walls and ceilings. You can choose from vinyl with a sheen or a flat finish. For ceilings, go with flat paint to hide any blemishes.
If you’re using a roller, you’ll need to use a standard latex or acrylic ceiling paint. If you’re going the sprayer route, be sure to use a latex paint that can be thinned. This is because a lot of thick latex paints can clog the sprayer.
Best Roller to Use
If you prefer to roll the ceiling instead of spraying it, use a thick nap roller. Such a roller holds more paint and works faster into the rough surface. A popcorn roller cover for acoustic surfaces like popcorn ceilings is available with most rollers. They will catch any paint drips while painting overhead.
How to Paint a Popcorn Ceiling with a Roller
Before you get started on your ceiling revamp, make sure you’ve got what you need to complete the job. Then follow the step-by-step instructions for painting a popcorn ceiling with a roller.
What You’ll Need
- Paint roller.
- Extension handle.
- Paint.
- Feather duster or vacuum cleaner.
- Protective gear.
- Painter’s tape.
- Angled paint brush.
- Flathead screwdriver.
- Plastic sheets.
- Ladder.
1. Prep the Area
Wrap the walls in plastic sheeting and the floors in drop cloths. Do the same for the lighting fixtures using covers and painter’s tape.
2. Start Scraping
Put your dust mask and safety goggles on, and scrape ¼ inches of the popcorn ceiling along all edges using the flathead screwdriver. This will make it easier to cut straight edges with the paint.
3. Vacuum the Mess
Use your vacuum cleaner equipped with a soft bristle brush or your feather duster to remove all dust from the ceiling and edges.
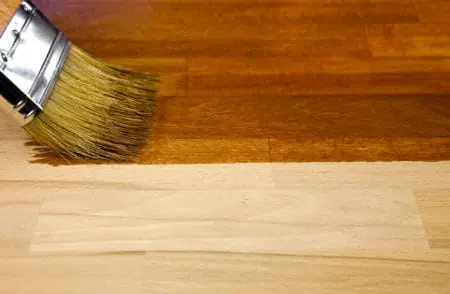
4. Cut the Edges
Dip your angled brush in paint and paint the inner edges of the ceiling.
5. Load Your Roller with Paint
Carefully pour paint into your empty paint tray and push your roller into it a few times, rolling off any excess on the ribbed section of the tray. You want a generous amount soaked into the roller but not dripping from it to allow a few passes on the ceiling before having to reload.
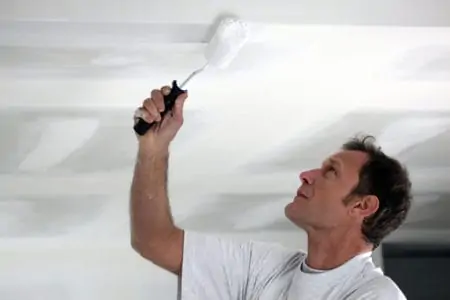
6. Start Rolling On the Paint
When you’re applying paint on the ceiling, make sure you always do so in a single direction if you can. This will avoid over-painting and visible paint marks.
7. Apply Second Coat
When the first coat of paint is fully dried, you can start applying the second coat. Do so in a perpendicular direction to the first coat.
How to Paint a Popcorn Ceiling with a Spray Gun
Just as you would when painting the ceiling with a roller, ensure you’ve got the right tools for the job! You don’t want to be mid-way through and realize you’ve forgotten something crucial.
What You’ll Need
- Stain-blocking primer.
- Paint sprayer.
- Paint.
- Feather duster or vacuum cleaner.
- Protective gear.
- Painter’s tape.
- Plastic sheets.
- Ladder.
1. Prep the Area
Cover everything that paint is not supposed to land on, just like you would if you used a paint roller. That includes furniture, walls, floor, and light fixtures.
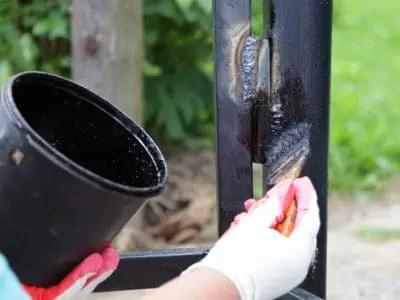
2. Fill Holes and Cracks
Repair any potential ceiling flaws, and then apply a stain-blocking primer if you have an older ceiling. When you’re done, gently clean the surface using a vacuum cleaner or a feather duster.
3. Choose Your Paint
You want to use flat or matte paint for the ceiling. If you choose acrylic, you have to thin it properly before applying it.
4. Prep the Sprayer
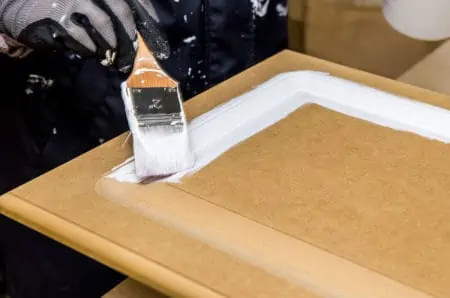
Get your sprayer ready. Connect all fittings and do a quick test on a piece of cardboard. This is to ensure the flow of paint is good.
5. Spray Away
Spray the paint in a single direction using consistent, gentle motions. Apply the paint with the sprayer held perpendicularly to the ceiling surface to get better coverage.
6. Time for Seconds
When the first coat is completely dried, check to see if you need a second coat. If so, spray it in the opposite direction.
Tips For Painting Textured Ceilings Without Making a Mess
Popcorn ceilings are known for making a mess during the paint job. This is because of their textured surfaces. But there are three important things to keep in mind if you’re looking to make the cleaning process easier:
Cover it Up
Make sure that everything that’s still in the room is properly covered in plastic. That includes floors, furniture, and light fixtures.
Vacuum with Caution
Exercise caution if you choose to clean your ceiling with a vacuum cleaner prior to applying the paint. You can easily scratch it.
Thin and Even Coats
Be careful not to use too much paint, as an extremely thick coat can weaken the texture. Moisture causes peeling/falling.
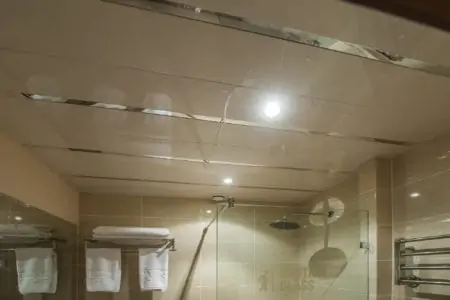
Why is My Popcorn Ceiling Falling Off While Painting?
Popcorn ceilings, also known as acoustic or textured paint ceilings, feature a coarse texture that is applied over the ceiling’s existing drywall. As a result, it may peel off over time for a variety of reasons that range from impact damage to moisture.
Quick Tip
Peeling popcorn ceilings are repaired by removing the damaged sections and applying a new texture coat.
Final Words on Painting Popcorn Ceilings
It’s true that painting popcorn ceilings is a little trickier compared to painting a normal flat ceiling. But it’s not that intimidating once you understand how the methods and equipment work. Keep in mind that if you learn how to avoid making a mess, half the job is already done.