Ready to remodel or paint your bathroom but dread having to paint behind the toilet?
I don’t blame you: it’s a tight space, and painting tools are often very difficult to handle in such situations. Luckily, I’ve got some expert tips to share about how to paint behind a toilet in a bathroom without too much trouble.
Key Takeaways
- Paint behind a toilet using a thin roller, Jimmy Sponge Stix, or DIY stick and rag.
- Protect the toilet and surrounding area with plastic sheets or garbage bags.
- Apply primer and paint in thin coats, using tools to reach the tight space behind the toilet.
- If necessary, remove the toilet bowl for easier access and better painting results.
How Can I Paint Without Removing the Toilet?
When it comes to redesigning your bathroom, it’s necessary to understand how to paint behind the toilet. You’ll quickly discover that this is the most challenging area in the bathroom to paint.
There is minimal workspace back there, the area is dirty, and there are pipes to paint around. However, you can complete the task with some planning and extra attention.
Don’t strive for perfection when it comes to painting a barely visible wall area. As you’re about to learn in this article, there are tools and tricks to help you paint as best as possible in this hard-to-reach area.
For instance, you can use thin paint rollers for the project. You can even get crafty and improvise by making your own painting pad with sticks.
How to Paint Behind a Toilet
There are a few ways to get into that tricky area, with a paintbrush, a Jimmy Songe Stix, or even a rag and stick. See which painting technique works best for your bathroom situation.
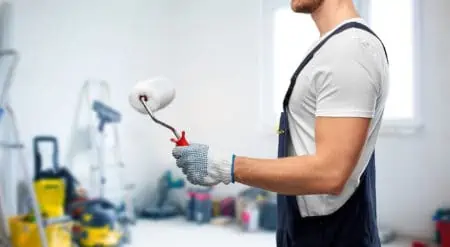
With a Thin Roller
That narrow space is often very difficult to reach, no matter what you do. So, how do you paint behind a toilet? There are three methods to do it, and the first one means using a thin roller.
What You’ll Need
- Painter’s tape.
- Plastic sheets.
- Garbage bag.
- Rubber bands.
- Paint.
- Thin roller or flat brush.
- Paint tray.
1. Protecting the Area
Since you’re painting behind toilet bowls and tanks, you have to cover them both to prevent paint splatters. You can use a combination of painter’s tape and drop cloths or plastic sheets.
You can also use a garbage bag that’s big enough to fit over the entire toilet tank. If you go with the latter method, bind the excess plastic using an elastic band.
2. Prepping the Paint
Grab your paint container and pour approximately one cup of paint into a six-inch paint tray. Take the foam roller and dip it inside the tray. Roll it out to ensure there is no paint dripping from the roller.
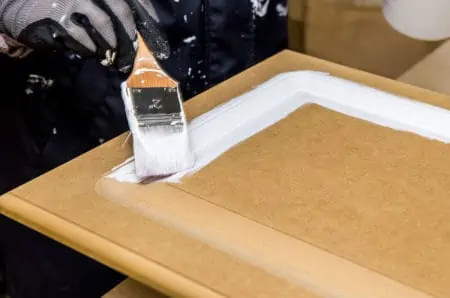
3. Painting the Wall
With a thin roller, you should be able to paint behind the toilet tank at about a five-inch distance. This will likely leave an unpainted section behind the tank, but it won’t be visible.
To paint the wall directly behind the bowl, you can use a flat brush.
With Jimmy Sponge Stix
Jimmy Sponge Stix is a tool that allows you easily paint behind the toilet without learning any new paint technique.
What You’ll Need
- Jimmy Sponge Stix.
- Damp paper towel.
- Traditional paint roller.
- Primer.
- Paint.
1. Prepping the Area
Due to the nature of this painting tool, you don’t have to put a garbage bag over the toilet. However, you should keep a damp paper towel nearby to be clean any potential smudges quickly.
2. Apply the Primer
Apply your primer over the spongy part of the Jimmy Sponge Stix using a traditional paint roller. Place the tool behind the toilet and press it against the wall.
Due to the stick’s length, you should be able to grab it on both sides. Apply two coats of primer.
Alternative
If you don’t have a roller, you can also apply the paint on the tool with a paintbrush.
3. Apply the Paint
Clean your Jimmy Sponge Stix using only water and leave it to dry. Following the same process as above, apply two coats of paint using this tool.
With a DIY Stick and Rag
Making your own paint pad is another way to paint behind a toilet. While rolling paint provides a more consistent color, utilizing a sponge or rag is another option if you don’t want to buy a thin roller.
What You’ll Need
- Clean garbage bag.
- Rubber band.
- Utility knife.
- Two paint stirring sticks.
- Hot glue gun.
- Clean rag.
- Paintbrush.
- Paint can.
1. Protecting the Area
A painting project begins by ensuring the area that shouldn’t be smeared with paint is protected. You can use a garbage bag to cover the toilet tank from the top down.
Then, pull the edges of the bag towards the front. You want the part of the bag on the back of the tank to be smooth and straight. Use a rubber band to gather and secure the extra plastic materials on the front side.
2. Making the Paint Pad
Take one of the stirring sticks and score a one-inch mark using a utility knife. Remove the piece. Do this again with another stirring stick.
Place these two sticks side by side. Take the hot glue gun and stick the small one-inch pieces over the stirring sticks.
This will help create a handle for the paint pad. Make sure to leave three inches at the end. Take the rag and glue it to the end of the handle.
Side Note
If you don’t have a rag you can use, feel free to use a sponge instead.
3. Apply the Paint
Take a paintbrush and use it to transfer the paint from the can onto the rag. Paint it lightly because squeezing the paint out of the rag will be very difficult otherwise.
Using the tool you just made, continue to paint behind the toilet tank. Begin from the side and work your way upward. Continue back down on the other side.
How to Remove a Toilet Bowl for Painting
Painting behind the toilet isn’t always possible or, for some people, it’s too frustrating to do without removing the tank. If that sounds like your situation, here is what you have to do.
Keep In Mind
In most cases, you won’t have to remove the toilet bowl to paint behind the toilet. It’s mostly the tank that’s too close to the wall for comfort.
What You’ll Need
- Sponge.
- Empty bucket.
- Screwdriver.
- Adjustable wrench.
- Ratchet wrench.
1. Disconnect the Connector
Turn off the shut-off valve to cut off the water supply. This is usually located behind the toilet. Flush the toilet multiple times, so there’s no water in the bowl and the tank.
Get rid of any excess water using a sponge. Remove the toilet connector tube found at the shut-off valve.
Always have a bucket nearby, just in case there’s water draining from the line. Disconnect the tube from the toilet tank.
2. Remove the Tank
This step only applies when you have a two-piece toilet. Locate the mounting bolts that connect the tank to the bowl.
Take a ratchet wrench and remove the nuts from the mounting bolts. Lift the tank carefully and place it out of the way.
3. Unbolt the Bowl
Take a screwdriver and pry the trim caps from the bolts that hold the toilet on the floor. Using an adjustable wrench, remove the nuts.
Pro Tip
If you can’t remove the nuts with ease, you can spray some penetrating oil.
4. Break the Seal
There is a toilet wax ring seal at the bottom of the bowl, right where it meets the floor. To remove the toilet bowl, you have to remove this seal.
You have to rock the toilet from side to side to break the seal. When that’s done, lift the bowl and get it out of the way.
Tips For Painting the Bathroom
- Clean the walls using a special pre-paint cleaner.
- Make sure to get rid of any mold or mildew.
- Wipe the baseboard clean.
- Use paint that’s formulated for humid environments.
- Remove all obstructions that are easy to get out of the way.
How Do You Clean Behind the Toilet?
One of the most problematic spots to clean is that darn space behind the toilet. There are a lot of tips and improvisations one can make to really get into that tight space and deep clean it:
- You can use a rag attached to the sticks to get behind the toilet and the tank.
- Disinfectant is very important when you’re cleaning a toilet. Spray some on a thin sponge and scrub behind there as best you can.
- You can make your own cleaning tool by gluing a sponge at the end of a long and thin stick.
Can You Paint a Toilet?
Painting the toilet is an easy process. The most complicated part and one you have to know about is how to choose the right type of paint for the job.
Choosing the Right Paint
You can paint your toilet with a variety of various types of paint. You’ll want to start with an acrylic latex primer and then finish with epoxy paint.
Epoxy paint is typically used to touch up or completely refinish a porcelain toilet. This means that they are truly only available in black, gray, and white hues.
If you’re not satisfied with the color selection, you can also use normal spray paint. If you opt for epoxy paint, that is all you will need.
However, if you use spray paint, you’ll want to purchase a clear epoxy coating. This will increase the waterproofing and durability of your toilet while maintaining the color you choose.
Painting the Toilet
The remainder of the steps are pretty straightforward:
- Remove the toilet seat.
- Clean the toilet.
- Turn off the water supply.
- Drain the water from the tank and the bowl.
- Sand the toilet.
- Apply the primer.
- Paint the toilet.
- Refill with water.
In the End
Learning how to paint behind a toilet feels less intimidating when you have the right mindset.
If you don’t want to stress over making your own tools, you can purchase products like Jimmy Sponge Stix to make your job easier. Remember that choosing the right type of paint can also make or break your entire project.