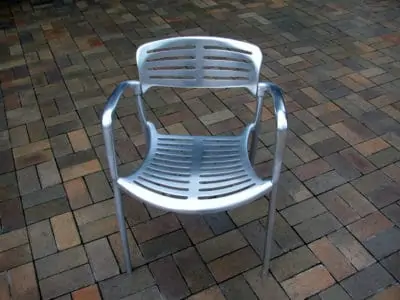
Aluminum has long been a trusted building material thanks to its lightweight and durable qualities. But as bare metal, it is pretty dull, so many people choose to brighten their aluminum surfaces. However, while it may seem straightforward, there is an art to painting aluminum.
We show you how to paint aluminum and give you hints and tips to get the best results.
Key Takeaways
- Prepare the surface: Clean the aluminum with a degreasing detergent and water, then sand it using 80-grit sandpaper followed by 400-grit sandpaper for a smooth finish.
- Apply primer: Use a self-etching primer to help the paint adhere better to the aluminum. Apply two thin layers, sanding between each coat.
- Choose the right paint: Acrylic or latex paints work best on aluminum surfaces. Matte or satin finishes are preferred over gloss paints.
- Seal the paint: Apply a sealer, like an enamel sealant, on top of the paint to protect it and ensure it stays on the aluminum for a longer time.
Can Aluminum Be Painted Easily?
Aluminum is no more challenging to paint than steel. However, the only way the paint will adhere is if you scuff the surface. It means the primer layer will stick better, allowing the topcoat to cure to a harder surface that will resist peeling and cracking.
Anodized Aluminum
Anodized aluminum is aluminum treated with an electrochemical process that involves immersing it in a series of tanks. The last tank creates an anodic layer that grows from the metal surface.
It is more resistant to corrosion than standard aluminum sheets; however, both types of aluminum are resistant to rust.
Another advantage of anodized aluminum is it can be colored, which might remove the need for painting. However, even in a raw metal state, it is more attractive than standard aluminum.
To get the paint to stick, remove the protective oxide layer on the aluminum using sandpaper.
Non-Anodized Aluminum
The main difference between the two types of aluminum is that the non-anodized version lacks the oxidized protective layer, making it less durable. However, it is easier to paint because you don’t have to remove that layer before applying primer.
Non-anodized material is less attractive in a bare state, and it cannot be colored, which means you will need to paint it if you want different shades.
Keep In Mind
You will still need to scuff the surface of the metal to get the paint to stick.
What Paint Should You Use on Aluminum?
With so many types of paints available, knowing which is the best to use on aluminum can be tricky. Some work better than others, so making the right choice is crucial.
Acrylic Paint
Acrylic paint like this Arteza Outdoor Acrylic Set is an excellent choice when painting on aluminum. However, you do need to prepare the metal surface first and use an acrylic primer.
Because aluminum is non-ferrous (it doesn’t contain iron or steel), it is tricky getting the paint to stick unless you use a primer. But with a little perseverance, you can create imaginative designs, making it ideal for crafts and art projects.
That way, the paint sticks to the primer and not the metal, meaning it will last for longer before peeling and flaking.
When the paint has cured, make sure you seal it to stop it from chipping.
Latex Paint
Latex paint works well on aluminum doors, furniture, and sidings because it adheres well and dries flexibly. This Rust-Oleum Ultra Cover paint is a great example. Also, it is easier to clean up after use because all it takes is soap and water. Latex paint also needs a primer to bond properly to the surface.
Latex paint is not the most durable, so if you are painting outside surfaces, you may need oil-based paint instead.
Enamel Paint
Enamel is another paint material that coats well on aluminum. However, a conversion coating is required first, which is a layer of primer brushed over the bare metal surface to protect it against corrosion. It also helps the paint adhere better.
Try this Rust-Oleum Protective Enamel for the best results.
You can also buy enamel sealer when working with enamel paints on your aluminum surfaces.
Spray Paint
Spray paint like this Krylon Automotive Wheel Paint could be the dream combination when it comes to aluminum. It adheres well and requires minimal surface preparation because it is a paint and primer in one.
This can of spray paint transforms your wheels from scratched and dull to shiny as new.
Aluminum spray paint is a great choice if you want faster results because it goes on in fast-drying thin layers.
How to Paint Aluminum
Before getting down to the nitty-gritty of how to paint aluminum, we first need to gather the right tools and materials. You also need to consider your safety because metal dust is dangerous to inhale.
What You’ll Need
The secret of success in any task is to have the right tools and materials. They ensure the most professional finish and make your life easier. It also means you are less prone to making mistakes.
- Drop cloths.
- Bucket and rag.
- Degreasing detergent.
- Sandpaper.
- Power sander (optional).
- Self-etching spray primer.
- Enamel sealant.
- Acrylic spray paint.
- Wire brush.
- Face mask.
- Goggles.
Preparing Aluminum for Painting
The prep work is arguably the most critical stage because it creates the proper foundation for the perfect finish. So, the more time you take, the better the outcome.
1. Clean the Aluminum
Start by preparing the area where you will be working. Lay the drop cloths to protect the floor and walls from paint splatters. Fill the bucket with warm water and add a few drops of degreasing detergent like Palmolive Oxy Power Degreaser.
Dip a rag in the water and wipe the surface with the degreaser solution, making sure you cover the entire surface. Use the wire brush for more stubborn stains like old paint to ensure nothing stops the paint from adhering.
Now dry the aluminum with a cloth, or leave it to air dry. Work in a well-ventilated area as painting aluminum gives off odors.
2. Sand the Surface
Sanding the surface of your aluminum helps the primer adhere better, and it removes any oxidized layers if you have anodized aluminum. You will need to don your face mask, gloves, and goggles to protect you against metal dust.
Take Note
Don’t take chances with your health. Metal dust contains carcinogens, which can lead to long-term medical issues if inhaled.
Start with coarse grain sandpaper to rough up the surfaces of your aluminum. Eighty-grit will work just fine. Later, you will swap to a finer 400-grit or higher.
Make sure you sand every corner, edge, and surface, because the primer will fail to adhere to the spots you miss. If you are working on large panels or doors, a power sander might be a better option for faster results.
Now swap to 400-grit sandpaper to refine the finish. When you are done, rewash it with the water and degreasing solution. Dry it with a cloth or leave it to air dry.
Priming Aluminum
The primer bonds with the metal surface, giving the paint a better chance of adhering. Skipping this stage increases the chances of the paint flaking and chipping.
1. Apply Self-Etching Primer
Self-etching primers, like this SEM Self-Etching Black Primer, have a special formulation that uses chemicals to etch the aluminum surface. This is ideal if your car’s wheels need some TLC and a touch-up with black paint, and you want a product that sticks. It also creates a better surface for the paint to bond.
Ensure that you read the manufacturing instructions before applying the first thin coat and allow the primer to dry in accordance with the guidelines.
2. Time to Sand Again
Grab the 400-grit sandpaper and lightly sand the surface again.
Apply a second coat, wait while it dries, and then repeat the sanding process to create the smoothest possible surface. Now you’re ready for the next phase.
Remove the dust with a rag after sanding, as this will affect the overall finish.
Painting Aluminum
As we said, your surfaces are only as good as the prep work, but it doesn’t mean the final painting stage is a breeze. You still need to follow the same careful steps. You need to choose the right paint, and if you are painting outdoor furniture, choose exterior grade paint.
1. Choose Acrylic Paint
Acrylic or latex paints are the best variety to use on metal surfaces. Make sure you choose a suitable product like this Rust-Oleum Ultra Cover.
Avoid gloss paints as they highlight every imperfection on the metal’s surface. Use matte or satin finish instead.
2. Choice of Application
How you apply the paint is a matter of choice, although the size of the project might dictate this to some extent. If you choose to spray, it might reduce the need to sand between coats. If you decide to use a brush, you will need to smooth each layer with 400-grit sandpaper.
Read the manufacturer’s instructions to determine how many coats you need and the drying times between layers.
This Is Crucial
Always allow the paint layers to fully cure before sanding. If the paint is still tacky, it will lift off and rough up the surface.
How Do You Make Paint Stay on Aluminum?
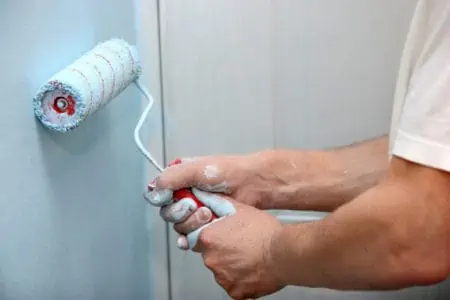
Applying sealer once the topcoat is thoroughly dry (this may take 24 hours) is the best way to get your paint to stay on aluminum. Products like this Rust-Oleum Satin Clear enamel dry to a clear satin finish and protect your topcoat.
Top Tips and Techniques for Painting Aluminum
We all know the pros have their cheats and hacks to get that super smooth finish, and we are willing to share a few with you. If it’s good enough for the professionals, it’s good enough for you.
Keep an Eye on the Weather
Humidity, moisture, and temperature all affect the way your paint adheres. You should not apply the paint in humidity above 85 percent. For the ideal operating conditions, check the manufacturer’s instructions before use.
Sand, Sand, Sand
If you are working with anodized aluminum, make sure you sand the surface thoroughly to remove the oxidized layer. If you skip this step, the paint might fail to adhere and flake off sooner.
This is not as important with non-anodized aluminum, but you still need to rough the surface to create a key for the paint to bond.
Spray In Stages
If your object has multiple sides, it’s best to spray one panel and let it dry before moving on to the next. If you attempt to coat them all at the same time, it will result in an uneven finish. It’s better to take more care and slow the process in favor of better results.
It’s also better to start on the top and sides before moving to the base. It stops you from getting drips and fingermarks on the surface when you try and move it.
Apply the Primer In Thin Layers
If you lay the primer on in thick layers, it will take a lot longer to dry and possibly peel straight off. It is better to lay down thinner layers so that you can sand between coats to get the smoothest possible finish.
Shake the Paint
When using spray paint, shake the can for a minimum of one minute before using it. This ensures the pigments in the paint are evenly distributed for the best coverage.
And when you apply the paint, hold the can about eight inches from the aluminum surface so it delivers an even layer. Also, with spray paint, move the can from left to right in steady motions to coat the entire surface.
FAQs

How Long Does It Take to Paint Aluminum?
It shouldn’t take any longer to paint aluminum than other surfaces unless the aluminum paint contains additional color pigments. Most aluminum paint is tacky to the touch in one hour and cures in two.

Does Vinegar Etch Aluminum?
Vinegar does etch aluminum because it is a weak acid. However, if you leave it on the surface for too long, the acid might leave you with corroded aluminum. Make sure you wipe it off after use.

What Is the Best Aluminum Primer?
Self-etching primer is the best product to use on bare aluminum. The chemicals in the solution micro-etches the surface of the metal, making it easier for the primer to adhere.

Can You Stain Aluminum?
Prolonged contact with water causes a chemical reaction that results in staining.
Let’s Paint
Painting aluminum transforms your dull metals into fun colors to match any design. It makes furniture stand out and protects surfaces against rain, UV rays, and wear and tear.
The secret is to put effort into the prep work first, or you risk the paint peeling and cracking prematurely. And no one wants to make their aluminum look worse.