Fiberglass doors are durable, energy-efficient, and low maintenance. Even so, the paint on them can chip or peel, especially when exposed to the elements.
This can make them appear unsightly, especially if it’s the front door to your home. I’m going to show you how to paint a fiberglass door and choose the best paint.
Key Takeaways
- Clean and repair the door before painting.
- Use non-oil-based paints like acrylic or alkyd paint for fiberglass doors.
- Apply primer to the door surface for better paint adhesion and durability.
- Maintain your fiberglass door by cleaning regularly and checking hardware.
Can You Paint a Fiberglass Door?
Yes, but you should avoid oil-based paints because they can damage the door. Choose epoxy resin, polyurethane, polyester, or acrylic paint.
What Kind of Paint to Use on Fiberglass Doors
If your fiberglass door is chipped, cracked, or faded, it is advisable to give it a fresh coat of paint. It’s essential to choose the best paint variety for your fiberglass door to ensure durability for the refinish.
1. Acrylic Paint
This is one of the best options for painting fiberglass doors if you want a satin or a semi-gloss finish.
2. Alkyd Paint
Alkyd paint is suitable for painting the exterior of a fiberglass door. The downside of this type of paint is that it takes longer to dry. When you paint your exterior door using alkyd paint, you could leave the door somewhat open for faster drying.
Keep in mind that sunlight can cause the paint to fade, so you want to avoid colors like blue or red. When choosing paint, you can ask a paint store employee to recommend a paint that lasts longer.
3. Stain
Gel stain is a good option for some types of fiberglass doors (like the ones in your garage). A good practice is to thin the stain using mineral spirits and then use a brush to apply it.
Stain is also a good idea if you want to give your fiberglass door a wood grain appearance. Just ensure you stain it with the right product.
For excellent results, consider the following tips:
- If you’re painting an exterior fiberglass door, always use outdoor paint because it’s weather-resistant.
- Epoxy resin paint is best paired with an epoxy resin fiberglass door.
- Darker colors fade faster in the sun than lighter colors.
- If you use stain on your fiberglass door, apply clear varnish afterward to protect it.
How to Paint a Fiberglass Door Smooth
Before we tell you how to paint a fiberglass door, you’ll need to grab the following items and materials.
What You’ll Need
- Sandpaper.
- Putty knife.
- Nail hole filler.
- Primer.
- Angled paintbrush.
- Painter’s tape.
- Drop cloths.
- Soap.
- Vinegar.
- Clean rag.
- Metal spatula.
1. Clean the Door
Grab some water and soap (or a small amount of vinegar). Using a clean rag, wipe down your door to prep the surface for painting.
2. Fixing the Door
If there are any holes in your door, this is the time to fix them. If you paint the door in a lighter color, holes will become even more visible. You can use wood filler for the holes and apply it using a putty knife or even your finger.
3. Taping the Door
Painter’s tape will help you avoid smudges and get paint on surfaces where it shouldn’t be. If you have a fiberglass door with sidelights, make sure to tape those windows as well.
You should run over the tape with a metal spatula. This eliminates air holes or gaps that would allow the paint to seep through.
You also want to make sure you tape off all the door’s hardware, or it will get smudged with paint. When you paint over nails and screws, they will be more difficult to remove if you ever need hardware replacement.
4. Priming the Surface
Take your angled brush and apply primer on the surface of the door. Primer is good because it makes sure that your paint has a durable finish. You might have to apply two coats of primer if the existing surface is darker than the new color.
Dry Times
Wait at least 30 minutes between coats for dry time.
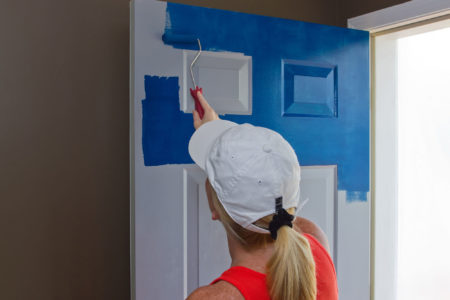
5. Paint the Door
You can use the same angled brush for priming and painting the door as well. Just ensure that you clean your paint brush thoroughly before switching to the topcoats.
The coat of paint needs to be of the right thickness, so you don’t see the old color underneath. You’re likely going to need to apply two coats for this. Ensure there are no drip marks as you go along.
Tips for Maintaining Your Fiberglass Door
Fiberglass doors are popular due to their strength, beauty, and ability to be customized with paint and hardware. As with any door, fiberglass doors require maintenance.
The elements have a tendency to deteriorate fiberglass, paint, and fittings, so you must be proactive in maintaining fiberglass doors.
Clean it Regularly
Fiberglass door maintenance means cleaning it often. To do this, make a cleaning solution with a bit of dish soap, a quarter-cup of baking soda, and water. Put everything in a spray bottle, spray it on the door, and clean it with a cloth.
Check the Door Hardware
If you do not properly care for your hinges, locks, stoppers, and knobs, they will wear out over time. When cleaning your doors, it is prudent to inspect the hardware.
Lubricate the hinge pins with oil to keep them adequately oiled. Ensure that the lock is snug and secure. Additionally, inspect all bolts and screws to verify they are securely fastened.
If you observe damage to the door or wish to update its appearance without replacing it, you can upgrade different hardware parts.
Consider Door Guards
You can install rubber or metal door guards on the doorknob, top, and bottom of a fiberglass door. They will help protect the door against scuffs and scratches. By installing door guards on fiberglass doors, you may insulate your home and save money on your utility expenses.
FAQs
If you still have questions about painting fiberglass doors, these common answers should help you out.

Will a Quart of Paint Cover My Door?
In most cases, one quart of acrylic paint should suffice for one fiberglass door, unless you’re painting a light color over dark. In which case, you may need to buy more. Even with primer, you’ll still need at least two coats.

Do You Have to Prime a Fiberglass Door Before Painting?
It is not always necessary to prime a fiberglass door, but that depends on the door itself. You always want to use primer on a worn-out old fiberglass door to make sure the paint adheres to the surface properly.

Should You Sand a Fiberglass Door?
If you have an unpainted smooth door, you want to use 220-grit sandpaper. However, not every fiberglass door requires sanding. Sanding is required when you want to remove peeling or chipped areas.

Can I Spray Paint Fiberglass?
Yes, you can, as long as the surface is properly prepped and primed.

Can You Use Rustoleum on Fiberglass?
Yes, you can use Rust-Oleum Marine Coatings Wood & Fiberglass Primer on fiberglass. It doubles as a primer and topcoat and even works on wood.

How Can You Stop a Painted Fiberglass Door From Fading?
You can use a gel stain to help protect the door from fading. After applying gel stain, you can apply fiberglass topcoat as well.

When Can I Close My Front Door After Painting?
It’s normally fine to paint the entry door and then close it three to four hours later. For interior doors, you might have to wait up to two days.
Final Words
Knowing how to paint a fiberglass door will ensure a long lifespan and a better appearance. Painting a fiberglass door can also make it more resistant to the elements. Some experts claim it’s even more energy-efficient.