Are you ready to paint your door, but you’re afraid of those nasty brush marks? Having a finish full of visible brush strokes is why most people prefer to hire a professional painter.
But that can cost a lot more money than you need to spend for a simple job. So, we’ll teach you how to paint a door without brush marks. It’s an easy task if you know how to do it right.
Key Takeaways
- Sand the door to remove blemishes and clean the surface with a dry cloth.
- Use spackle and caulk to fill holes or cracks and cover or remove door hardware.
- Apply a primer coat and let it dry before applying the first paint coat and allowing it to dry.
- Sand the first layer and apply the second paint coat for a smooth, brush mark-free finish.
Best Paint for a Smooth Finish
Figure out what materials you’re working with and see which paint is best to use.
| Situation | Best Type of Paint |
| Interior | Water-based paint. |
| Exterior | Water or oil-based paint. |
| For Wood Doors | Water-based for non-bleeding wood; oil-based for bleeding wood. |
| For Metal Doors | Oil-based paint. |
| For Fiberglass Doors | Water-based paint. |
Interior or Exterior Door
There are small distinctions between interior and outdoor paints, such as the resin used in their production. Resin is responsible for adhering the pigment to the surface.
It’s critical for an external paint to be able to withstand temperature variations as well as be exposed to moisture.
Exterior paint must also be more durable and resistant to fading, chipping, and peeling as a result of direct sunlight. Therefore, the resins used in bonding exterior paints must be softer because of these considerations.
The binding resins used in interior paint are stiffer, which reduces scuffing and smearing and increases durability.
The pigments and solvents used in interior and exterior paints are identical in their properties. Depending on the weather, you can use either water or oil-based paints outside.
However, oil-based paints are not typically utilized for interior work. This is because of the odor they emit and the difficulty in cleaning up after them.
Door Material
Paint your fiberglass door with epoxy resin paint, polyurethane, polyester, or acrylic paint to give it a professional look.
For the best results, choose a paint that is compatible with the type of fiberglass used. Water-based paints are the best in this case. Oil-based paints should not be used because they can harm the door.
If you have a wooden door to paint, the type of wood will dictate your paint choice.
Water-based paint is the way to go if the door is made from a species that’s not prone to bleeding. For doors made from wood that does tend to bleed, like cypress or cedar, oil-based paint is good.
Lastly, if you are looking to paint a metal door, oil-based paint is better because it helps prevent rust. This is whether it’s made from steel or some type of alloy.
How to Paint a Door Without Brush Marks
Anyone can learn how to paint a front door without brush marks. Just follow these steps.
What You’ll Need
- 220 grit sandpaper.
- Clean microfiber cloth.
- Optional: pressure washer.
- Cleaner or degreaser.
- Spackle.
- Caulk.
- Primer.
- Paint.
- Paintbrush.
- Paint roller.
- Screwdriver.
- Painter’s tape.
1. Sand the Door
Grab some 220-grit sandpaper and sand the door. You can also get an angled sanding sponge, which will allow you to sand in touch-to-reach spots.
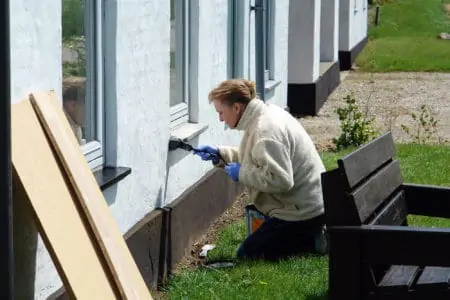
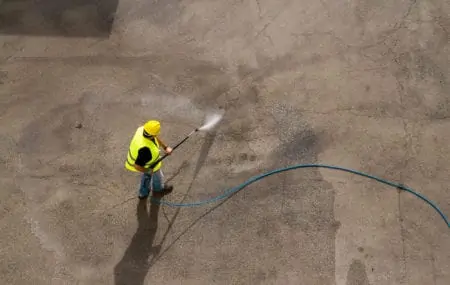
2. Clean the Surface
If you’re looking to paint an exterior door, you might need a power washer to get rid of all dirt and debris. Make sure you only use it on the exterior part of the front door.
If it’s an inside door, you can use a special cleaner or degreaser like TSP. You can also get rid of dust by using a clean microfiber cloth.
3. Spackle and Caulk
Natural doors, in particular, require caulking and sanding before painting in order to achieve the finest effects. If you don’t do this, your door might have small holes that won’t be covered in paint.
Spackle any tiny holes that you find. When the spackle is dry, sand the surface. Add caulk to the inside of the panels (particularly if you’re painting a wooden door) and locate gaps on intersecting wood parts.
4. Cover/Remove Door Hardware
Obviously, it’s up to you to remove the door from its hinges or paint it without removing it. Whether you do or not, you will have to remove the hardware or cover it completely.
Professional painters typically remove hardware from the door before applying paint. But, you can tape the door hardware instead, so there’s no risk of misplacing nails and screws.
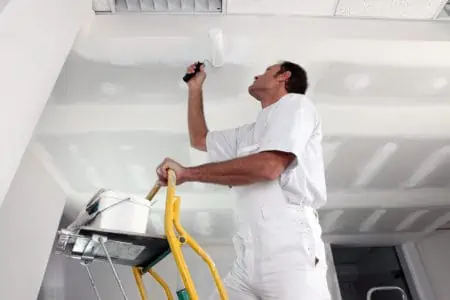
5. Apply the Primer
If you’re painting a door that hasn’t been painted before, you have to apply some primer.
Pro Tip
If you’re painting raised panel doors, paint the indented areas first.
6. Apply the First Coat of Paint
If you’re painting a new door, apply a coat of primer, allow it to dry, and sand it. Keep in mind that sanding the surface when each coat is dry will render a smoother paint finish.
Remember to take into consideration the material of the door you’re painting. This will help you choose the best paint for the job.
7. Sand Between Coats
Sanding is a crucial step for painting a door without brush marks. Wait for the first coat of paint to dry before you begin sanding. When you sand each paint layer, the brush strokes become less visible and make the second coat look smoother.
8. Apply the Second Paint Coat
Painting a door requires at least two paint coats for a beautiful gloss. After you’ve sanded the first coat, wipe the surface down with a clean cloth, and apply the second coat.
Keep In Mind
You can go back to touch up spots that don’t seem right to you. Dip the brush in some paint and dab the area.
How to Eliminate Brush Strokes After Painting
These two methods will help get rid of brush strokes even after the paint is dry. I recommend sanding as it’s the easiest route.
Sanding
Grab some 180-grit sandpaper. Make sure to wipe it constantly with a brush to prevent clogging. Don’t use an electric sander because it heats up the paint and changes its consistency.
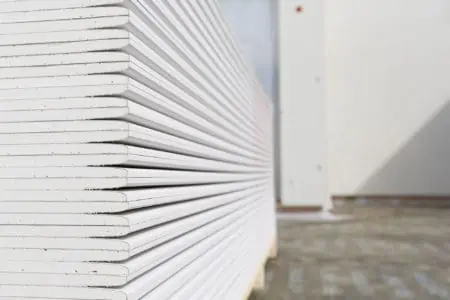
Drywall Compound
If there are still visible brush marks after sanding, you may need to start the process again. Apply a thin coat of compound to the door to even out the texture. When it’s dry, smooth it out using 180-grit sandpaper.
Apply a coat of primer and proceed to repaint that area of the door using proper methods for a paint job without streaks.
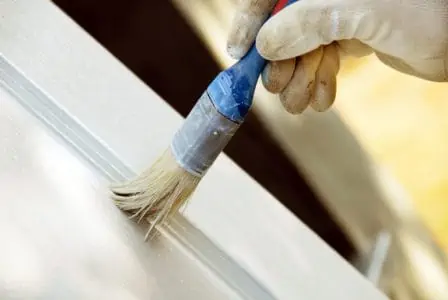
Should I Use a Brush or Roller to Paint Door?
Both. Since paintbrushes are likely to drip and run, use them before painting the remainder of the door. Brush the indentation areas of the paneled door as well.
Avoid letting droplets dry by wiping them as you go. If there are dried drop stains, sand the door and repaint it.
After painting the corners, use the foam roller to roll the door gently and evenly. The roller helps remove any brush marks. But, pushing too hard on the door with a roller can damage the finish.
Pro Tips for Painting Doors
Painters and interior designers always have tips that could help you get the best results when painting a door.
Remove the Hardware
If you remove hardware from the door, it will be easier for you to spot gaps, holes, and cracks that might need repairs. When you’re removing hinges, tap them gently using a hammer and a nail.
Invest in Good Materials
Professional results require top-notch instruments. Use a brush with soft bristles.
If you prefer a roller, look for ones with Pro Grade microfiber sleeves, which hold more paint and are smoother than foam. Buy quality drop cloths, a paint pan, and sandpaper.
Sand and Prime the Surface
Make sure that you sand the surface by using sandpaper or a power sander. When you’re done, make sure to use a soft cloth to remove any dust.
Paint Continuously
It’s important that you don’t take a break when painting the door. If you pause frequently, the paint will dry unevenly, resulting in a patchy finish.
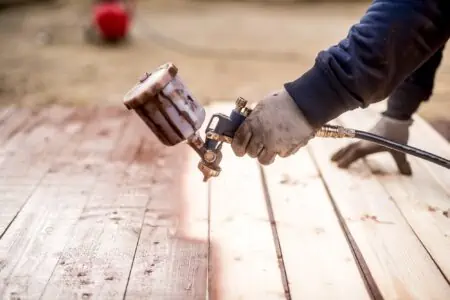
Consider Using a Sprayer
If you don’t own a paint sprayer, you could consider renting one (you can find one at Home Depot). Make sure that the sprayer you’re using is compatible with latex-based paint because it will produce fewer fumes.
Dry the Paint Faster
If you want to make sure it doesn’t take forever for the paint to dry, always apply thin and even coats. If you’re using a paintbrush, only dip it halfway into the paint and remove some of the excess paint.
FAQs

Will Roller Marks Go Away When Paint Dries?
In most cases, no. The stipples and ridges will flatten significantly with drying time, but they will not disappear entirely. Using the proper nap roller cover for the surface will make a significant difference.

How Do I Remove Paint from a Door?
To strip paint from a door, use products designed for stripping paint, like CitrisStrip. Apply the solution to the surface and let it sit for a few minutes. Then use a scraper or a tool that can help you scrape off the solution and the coat of paint.
The Verdict
Now that you know how to paint a door without brush marks, you can easily follow this tutorial for other surfaces throughout the house. These methods also work if you’re looking to paint a cabinet, a window frame, and trim.