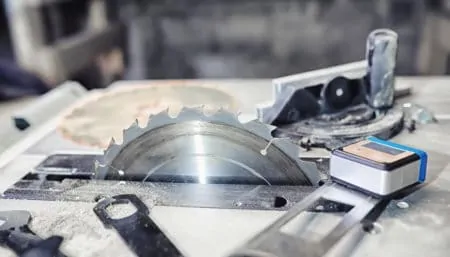
A table saw is a staple tool for any woodworker, with the versatility required to make a range of different cuts quickly and accurately. If you are serious about carpentry or working with wood in general, it is well worth adding a table saw to your collection.
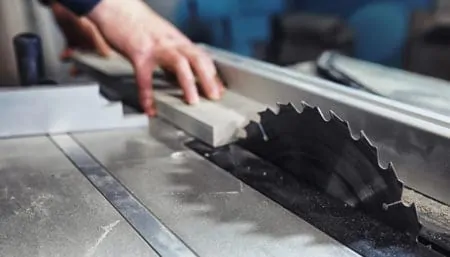
Despite all their benefits, these saws have exposed blades and can be very dangerous, especially if you need to make intricate cuts. Fortunately, it is possible to control the piece you are cutting while keeping your hands at a safe distance by using a table saw sled.
You could buy one of these tools from a hardware supplier but you can save money by making one yourself. In this article, we will explain how to make a table saw sled, including all the parts you will need and the different sleds required for various cuts.
Key Takeaways
- A table saw sled enhances safety and accuracy for crosscuts and miter cuts.
- Measure the miter track and cut a hardwood strip to fit snugly for smooth sliding.
- Attach fences to the sled base using wood glue and screws, ensuring proper alignment.
- For miter cuts, create a fence with 45-degree angles on both sides of the blade.
Why Use a Table Saw Sled?
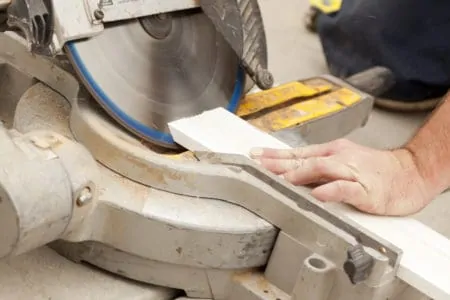
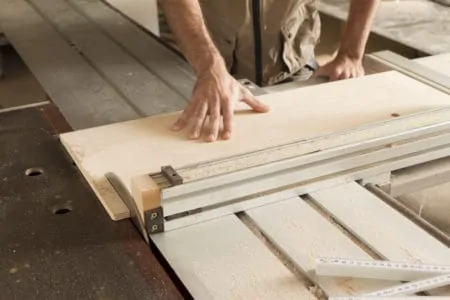
A sled is a movable device that slides along the factory-made grooves in your table saw. Using one makes cross-cutting and miter-cutting safer, neater, and more precise. For crosscuts, the stock rests on a wooden fence to hold it steady as it approaches the saw blade.
The stock also rests on the fence for miter cuts but the miter gauge adjusts the angle so you can make 45-degree cuts, 90-degree cuts, and many other angles in between.
A table saw sled increases the range of crosscuts and miter cuts you can make without negatively impacting your safety. Learning how to make a table saw sled means you will be able to make safe, accurate cuts without spending much money.

How Big Should a Table Saw Sled Be?
There is no universal answer to how large a table saw sled should be, as it will be influenced by the size of your saw. We recommend making the sled no larger than the width of your saw table, but about three-quarters of the size of the table is usually ideal.
How to Make a Table Saw Sled for Crosscuts
To make a table saw sled for crosscuts, you will need to gather the required materials and tools. You will usually need:
- Calipers
- Tri-square
- Screwdriver
- Drill and bits
- Countersink bit
- Wood glue
- 2 x 2 lengths of wood
- Plywood (flat and a minimum of 0.25 inches thick)
- Straight hardwood scrap such as oak
- Dustpan and brush
- Hearing protection
- Face mask
- Safety goggles
The calipers are essential because they will provide an accurate measurement of the table saw’s miter track depth. The tri-square aligns the sled with the table saw blade and rip fence to ensure you will make straight cuts.
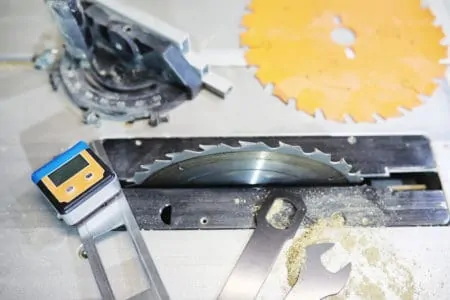
1. Measure the Miter Track
Miter tracks are usually a standard size, measuring 0.75 inches wide and 0.375 inches deep. However, it is always worth checking your miter track’s size to ensure it matches these measurements. Use calipers and measure the width and depth of the track.
2. Cut the Track
It is time to put on your protective equipment. Wear ear defenders, an N95 face mask, and safety goggles.
Set your table saw fence to the exact width of the track. Take a length of hardwood scrap and make a rip cut. Next, adjust the fence to the depth measurement and pass the hardwood back through the blade.
Hardwood is a dense material and will withstand wear and tear better. Now check that the depth and width match the measurements of the miter track to ensure you achieve a snug fit.
3. Keep the Work Area Clean
Before checking whether the hardwood fits the track, use a dustpan and brush to remove any sawdust. You don’t want debris preventing the sled from moving smoothly. This simple step could be the difference between making an accurate cut or a rough one.
4. Test-Fit the Track
Ideally, you want a snug fit with no side-to-side movement, but one that allows the wood to slide smoothly. Move the wood along the track to check that it can slide unrestricted but that there is no lateral movement.
5. Glue the Base
One advantage of this sled design is that its base doesn’t need to be square because the sled runs along the miter tracks. The base only serves as a flat platform and won’t influence the measurements of the material you cut.
Place the hardwood into the miter track and apply a small trail of glue along the surface. You don’t need much as you will soon be inserting screws into the wood to secure it. Once the adhesive is applied, place the plywood onto the hardwood, making sure the base is square with the blade and meets the blade in the middle.
Leave it to dry overnight.
Warning
6. Secure the Track
Lift the track out of the miter slots and turn it over. Place a suitable drill bit into your drill and use it to make a series of pilot holes along the hardwood. Then, countersink the holes to ensure your screws will be flush.
Insert the screws and use a manual screwdriver to hand-turn them until they are secure. The combination of the screws and glue should ensure the track is secured.
Warning
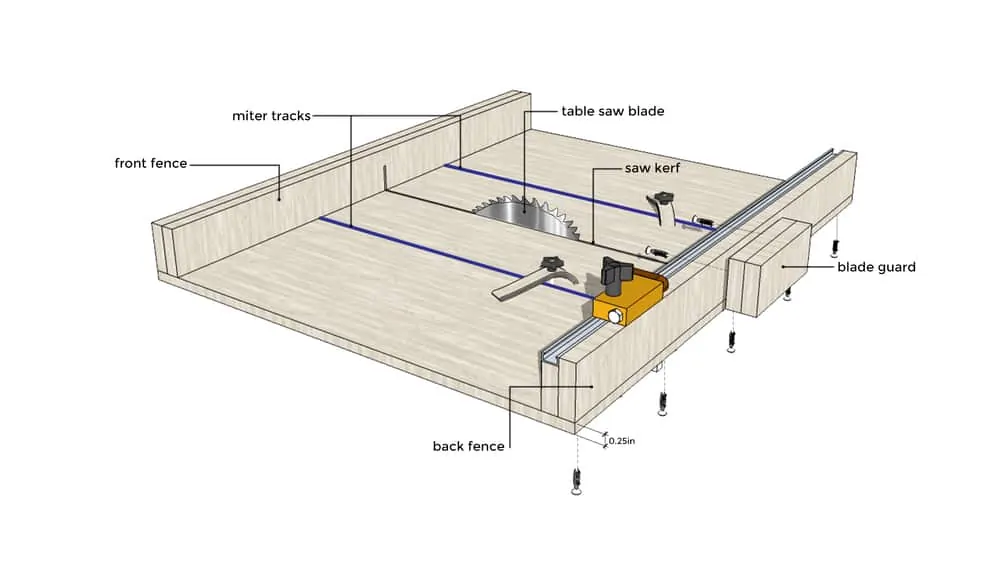
7. Glue the Front Fence
Cut a length of 2 x 2 to match the width of your plywood base and use wood glue to stick it to the surface of the base that will be furthest from you when you use the sled. This fence only has one job: ensuring the integrity of the structure once you have cut the kerf.
8. Cut a Partial Kerf
Switch off the saw and remove the insert and riving knife. Return the insert to its position and lower the saw blade into place. Place the sled base into the miter slot and position it so it sits directly above the blade at the center of the base.
Now, switch the power back on and gently raise the saw to set the kerf. The top of the blade should be approximately 1 inch above the surface of the plywood. The kerf is the material that the blade removes and is the same width as the saw blade.
9. Make the Back Fence
You can use the same 2 x 2 wood to make the back fence, but keep in mind that this is the most important part of the sled. The back fence needs to hold the stock in place and have enough capacity to accommodate larger projects.
The back fence must be square to the saw blade to make accurate crosscuts. Use a tri-square to check that the wood is straight and at the correct angle. The back fence should be as long as the front fence and the same width as the base.
10. Attach the Back Fence
With the blade protruding through both the table and the plywood base of the sled, place the tri-square against the face of the blade. Remember that the blade’s teeth are slightly wider, so you will need to make sure the tri-square is in full contact with the blade’s face.
Now, align your back fence so it is perpendicular to the saw blade, using the tri-square arm as a guide. If you were viewing it from above, the configuration should look like a capital T, with the back fence forming the cross-section.
Add a few beads of wood glue to hold the fence in place.
Remember
11. Double-Check
Reposition the tri-square against the other side of the saw blade to double-check that the back fence is aligned. If you are satisfied, allow the glue to dry overnight. Then, as you did with the track strip of hardwood, drill a series of pilot holes and countersink them before driving in the screws to fix them in place securely.
12. Raise the Blade
Raise the blade until it is 0.50 inches higher than the plywood’s surface and protrudes through the sled. You now have a functioning hand-made crosscut sled.
How to Make a Table Saw Sled for Miter Cuts
1. Secure the Track
Follow steps 1 to 6 of our guide to making a crosscut table saw sled. Also, raise the blade in the center of the base to create the kerf as you did for the crosscut sled. This will give you a center point to align the tip of your miter fence.
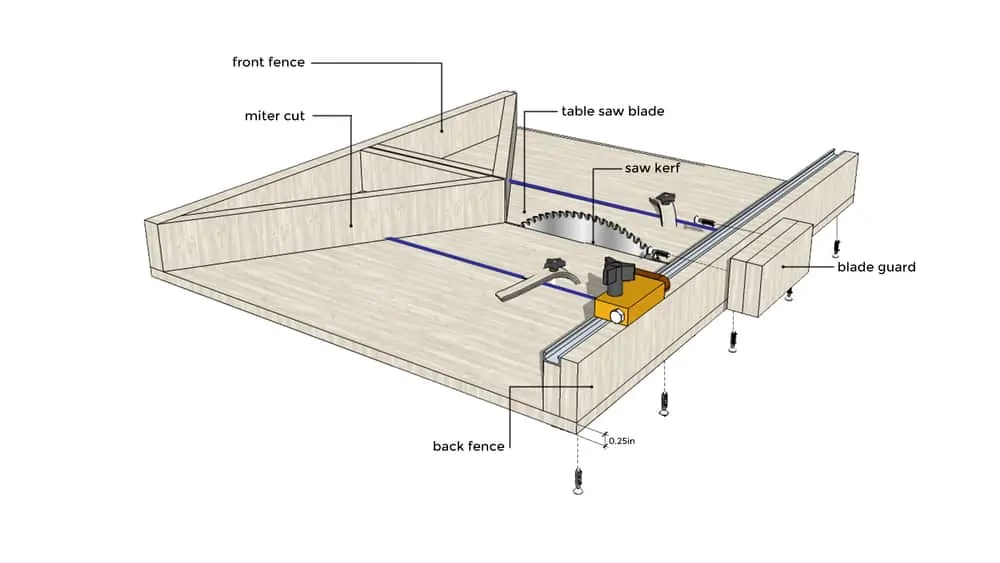
2. Add the Fence
The fence is a square of plywood that is the same width and depth as your sled base. Turn the square to face the base like a diamond, with the tip facing the blade. Position the diamond so it is approximately one-third of the way onto the base. You should now have 45-degree angles on both sides of the blade.
3. Attach the Fence
Apply some beads of wood glue and press the fence down, then leave it to dry overnight. Once it is dry, turn it over and drill a series of pilot holes and countersink them to ensure the screws sit flush. Now, hand-screw the two pieces of wood together.
4. Cut Off the Overhang
There should still be a large section of the wooden diamond shape overhanging. Use a handsaw to remove this so the edge is even with the plywood sled base. You can place the section you have removed on top of the fence to increase the thickness of the fence edge to 1.5 inches. Use the same method as when you attached the first layer.
This will give you the capacity to cut thicker pieces of wood.
5. Trim Where Necessary
Tidy up any rough edges so the three layers of plywood have a uniform edge. You will now be able to use your miter table saw sled to make identical cuts as many times as you need.
FAQs

Is Melamine Good for a Table Saw Sled?
Melamine is a great choice for a table saw sled because it perfectly balances durability and affordability.
It’s easy to work with, has a smooth finish that helps reduce tear-out, and won’t easily chip like other materials such as plywood.
Apply a coat of wax or mineral oil to protect your finished project from dampness. All these benefits make melamine the ideal material for creating precise cuts with your table saw sled.

How Tall Should Fence be on a Table Saw Sled?
The fence on a table saw sled should be between 1 1/2″ to 2 1/2″ wide and 2″ to 3 1/2″ tall for maximum accuracy and stability. The wider fence makes it easier to keep the blade straight when cutting, while the taller fence prevents kickback from larger pieces of wood.
This combination of width and height creates optimal conditions for improved safety and cutting precision. A sturdy, properly sized fence is essential to creating successful projects with your table saw sled.

What Can I Use As a Table Saw Sled Runner?
Table saw sleds require a runner to allow the sled to glide smoothly across the table surface. The ideal material for runners is metal, such as aluminum or steel.
Metal runners provide a much smoother and more precise motion than wood or plastic. They are also highly durable, so don’t worry about replacing them anytime soon.
For better precision, you can use two metal runners instead of one for added support on the sled. With metal runners installed, your sled can make consistent cuts with minimal deflection for even better accuracy.

What Is the Best Material for a Table Saw Sled?
The best material for a table saw sled is a medium-density fiberboard (MDF).
MDF is an ideal material for constructing a table saw sled due to its strong and dense properties, which make it resistant to warping or cracking. The smooth surface of MDF allows the sled to glide smoothly along the table saw’s miter gauge track.
This ensures optimal accuracy when making cuts with the table saw. Other materials that can be used to construct a table saw sled include plywood and particle board, but they may not provide as much stability as MDF.