You can buy prehung doors from most DIY and online stores, but what if you have a bespoke design in mind? Perhaps you have an irregular-shaped opening and can’t find a suitable door off-the-peg?
This article will show you how to make a door from scratch. We also include the anatomy of a door and door alternatives.
Key Takeaways
- Measure the door opening and cut the necessary components for the custom door.
- Create mortise and tenon joints for a strong and durable connection between door parts.
- Slot in panels and glue stiles and rails in place, allowing for wood expansion.
- Paint, hang the door, and install the lock mechanism for a complete custom door.
Is It Cheaper to Make Your Own Door?
Building a door could cost as little as $50 to $100, especially if you use wood or plywood. Depending on the material, off-the-peg doors could cost as much as $500, but you can pick up wooden examples for a couple of hundred dollars.
So, it is cheaper to build your own door. However, asking a professional to construct your unique door from scratch will cost you upwards of $1,000.
There are instances when making your own door is not an option. Fire doors must comply with fire safety regulations that dictate the type of door you can hang. Also, in older homes, you may be restricted to size and design due to strict local building codes.
In these instances, it’s often not a good idea to build your own door and instead just buy one in.
Anatomy of a Door
Knowing the anatomy of a door is crucial if you want to build one from scratch. How many people can honestly say they know the components of a door? Not many, we bet.
Let’s start from the top of the door and work our way down.
Top Rail
The top rail is pretty self-explanatory. It is the piece of wood sitting at the top of the door, connecting the hinge and lock stile.
Lock Stile
The lock stile is the strip of wood that stretches down the lock side of the door, running from the top to the bottom.
Hinge Stile
The hinge stile is the same as the lock stile, but it sits on the opposite side of the door to the lock stile. It is the part of the door where the hinges are mounted.
Panels
Solid wooden doors typically have four or six panels. These sit in the center section at the top and bottom of the door.
Mullion
The mullion is the supporting bar that runs down the center of the door and separates the panels. It connects the top rail with the bottom rail.
Lock Rail
The lock rail sits in the middle of the door and connects the lock stile with the hinge stile. It’s the piece of wood that holds the lock, hence the name.
Lite
Some doors have a glass panel, called a lite. If your door has this, it will likely have an intermediate rail rather than a lock rail. Because the intermediate rail sits just below the glass panel, it is too high to mount the lock and handle.
How to Make an Interior Door
Interior doors are less complex to construct than exterior doors. You don’t need so much focus on additional strength or security. Plus, these doors are lighter and made of thinner wood.
Before you begin, you will need to gather the correct tools and materials. So, let’s get started.
What You’ll Need
- Tape measure.
- Pencil.
- Paper.
- Face mask.
- Goggles.
- Safety gloves.
- Circular saw.
- Drill.
- Hole saw attachment.
- Wood glue.
- Two 8×4 foot sheets of 0.5-inch plywood.
- Ruler.
- Mallet and chisel.
- Spirit level.
- Pair of sawhorses.
- Sandpaper.
- Orbital sander and sanding pad.
- Finishing nails.
- Eight strips of wooden molding.
- Tack cloth.
- Clamps.
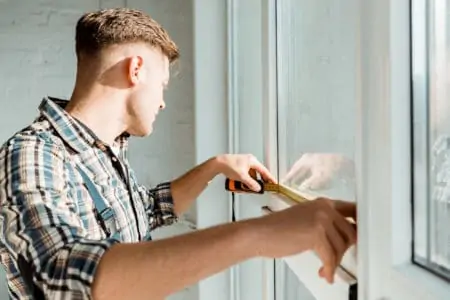
1. Measure the Opening
Measure the width in three places, starting at the base, then the center of the frame, and finally the top. Do the same for the height and make a note of the measurements.
It’s always a great idea to check the measurements twice before you make any cuts in the plywood.
Top Tip
Always use the smallest measurement if there are any discrepancies.
2. Cut the Board to Size
Lay the four-foot by eight-foot plywood sheet on the sawhorses. Grab the pencil and tape measure and mark out the door’s dimensions. Use the ruler to help you get a straight line.
Don your safety gloves, goggles, and face mask. Plugin the circular saw and power it up. Wait while the blade reaches the maximum speed and cut along the width and length.
3. Sand the Plywood
Grab the orbital sander and smooth the surface of the plywood, taking care to remove rough edges, especially where the saw made the cuts. Do this for both sides of the panel. Wipe away the sawdust using a tack cloth. You might need to clamp the plywood down while you sand it.

4. Add Stiles
You will need four stiles to frame both sides of the door. Cut the second plywood sheet into 80 by 4.5-inch strips. Now run three lines of construction or wood glue along the length of each stile.
Position the stiles and press them in place. Use the clamps to hold the plywood strips while the glue sets. This should take about 15 or 20 minutes.
Once the adhesive dries on one side of the door, flip it over and repeat the process for the other side.
5. Cut the Rails
Measure the distance from the inside edge of the stile to the inside edge of the opposite stile. This will give you the length of the rails. If your measurements are correct, the distance between the left and right stiles should be 16 inches.
Both sides of your door will need three rails: one at the top, middle, and the bottom, so remember to cut six.
6. Glue The Rails
Starting at the base, add two glue lines to the underside of the rail and glue it in place. Repeat this for the middle and top rail.
Remember to use the clamps. They help hold the board flat and free up your hands for other tasks. Wait for 15 to 20 minutes while the glue sets.
Helpful Hint
To find the position of the middle rail, find the center of the board (40 inches) and mark the line with a pencil.
7. Add the Moldings
To give your door a more professional finish, add moldings. You’ll need eight strips measuring 33.25 inches and eight lengths measuring 16 inches. Saw the ends off at a 45-degree angle to get the neatest finish.
Glue the molding strips inside the rails and stiles and hold them in place with finishing nails.
8. Drilling Out the Handle
Using the drill with a hole saw attachment makes boring the hole for the handle mechanism a simple process. You will need a hole saw with a diameter of 2.125 inches. Clamp the door down so it doesn’t slip, and start drilling.
When you cut through to the other side, smooth any rough edges with sandpaper.
Swap the hole saw for a smaller, one-inch version and drill through the edge of the door to make the opening for the latch. Use a door hole-boring template like this DEWALT Door Lock Installation Kit to make this task easier.
9. Sand and Paint
Finish off the door by smoothing the surface and any rough edges with the sander. Now you’re ready to apply the primer and paint. And the good news is the paint will hide many of the joins.
Wait 24 hours between the second primer coat and the first topcoat. Then apply two layers and wait another 24 hours for the paint to set.
10. Fit the Handle
Push the latch mechanism into the one-inch hole on the side of the door and secure it with the included screws. Now line up both handles on either side of the door.
Insert the rod into one of the handles and thread it through the hole in the door. Once it feeds through the latch mechanism, it should connect with the other handle. Screw down the faceplate to secure the handles and test to see if the latch works.
Take Note
The round side of the latch should face the door jamb. If you put it in the wrong way round, you will struggle to open and close the door.
Now you are ready to cut the mortise for the hinges and hang the door.
11. Cut the Mortise for the Hinge
Place the hinge on the hinge stile approximately seven inches from the top of the door. Draw around the hinge so that you have a template. Finally, measure the depth and mark it on the door. This is so you know how deep to cut the mortise.
Grab the chisel and mallet and cut along the edge of the hinge template to the depth marked on the door. Place the hinge back on the door and mark the screw holes. Drill pilot holes first to avoid splitting the wood and insert the screws.
When you hold the door to the frame, you will need to repeat this process so the hinge sits flush in the jamb. Repeat this process for the base hinge, placing it approximately nine inches from the bottom of the door. Now you can hang the door.
How to Build an Exterior Door
Building an exterior door is a little more involved than constructing internal doors. There are security considerations, and it also needs to be weatherproof. Before we delve into the details, first, we need to get the right tools and supplies.
What You’ll Need
- Three 6×2 by 80-inch boards for the stiles and mullions.
- Three 8×2 by 36-inch boards for the rails.
- Four 1.5-inch thick boards for the panels.
- Paint.
- Hinges.
- Lockset.
- Router.
- Chisel and mallet.
- Tape measure.
- Pencil and paper.
- Table saw.
- Jointer or hand plane.
- Sander.
- Square.
- Drill.
- Clamps.
- Waterproof glue.
- Paintbrush.
- Face mask.
- Goggles.
- Safety gloves.
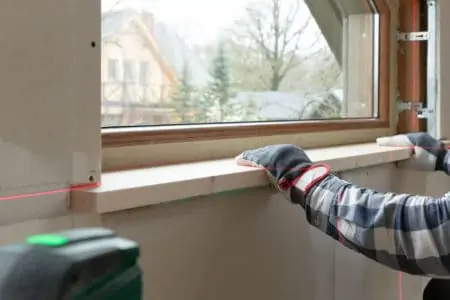
1. Measure the Opening
Measure the opening starting with the width. Measure from the bottom, the middle, and the top using the smallest measurement as the guide. Do the same for the length, working from left to right, using the smallest measurement as the guide.
Remember to trim 0.25 inches from your measurements to allow the door to fit inside the jamb. Another way is to use the same dimensions as the old door.
2. Cut Your Component Parts
Safety Tip
Don your safety gloves, face mask, and goggles. Sawdust contains toxic particles that can irritate your eyes, nose, and lungs.
Start by cutting the stiles, mullions, rails, and panels to the dimensions designated in the list above. Once the parts are cut to size, use the planer to make them flat. Clean up any rough edges using the sander.
Lay out the pieces and see if the edges are square using the square tool.
3. Cut the Grooves
The rails and stiles are the horizontal and vertical pieces on your door. You have a hinge stile and a lock stile, with the rails running across the top, middle, and bottom. Grab the router and cut a 0.5-inch groove at a depth of 0.56 inches along the inside edge of the rails and stiles.
Make sure you cut the grooves in the center of the edges. The grooves hold the panels, which are not glued to allow for wood expansion.
4. Make the Mortise and Tenon Joints
Doors only use one type of joinery: mortise and tenon joints; it is an ancient method for joining two pieces of wood. You can use a router or a chisel to do this, but using a router is far quicker. Once the mortises have been cut, you can move on to cutting your tenon joints.
You can use a hand saw to cut the tenons. Start by measuring the depths of the mortise and marking it on the piece of wood for the tenon. Cut two lines into the end of the wood using the table saw, and remove the outside strips.
You should now have a tenon to slot into the mortise. Do this for all the components, ensuring that the stiles have the mortise and the rails have the tenons.
5. Dry Assemble the Door
Lay the pieces onto a flat surface, and assemble the door. This gives you the opportunity to see if everything fits and whether there are any last-minute adjustments.
If you are happy with the fit, you can glue the center mullion in place. Starting from the center of the door allows you to slot in the panels and lock them in place when you install the stiles.
6. Slot In the panels
Put the panels into the 0.5-inch groove and slot them in place. You can attach the hinge and lock stiles and glue them in place.
Use the clamps to hold the panels in place while the glue dries. This should take no more than 30 minutes.
Take Note
Don’t get any glue in the grooves, as this will stop the panels from floating freely.
7. Now You’re Ready to Paint
Use two coats of exterior primer and wait 24 hours while it dries. For the smoothest results, you should sand between each coat. Now lay down a minimum of two coats of paint and wait the recommended time while it dries.
Now you are ready to move on to hanging the door.
8. Hanging the Door
Grab the hinges and mark their depth and dimensions on the hinge stile. The top hinge should be approximately seven inches from the top of the door and nine inches from the base. The center hinge should line up with the center edge of the lock rail.
Grab the chisel and cut the mortise for each hinge, checking the depth at every stage. Position the hinge in place and mark the screw holes. Use the drill to make the pilot holes and then insert the screws.
Attach the other two hinges and then place the door in the opening. Use thin wooden blocks to level it up and ensure that the gap between the frame and the door is even all the way around. Once you find the right position, mark where the hinges meet the jambs.
You may need to cut a mortise to get the hinge completely flush. Use the same technique as before. Now attach the hinges, and the door is hung.
9. Install the Lock Mechanism
Once the door is in position, you can line up your lockset and strike plate. As mentioned before, the easiest way is to use the lock positioning jig. Grab a drill and insert the hole saw to make the cut for the handles.
To mount the latch, find the center of the lock rail and drill a hole using a one-inch hole saw. Insert the rod between the two door handles and thread it through the latch mechanism. Now screw down the handle faceplates to hold them in place.
Mark the position of the strike plate and screw it in place. Your door is now hung and should open and close.
Ideas for Building a Custom Door
Since you are creating a unique door, why not go to town and release your creative side. You can personalize the door or add color to make it stand out.
Stained Glass
Stained glass is a great way to enhance your custom door. It brightens the entrance to your home and creates a talking point for visitors. It also throws beams of colored light into your home when the sun catches it.
Personalized Touches
Why not take a leaf out of the Victorians style handbook and personalize your door. You could include your initials, your surname, or the names of your kids. Either get the glass etched or carve it into the body of the door.
Different Woods
An effective way to create the wow factor is to incorporate different types of wood. Mixing and matching dark and light woods creates interesting contrasts and makes your door stand out.
What Can I Use Instead of Doors?
Sometimes, you need to find alternative ways to plug that opening. Maybe the wall doesn’t have enough space to hang a door, or you lack the floor space for a swinging door.
Curtains
Thick curtains are an ideal and speedy solution to covering an opening in the wall. Use heavy material for the best insulating qualities. However, curtains will not deliver the same soundproofing that a door has.
Saloon Doors
We’ve all seen the swinging saloon doors in western movies. It’s an interesting way of closing off the partition. The only downside is that they don’t cover the entire opening and are not great for soundproofing.
Modesty Screens
Freestanding screens that people slip behind for a quick change of clothing are ideal for covering an opening in your wall.
FAQs

How Do You Build a Modern Style Door?
The process for constructing a modern-style door is the same as other methods we’ve mentioned. However, the difference comes with the finish, because modern-style doors come in all designs.
Unlike standard doors that conform to a set of design rules, modern-style doors have sleek and bold lines. Other elements include contemporary colors, bold door hardware, and high-quality materials.

What’s the Cheapest Material to Build a Door?
Plywood is an ultra-cheap door material, but surprisingly, so too is aluminum. It is strong, rust-resistant, and lightweight, making it an excellent option for garage doors or small openings.

Can I Just Replace a Door Without Replacing the Frame?
You can replace a door without removing the frame as long as the new door matches the dimensions of the old one. Otherwise, you will struggle to get it to fit. This method works well for both interior and exterior doors.

How Much Does It Cost to Have a Custom Door Made?
For the simplest designs, a custom-made interior door will cost about $500 to $600. These figures rise dramatically depending on the materials used and the complexity of the project. For exterior doors, you can easily spend $1,000 or more.
Deliver More With a Custom Door
Few tasks give you the sense of satisfaction that building your own door brings. It enhances the exterior of your home, and you win bragging rights when guests come to visit.
You’ll be able to stand back and admire your handy work and boast that you built it. And best of all, you have something that is a one-off.