Does your toilet rock worse than a Bucking Bronco? Knowing how to level a toilet is a valuable skill, especially as it saves you a packet on plumber’s fees. It is a simple enough task, as long as you have the right tools.
We show you the best techniques for leveling a toilet, including how to shim a toilet and testing if it’s level.
Key Takeaways
- Check if your toilet is level using a spirit level.
- Use plastic shims or stainless steel washers to level your toilet.
- Test the toilet after leveling to ensure it’s stable and comfortable.
- Turn the water back on and check for any leaks around the toilet base.
Does a Toilet Need to Be Level?
Your toilet needs to be level because you will slide right off if it’s not. Imagine how uncomfortable going to the bathroom would be if it was on the slant. And if you have elderly or mobility-challenged relatives, they could stumble when sitting on an uneven toilet.
So, your toilet must sit level for health and safety reasons.
How to Test Whether a Toilet is Level
Before you roll up your sleeves and get to work, you need to know whether the toilet is uneven or the floor. You will need a spirit level to do this.
Lift the lid and toilet seat and place the spirit level across the span of the bowl. Check if the bubble on the spirit level is in the middle. If it is, you have a level toilet.
Next, lay the spirit level on the floor nearest the toilet and perform the same check. The floor is uneven if the bubble sits on the left or right. You will need to either level the floor or use shims.
How to Level a Toilet
If you are fed up sliding off your toilet, or it is so wobbly it makes you seasick, it’s time to get it fixed. Before starting your toilet leveling task, you will need to gather the right tools as part of your leveling kit.
What You’ll Need
- Adjustable wrench.
- Screwdriver.
- Old newspapers.
- Towel.
- Putty knife.
- Sponge.
- Stainless steel washers and plastic shims.
- Spirit level.
- Bucket.
- Small jug.
- Rubber gloves.
1. Isolate the Water Supply
Feel behind the toilet for the isolation valve and turn the knob to the off position. Without an isolation tap, you will need to switch the water off at the main valve where the water pipe enters your property.
Disconnect the water pipe using the adjustable wrench. If you have a plastic fixture, it should tighten by hand so you won’t need the wrench.
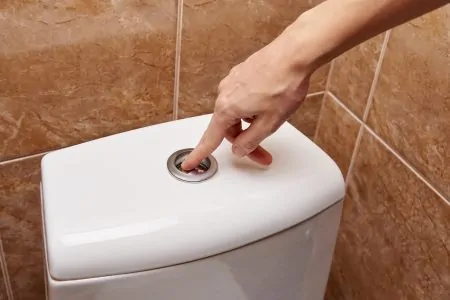
2. Flush the Toilet
Before you do any work, lay the towels around the toilet’s base to catch drips. Flush the toilet to empty the system of water. You may need to do this a couple of times to remove all the water.
Lift the tank lid and use the sponge and bucket to mop up the water residue. Do the same in the toilet bowl, scooping the last remnants of water with the jug. Now you can dispose of the water down the drain.
Safety Note
Wear rubber gloves because toilet water is contaminated with fecal matter that could pose a health risk.
3. Remove the Flange Bolts
Lift the plastic caps protecting the flange bolts. Use the wrench to unscrew the bolts and remove them. The toilet is now free-standing and unattached to the floor.
4. Remove the Toilet
Before you try and lift the toilet, you may need help. Toilets weigh between 60 and 120 pounds, so they are hefty objects. Also, lay down some newspapers on the floor to stand the toilet on.
Grasp the toilet with both hands and loosen it, so that it rocks back and forth. Now, lift it from the flange and carefully place it on the newspaper. You should now see the drain hole and wax seal. At this point, you should check the condition of the toilet flange and wax ring.
You may need to replace the wax ring if it shows signs of wear and tear. It should sit flush with the floor. If it protrudes, it could be the cause of your uneven floor.
Use the putty knife to scrape away wax residue and remove the wax ring.
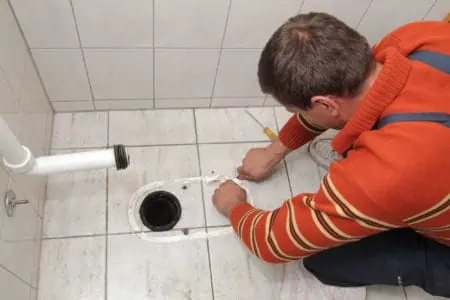
5. Check the Floor is Level
Lay the spirit level over the drain opening and check that the floor is level. This is also the time to place a new wax ring onto the waste pipe on the toilet. To do this, lay the toilet on its side and slide the ring straight over the pipe.
Take Note
Don’t overhandle the ring as you may cause it to misshape, which could lead to leaks further down the line.
6. Replace the Toilet
Get help to lift the toilet back in place. Lower the toilet over the drain hole, lining up the base with the flange. Press the wax ring down so that it is secure in the setting.
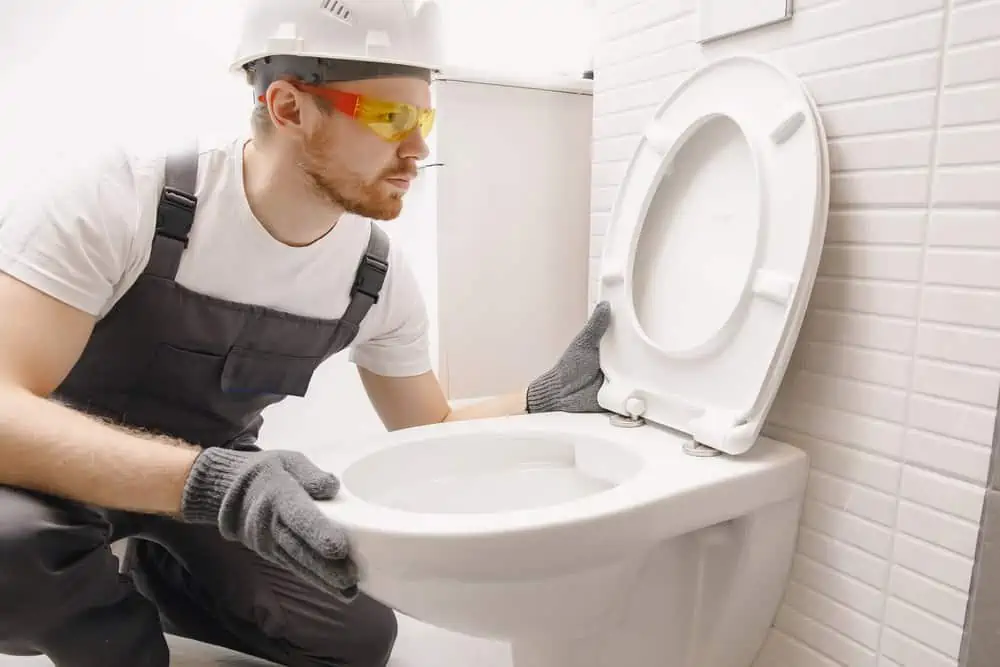
7. Check the Toilet is Level
Place the spirit level over the toilet bowl opening and check its level. The bubble should sit in the center of the fluid chamber. Now, sit on the toilet to ensure it feels level and comfortable.
Take care not to rock it back and forth. You can insert the flange bolts and tighten them using the wrench if you are happy.
If your toilet is not level, use washers or plastic shims as spacers to raise or lower the toilet. Shims are small wedges that insert beneath the toilet base to level it up. The washers attach to the flange bolts.
8. Turn the Water Back On
Reattach the water supply line using plumber’s putty to get a tight seal. Switch the water back on and wait while the flush tank refills. Your toilet is now level and ready to use.
9. Check for Leaks
Grab a flashlight and shine it around the base of the toilet. You are looking for pools of water and small leaks. Get on your hands and knees and feel around the back of the toilet.
If you feel water, you will need to retrace your steps and remove the toilet again.
How to Shim a Toilet
One of the easiest ways to level your toilet is to use shims. It’s the best technique if your toilet sits on an uneven floor.
What You’ll Need
- Plastic shims.
- Washers.
- Hammer.
- Adjustable wrench.
- Spirit level.
- Flashlight.
- Utility knife.
1. Check for Gaps
Get on your hands and knees to check the toilet’s base for gaps. Dirt and dust accumulate over the years, so give the toilet’s base a clean to remove loose debris. This also helps to reveal the gaps.
In some instances, if the floor is uneven, you may need to use two shims stacked one on top of the other. There could be gaps anywhere around the base, so check it thoroughly.
2. Insert the Shims
When you locate a gap, insert a shim, pushing it gently under the toilet until it is secure. Use plastic shims because wooden ones rot over time. Once the shim is in position, give it a couple of taps with a small hammer.
Use the utility knife and cut away the exposed ends of the shims to sit flush under the toilet.
3. Check the Levels
Using the spirit level, check that the toilet is level and add more shims if necessary. When the bubble sits in the center of the spirit level, you have a correctly set toilet. Finally, sit on the toilet to check the height and if it feels secure and comfortable.
If it still rocks (not in a “your toilet rocks” way), you may need additional shims.
Top Tip
A straightforward fix for a wobbly or uneven toilet is to check that the mounting bolts are tight. One or two extra turns with a wrench could be the adjustment your toilet needs.
4. Adjust the Bolts
Follow the water draining process listed above and the same techniques for removing the toilet. Lift the toilet free from the flange mounting bolts and add washers. Replace the toilet and check it is level with a spirit level.
Insert plastic shims in the gaps around the toilet’s base, tapping them in place with the small hammer. Keep checking the levels until you reach your goal.
5. Test the Toilet
Before tightening the bolts, sit on the toilet to check height and comfort. Don’t move it because you could damage the wax ring inside the waste pipe. If you are happy, tighten the bolts with the adjustable wrench.
Crucial Point
When you tighten the bolts, don’t get carried away because your toilet is ceramic and could crack under the pressure.
6. Turn the Water Back On
Reattach the water supply pipe and turn the water isolation valve to the “on” position. Wait while the tank refills, and then flush. Get on your hands and knees to feel for leaks, and use a flashlight to highlight potential problems.
FAQs

Should You Caulk Around a Toilet?
You should caulk around the toilet base according to the rules of the International Plumbing Code. It secures the toilet and makes it more stable. However, some plumbers disagree with this practice, citing access problems.
Caulking the toilet masks potential leaks, making them more challenging to spot. It also hinders access to the source of the problem because you will need to cut away the caulk.

How Do You Hide Toilet Shims?
You have to cut away the exposed part of the shim using a utility knife to conceal the shim. You could also caulk around the base to mask the shim. If you lay the toilet on tile, you could also secure it with grout.

Is My Uneven Toilet Dangerous When I Sit On It?
It can be dangerous for elderly relatives and those with mobility issues. Small children may also trip or fall sitting on an uneven toilet.

How Do You Make a Shim?
A shim is a generic term for a wedge-shaped piece of material used to level things. You could make your shims from wood slithers or even folded plastic.
While you can use wood, it is susceptible to water damage and rot. Also, don’t use paper because it will rot down, causing the toilet to move.
How to Fix a Rocking Toilet
So, now you know the easiest techniques to fix and level a toilet. It takes patience to find the correct level, but luckily the process is simple enough. It’s more about trial and error than getting it right the first time.
The next time you sit on your toilet and it feels uneven, follow these steps and avoid paying premium rates to a professional.