If walking on your concrete floor feels like you are scaling the north face of the Eiger, it’s time to take action. Knowing how to level a concrete floor is crucial, especially if you lay a new floor over the concrete.
We show you how to level a concrete floor, explain the different types of self-leveling compounds, and give you hints and tips.
Key Takeaways
- Identify uneven floors using a spirit level and mark the high and low spots with chalk.
- Use self-leveling compound, mortar, or non-shrink grout to level the floor depending on the situation and location.
- Properly clean, fill cracks, and apply primer on the concrete floor before leveling.
- For self-leveling compound, pour and spread it using a long-handled squeegee, allowing it to dry according to the instructions.
How to Tell If a Floor Is Uneven
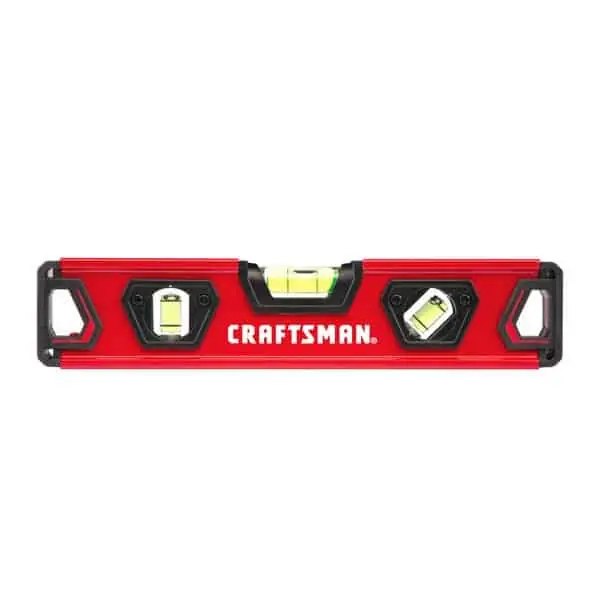
You will need a spirit level to tell if your concrete floor is uneven. They come in various sizes, ranging from nine inches to 72 inches. This Irwin 48-Inch level is the ideal tool to check if your surfaces are even.
Lay the level in the center of the room and look at the bubble in the chamber. If it is off-center, you have an uneven floor. Move the spirit level to different parts of the floor to gauge the level.
You can use other methods, like placing a ball on the floor and watching to see if it rolls.
What is the Cheapest Way to Level a Concrete Floor?
The cheapest way to level a concrete floor is to use a self-leveling compound, cement, or mudjacking. Self-leveling compound can be purchased for as little as $20 and is easy to use.
You could also use new cement to level your floor. It is more affordable than a self-leveling compound but lacks the self-leveling qualities.
Mudjacking is a cost-effective way to remedy an uneven floor. It involves drilling several holes through the concrete to the soil beneath. Then mud or other material is pumped under the floor to raise it to the correct level.
The final method involves two-part epoxy resin. Many products are self-leveling, like this clear epoxy resin kit for garages. Mix the resin with the hardener on a 1:1 basis and pour it over your floor; once it sets, it is rock hard.
If we had to pick our favorite method, self-leveling compound wins every day and twice on Sundays. It is easy to use, comes pre-mixed, and is the most cost-effective solution.
Best Self-Leveling Compound
We talk about self-leveling compound a lot in this article, but what are your options when it comes to choosing a product? Here’s a rundown on the best self-leveling compounds.
DAP Self-Leveling Compound
This DAP product is among the cheapest you can buy. It is suitable for plywood, concrete, and wooden floors. It is the perfect solution to level your floor before laying laminate or carpet.
Sikacryl Ready-Mixed Concrete Patch
Sikacryl is a ready-mixed tub of patching concrete and is perfect for leveling your floor. It is easy to use, and because it comes mixed, you don’t need to learn the ratios of water to concrete.
Henry Underlayment Adhesive
If you have a more substantial floor, this Henry Underlayment Adhesive is the best product to use. It comes in powder form, so you need to mix it, but once down, it sets in as little as six hours.
Rust-Oleum Rocksolid Garage Floor Coating
If you fancy something different, try this Rust-Oleum Rocksolid epoxy resin floor kit. It works on basements, garage floors, workshops, and many other surfaces. It covers up to 500 square feet, and once down, it dries in 24 hours.
How to Level an Uneven Concrete Floor
So, your days of clinging to your concrete floor like a mountain goat are about to end. But before you get started, you need to gather the correct tools for the job.
What You’ll Need
- Self-leveling compound.
- 5-gallon bucket.
- Metal scraper.
- Shop-vac.
- Broom.
- Spirit level.
- Concrete leveler primer.
- Crack filler.
- Paint tray and long-handled roller.
- Drill with mixer adapter.
- Hand trowel.
- Concrete grinder (optional).
- Pry bar.
- Squeegee.
- Plastic sheets.
- Masking tape.
- Chalk.
- Water.
- Face mask.
- Goggles.
1. Remove Furniture and Belongings
Remove the baseboard, furniture, and floor coverings to clear the room completely. Remember that the height of the floor will increase, which is why you need to remove the baseboards.
Use a pry bar to pull off the baseboard and door trim.
Take Care
Remove the trim carefully because it will need to be replaced after you level the floor.
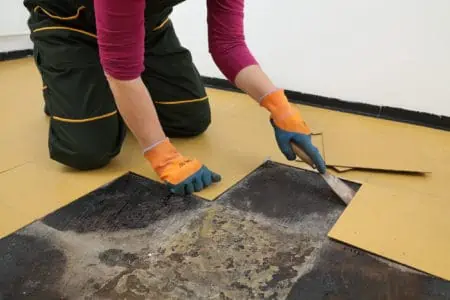
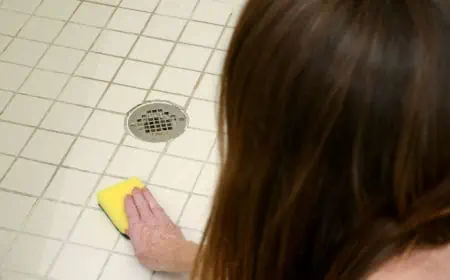
2. Clean the Concrete Floor
Grab the scraping tool and remove any lumps or debris from the floor. Concentrate on old linoleum, chipped concrete fragments, and old tiles. Sweep it up and dispose of it safely, then vacuum the floor with the shop-vac.
Good To Know
Don’t use your standard vacuum cleaner for this task. Heavy dust and debris will kill it.
3. Fill Cracks
Inspect the floor for gaps and cracks. These need to be filled before moving on to the next phase. This DAP Liquid Cement Crack Filler is the ideal product to use because the bottle has a long nose that fits into the smallest spaces.
Use the trowel to press the filler into the cracks and smooth them out. Let the filler dry before moving on to the next step. Follow the instructions to get the drying times.
You might think that the leveling compound will fill the gaps (which it will), but you will use much more of the compound than you need. Filling the cracks first enables the compound to do its job of leveling your floor.
4. Mark the Uneven Spots
Chalk is a great way to highlight high and low spots on the floor. Work in small sections and sweep across the entire floor. Mark an X for the bumps and an O for the dips.
Use the spirit level to discover any other areas you may have missed.
5. Grind the Concrete
Use the concrete grinder to smooth out any high sections. You can hire them from hardware stores. Put on your safety gear because this part of the process is extremely messy.
Seal the door with plastic sheeting and masking tape if working indoors. This stops the dust from escaping and contaminating the rest of the house.
Work the grinder back and forth, paying particular attention to the spots marked with an X. Wait for the dust to settle and use the shop-vac to suck up the remaining dust.
6. Apply Concrete Leveler Primer
Pour the primer on the floor and work it into the concrete with a long-handled broom. Use downward pressure to ensure that it reaches every crack and crevice. Alternatively, if you don’t want to use a broom, pour the paint into a tray and use a long-handled roller.
You should get 400 square feet of coverage from a one-gallon can of primer. Allow the primer to dry for between three and 24 hours before moving on to the next step.
Top Tip
Don’t let the primer overdry because you will have to reapply it. It should still be tacky to the touch.
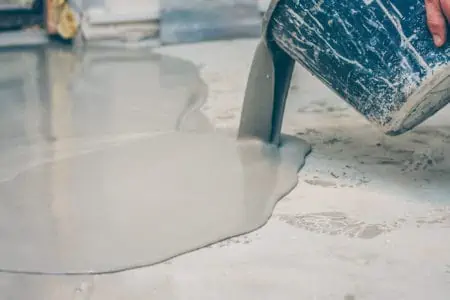
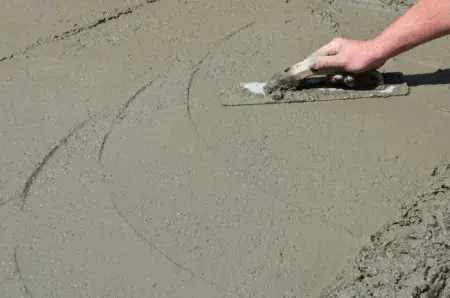
7. Mix the Concrete Leveler
Follow the instructions on the bag of the leveler compound and pour it into a five-gallon bucket. Add the required amount of water and use the drill with the mixing paddle attachment to mix it to a smooth consistency.
Only mix one bag at a time because you won’t have the time to lay it before it starts setting in 15 to 30 minutes. You can only work with the compound when it is pliable.
Take Note
Get some help when laying the leveling compound so that one person can mix a new batch while the other spreads.
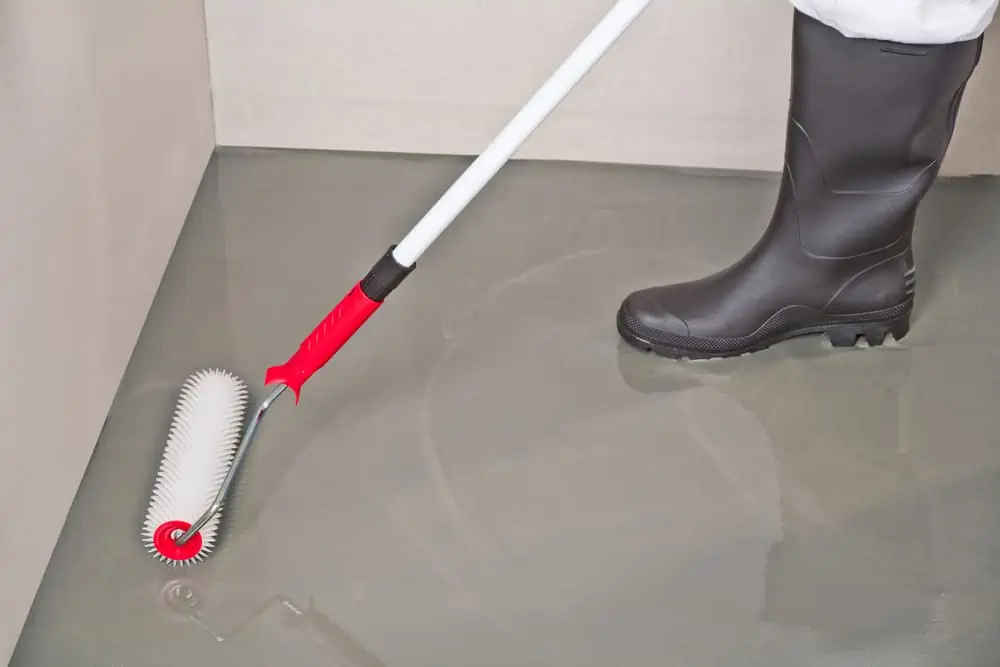
8. Spread the Compound
Pour the bucket of compound onto the floor and spread it using the long-handled squeegee. Pay attention to the corners and edges of the room. Work backward and forward, moving the mixture over the floor to get an even coating.
Concrete leveler uses gravity to find the natural level. The squeegee ensures you don’t get pooling, and the compound gets spread in areas where it struggles to move.
9. Let the Leveler Dry
Follow the instructions for the drying time. As a rule of thumb, most compounds are dry to walk on in four hours and completely cured in 24 hours.
You should be able to install a tile floor after the concrete is dry to walk on. However, wait about 16 hours if you want to lay a carpet.
Keep In Mind
The drying times can vary according to the temperature and humidity levels where you live.
10. Replace the Trim
Now that the floor is dry, replace the baseboards and trim, and bring the furniture back into the room.
How to Level a Concrete Floor Without Leveling Compound
It is possible to fix your concrete floor without using a leveling compound. While compound is cost-effective, other methods are just as effective.
With Mortar
Mortar performs similarly to leveling compound, with one exception: it doesn’t self-level. It goes down thicker, but that gives you longer to work it over the floor. You also apply it with a trowel rather than a squeegee.
Mortar is one of the best materials if you are working outside. Creating a new patio with mortar ensures it stands up to the rigors of the weather.
Thinset mortar is one of the best mixes because it contains an alkyl derivative, which helps it bind. It also has cement, fine sand, and a water-retaining agent.
You would still need to perform the same in-depth preparation as using a leveling compound. Plus, you would need to fill the cracked concrete sections with mortar or filler.
Grinding
Grinding involves sanding away the lumps and bumps to even up the floor. Mark the raised spots with a chalk X to make them easy to spot. You can hire a concrete grinder from most reputable DIY stores.
Work the grinder in sweeping backward and forward motions, and then check the floor periodically with a spirit level. You will need your safety goggles and face mask for this task as it is very messy.
It’s also a great idea to seal the doors with plastic sheeting and masking tape. It stops the dust from seeping into the rest of the house.
With Non-Shrink Grout
Non-shrink grout is widely used in industrial and construction settings. It is sometimes called hydraulic cement and works by setting at the same volume (or greater) than the original volume when wet.
If you are working on an exterior project, non-shrink grout is an excellent choice. You use it in the same way as mortar when leveling a concrete floor. It goes down with a trowel and, once set, is extremely durable.
How Much Self-Leveling Compound Do I Need?
A lot depends on the product you choose, the size of your floor, and the thickness you want to pour. Most brands list their maximum coverage on the packaging as a handy guide.
Given that the average size of a single-car garage is 240 square feet, it is possible to work out the rough amounts you will need. If you have a two-car garage, simply double the quantities.
Here’s a handy chart:
| Thickness | Amount |
| 0.125 inches | 200 to 220 pounds of mix |
| 0.25 inches | 400 to 440 pounds of mix |
| 0.50 inches | 800 to 1600 pounds of mix |
| 1-inch | 1600 to 1920 pounds of mix |
Tips for Leveling a Concrete Floor
Use chalk
Grab a stick of chalk and mark the raised spots with an X and the dips with an O. That way, you know where the uneven parts are, and where to fill or grind.
Use the Longest Spirit Level
Spirit levels come in all sizes but go for the longest one you can find when leveling your floor. Most levels are 12 or 16 inches in length, but you can also get 48-inch and 72-inch versions.
Wear Spiked Shoes
Wearing spiked shoes enables you to stand on the floor while still working with the self-leveling compound. It also gives you added grip. These QWORK Spikes are ideal because they strap to your existing shoes.
Use a Paddle Mixer
Rather than mixing the leveling compound by hand, invest in a paddle mixer attachment for your power drill. This Edward Tools model is a great example. It fits your power drill, turning it into a giant mixer.
Mixer attachments speed up the way you mix mortar and leveling compounds.
FAQs
Why Is My Concrete Floor Uneven?
Concrete floors become uneven for several reasons. If you live in an old house, the floor can sag over time, becoming chipped and cracked as the house moves.
Humidity and moisture can affect the concrete, causing it to swell and shrink. Heat and sunlight do the same. Also, freshly laid concrete floors shrink when they dry out, which could cause movement.

How Much Does It Cost to Level a Concrete Floor?
Using a professional contractor, leveling a concrete slab could cost upwards of $25 per square foot. However, taking the DIY approach will shrink that cost to about $2 per square foot. This is because you only have to account for the materials.

How Do I Level a Concrete Floor Outside?
The method is the same outside as it is inside. Leveling compound is the best material to use, or you could try thinset mortar because it is so hard-wearing.

How Thick Can Self-Leveling Concrete be Poured?
The minimum thickness should be about 0.25 inches, and the maximum is one-inch.
Another Level
Leveling your concrete floor is essential if you are preparing for laminate or another flooring to go down. An uneven concrete floor could signify bigger issues, like subsidence and other foundation problems.
The next time you feel like one leg is shorter than the other, get on your hands and knees and check if your floor is level.