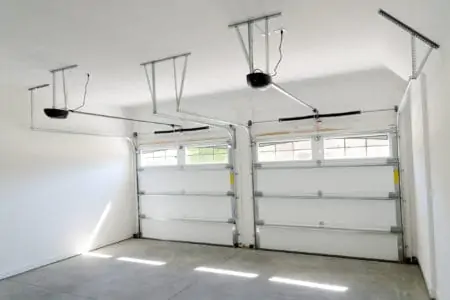
Do you live in a cold climate and have constant winter heartbreaks when your garage is freezing cold? If you’re having a hard time keeping the premises warm, maybe it’s time to learn how to insulate a garage door. It keeps heat inside and cold out, and it’s very simple to do.
We’ll guide you through the different types of insulation, which is best for your garage door, and exactly how to install it.
Key Takeaways
- Understanding R-value: R-value is a measure of thermal resistance that helps determine the effectiveness of insulation materials.
- Choose insulation type: Options include fiberglass, spray foam, rigid foam, and cellulose, each with pros and cons.
- Measure and cut: Measure your garage door’s panels and cut insulation materials accordingly for a snug fit.
- Installation methods: Insulate your garage door using an insulation kit, foam boards, or batting, depending on your preference and climate.
Does R-Value Matter in Garage Doors?
R-value is an imperial unit of thermal resistance commonly used in the construction and building industries. It represents the resistance to heat movement. You can minimize the transfer of heat or cold by employing an insulating substance.
R-value is used to indicate a product’s energy efficiency. This value is determined by the insulator’s thickness and physical parameters. The higher the number, the more effective the door’s thermal insulation.
Apart from being a hole in the side of your house, garage doors are often constructed of thin metal components that allow for easy heat flow in and out. These are usually made of steel or fiberglass.
Steel doors are excellent conductors of heat. This means that they are unsuitable for summer months because they get too hot and unsuitable for winter months because they get too cold.
This causes the air temperature within your garage to fluctuate as well. That’s where R-value comes in.
How to Insulate a Garage Door
There are several factors to consider before jumping in. like whether you’re using an installation kit or not, foam batting, and more.
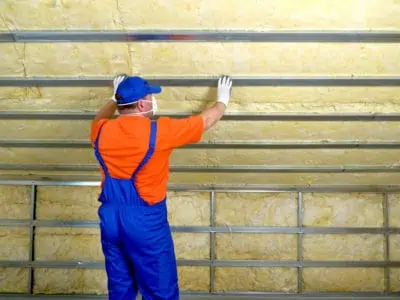
With an Insulation Kit
The optimum garage door insulation kits for your property are determined by the size and style of garage door you have. Your budget will also help determine the type of garage door insulation you wish to utilize.
Evaluate the installation method and the effectiveness of the insulation in relation to your heat retention requirements.
1. Determine the Material
Garage door insulation kits are made with different materials:
- Fiberglass: Very common option for some insulation. Has a high R-value, but is messy to work with.
- Spray Foam: A cheap and easy solution, but not an effective one for garage doors.
- Rigid Foam: Is mostly made with styrofoam and is pretty easy to work with.
- Cellulose: Made from organic material. Is easy to apply and fire-resistant, but also very expensive.
Based on these criteria, you can choose a kit with the material that best suits your needs.
2. Determine the Size
You can find several customizable insulation kits, but you want to choose one that matches your garage door measurements as best as possible. This ensures you won’t waste any precious material.
For cellulose or spray foam, measure the garage door size to determine how much material you need.
Remember
Some insulation kits are installed on individual garage door panels, while others insulate the entire door and move along with it.
3. Check Compatibility
Not all insulation kits are compatible with every garage door. Some kits require metal channels along the support frame of the door. That makes these incompatible with wooden doors.
Because of that, it’s essential to read the installation instructions and product descriptions very carefully before you buy an insulation kit.
4. Install the Kit
Follow the instructions given or the label or any manual that came with the kit. Below you will find information on how to insulate a garage door with foam board or batting.
With Foam Board
This is my personal choice for insulating a garage door.
1. Measure the Door
Garage doors are usually made of one or multiple panels. In the latter scenario, you’ll have to measure each panel individually.
Grab your tape measure and determine each panel’s depth, width, and length. Add up the total to determine how much foam board you have to purchase.
2. Select the Foam Board
You can choose between expanded polystyrene, extruded polystyrene, and polyisocyanurate. Whichever of these you choose, make sure the boards are a little thinner than the door panels. This will make installation easier.
Consider the R-value of the foam board; the higher the number, the better insulation it provides. Polyisocyanurate is the best material in terms of foam insulation, with a value between 5.7 and six per inch. It’s also the most expensive option.
3. Cut the Foam
You are likely to find the insulation foam board in planks that measure 4 x 8 feet. If you can’t cut them at a local home improvement store, you will have to do this yourself.
Use the measurements identified during the first step of this tutorial. You can use a handsaw to cut the foam boards. Cut in a straight line because this helps fit every piece of foam into the panels.
4. Install the Boards
After cutting all the pieces, fit them into the door panels. Make sure the foiled side of the boards faces you and tuck each piece around the edges for a snug fit.
With Batting
Batting is also a great choice. But I wouldn’t recommend batting if you live in a moist climate.
1. Install the Retainer Pins
Locate the spot that is 12 inches from each panel’s edge and halfway between the horizontal rails. Peel away the adhesive backing paper and adhere the retainer pin base to the panel. Each panel should have two retaining pins.
2. Cut the Batting
Place the batting with the vinyl side facing downward. Mark the lines where you have to cut. Put the batting on a piece of plywood or another wooden surface.
Compress using a straightedge and use a utility knife to cut the batting.
3. Install the Batting
Place the insulation so that it’s centered in the panel. Push it towards the retaining pin until it perforates the vinyl side.
Put the retaining cap on the end of the pin that’s now visible. You should hear a click when it’s in place.
Cost to Insulate Garage Door
Insulating a garage door is a cheap and simple DIY project. It will cost approximately $200 to insulate two nine-foot wide doors.
How Much Weight Does Insulation Add to a Garage Door?
A normal 16×7 garage door weighs approximately 150 pounds, depending on the door’s thickness and material. Insulation can raise that by up to 25 pounds, depending on the R-value, which is a measure of the insulation’s thickness.
This could cause the door to be unbalanced. This means the springs are either not supplying enough tension to counterbalance the door’s weight, or they are exerting an excessive amount of tension. In either case, the opener is under additional strain.
If left unattended for an extended period, an imbalanced door can prematurely fail the opener or cause a cable or spring to rupture.
If your torsion spring door crawls up the track when you let go, a do-it-yourself solution may still be possible. An additional door stiffener or brace can contribute the required 10-15 pounds to balance a garage door.
These braces help to prevent flex in large doors and frequently serve as an additional “grip place” for manual operations.
FAQs
Get some more insight before tackling this project yourself.

How Can You Tell if a Garage Door is Insulated?
You can check the door’s temperature or check the door’s back panel to see if it has multiple layers. You can also visit the manufacturer’s website and read the specifications for the door you have.

How Do You Insulate a Garage Door With Windows?
If you have a garage door with windows, all you have to do is work your way around the frames when installing the insulation layer.

Can You Insulate a Roll-Up Garage Door?
Yes, you can. Choose 98 percent thermal break insulation for a roller door, which can be installed even after the door is set in place.

Can You Insulate a Garage Door With Styrofoam?
Yes. You can use polyisocyanurate, extruded polystyrene, or expanded polystyrene. Just make sure they are fire-rated and foil-faced before you install them.

Does Insulating a Garage Door Make It Too Heavy?
Insulation can add up to 25 pounds extra to the weight of your garage door. This means that you’ll have to counterbalance the added weight to prevent any potential risks of springs not being resistant enough.
The Verdict
Understanding R-value is a large part of knowing how to insulate a garage door. This will help identify the insulation options that match your heating needs. Garage door insulation itself is a breeze once you have settled on the proper material.