Knowing how to install window trim will save you a lot of money in labor costs. However, installing a window trim can be time-consuming, especially if you’re not familiar with the process.
So, here’s how to trim a window for both the interior and exterior of the house.
Key Takeaways
- Interior window trim installation: Remove existing trim, mark reveal lines, cut and install top, side, and bottom trims, and finish with spackling, sanding, and painting.
- Exterior window trim installation: Measure the window, cut the trim, install and nail the trim, fill nail holes, and paint with exterior-grade paint.
- Choose the right wood: Use redwood for exterior trims and cherry or walnut for interior trims.
- Tips for successful installation: Make accurate cuts, ask for help when needed, and use proper safety gear and equipment.
Window Trim Installation Cost
Average window trim installation costs between $100 and $170 per window but could be as much as $350 depending on your windows. This excludes labor costs, which are approximately $70 per hour. The installation process takes approximately one hour per window for larger windows.
If you choose the DIY route, you have to factor in the cost of the materials needed for installation. If you already have the tools and only need to purchase the materials, you could get away with less than $50.
Parts of a Window
Before we show you how to trim a window, we need to explain some window-related terminologies.
Sills
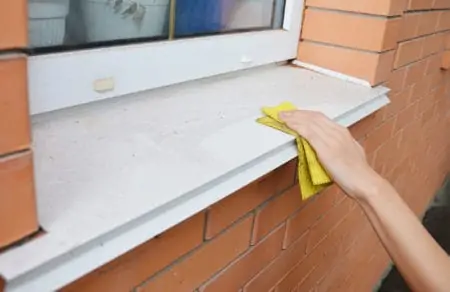
A sill (the lower portion of the frame) serves as the frame’s foundation and is also often referred to as a horizontal strip. It is the section of a window that you generally lean against or place things on, such as potted plants.
From the outside, the sill is a stool. It is slightly angled toward the ground and is rarely angled below 90 degrees.
Jamb
The jamb (side verticals) is a window frame component that runs horizontally from bottom to top on either side of the window. The jamb is a critical component of the window structure because it holds the window panes in place.
Sash
Sashes are window components that support the window panes and frame the glass. The sash is what opens and closes the window. Sashes on non-opening windows, such as picture windows, are fixed.
Head
The head is the highest horizontal piece parallel to the sill on the window frame. At the top, it signifies the window’s highest position. Typically, we measure the window’s height from the sill to the head.
Stiles
Stile is the term used to describe the vertical portion of a window sash. More specifically, it is a section of the sash frame that runs parallel to the jambs.
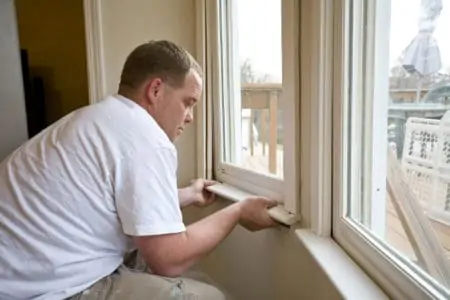
How to Install Interior Window Trim
We’re going to focus on a window trim interior installation over drywall using mitered corners. Mitered corners are made by cutting the ends of two pieces at a 45-degree angle. Once put together, they create a picture frame look.
What You’ll Need
- Utility knife.
- Pry bar.
- Measuring tape.
- Pencil.
- Miter saw.
- Brad nailer (nail gun).
- Nails.
- Spackling compound.
- Sanding paper.
- Caulk.
- Stain or paint.
1. Remove Existing Trim
Using a utility knife, score through the dry paint along the seam between the wall and the molding. Repeat this for all four sides of the window.
Place a pry bar between the wall and the trim. Gently tap it to loosen the trim. Repeat the process for all four sides until the trim is removed.
2. Mark Reveal Lines
Using a pencil and a tape measure, mark the jamb 1/8 inch from the inside edge. Do this for all four sides.
3. Cut and Install the Top Trim
To cut your window trim interior, do the following:
- Measure the overall width across the top of the window.
- Mark the measurement on the trim.
- From there, cut each end at a 45-degree angle outward.
- Using the brad nailer, install the top trim in place at the reveal line you marked.
4. Cut and Install the Side Trims
From one side, measure the length of the window.
- Mark that on your trim piece.
- From each end of the mark, cut a 45-degree angle outward.
- Snugly fit one end up to the angled end of the top piece. Line up the trim with the reveal line.
- Brad-nail the trim in place.
- Repeat for the other side.
5. Cut and Install the Bottom Trim
For the bottom trim, you have to:
- Measure the window’s bottom width between the two side pieces.
- Mark that measurement on the trim piece.
- Cut a 45-degree angle outward on each end.
- Snug in place and brad nail to secure.
6. Finishing the Trim
Cover the nail holes using a spackling compound and sand the surface to level. Add a bead of caulk between the wall and the trim. Let dry and paint.
Add a decorative crown molding to the top trim piece for a little extra curb appeal.
How to Install Exterior Window Trim
Exterior trims are very similar to interior trims in terms of installation, except when it comes to the cuts. Rather than mitered corners, it’s best to do straight lengths on the top and bottom. Then straight cuts on the vertical sides.
Top Tip
Straight cuts and straight lengths refer to the shape and cut of the trims. Use straight cut lines and pieces rather than angled or mitered.
Most exterior trims are made of vinyl these days, but wood is still commonly used for its ability to be painted/stained.
What You’ll Need
- Measuring tape.
- Pencil.
- Ruler.
- Circular saw.
- Nails.
- Hammer.
- Wood putty.
- Spackling compound.
- Exterior-grade paint.
- Exterior trim.
- Exterior caulking
- Drill.
1. Measure the Window
Once you’ve chosen your casing type, use a measuring tape to determine the trim’s correct height, length, and depth. Keep in mind that the sizes will likely be unequal, necessitating shims.
Shims are thin, wedge-shaped pieces of wood usually made from cedar but can be found in other wood species. To use them, insert the smallest end behind the trim where needed until your trims are square and level. The shims won’t be visible after you finish caulking.
2. Cut the Trim
Cut the trim pieces and then hold them up to the window to ensure the sizing is correct. A dry fit test before installing will reveal any flaws.
3. Install the Trim
Set aside the two horizontal boards and make four even nail marks on the vertical boards using a pencil and a ruler. Pre-drill holes in each area with a drill bit somewhat smaller than the nails/screws you intend to use.
4. Nail the Trim
Position the vertical boards around the window and secure them loosely with a nail in each mark. If necessary, fix the trim by placing wood shims along the edges to ensure the boards are secure and centered.
Complete this for the vertical boards, then do the same for the horizontal ones. After securing everything in place, drive each nail deeply into the trim board.
5. Fill the Nail Holes
After installing the trim, fill any nail holes or scratches with the spackling compound or putty before painting. Finish and seal gaps around edges with exterior caulking. I prefer GE Sealants and Adhesives.
6. Paint the Trim
Always use exterior-grade paint, especially on wood trims. Over time, these treatments prevent the wood from cracking and splitting.
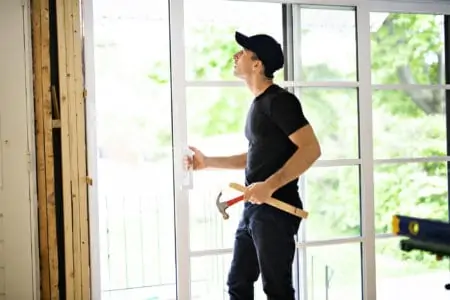
Tips for Installing Trim
To make sure your trim installation efforts yield great results, consider the following:
- Cuts are super important. If you have to, measure three times before you make one cut.
- Ask for help. You’ll sometimes need an extra set of hands to hold trims in place while you nail them to the wall.
- Use a proper ladder. To install the top side of the trim, you’ll need to reach up high, so it’s important to have a stable surface to stand on while you work.
Use Safety Gear
Including protective glasses like these 3M Safety Glasses, work gloves, and masks (especially when cutting trims/sanding).
FAQs
If you’re a beginner and still have concerns, check out some of these common questions I come across.

What Type of Wood Should You Use for Window Trim?
Redwood is the best trim wood for outdoor applications. Due to its inherent weather resistance, it is ideal for external trim work. It’s strong and direct, with an ambient quality that enhances the character and value of any property.
For interior trims, you can use cherry and walnut.

How Do You Install Window Trim Without a Nail Gun?
To do this, you have to drill a hole where the top of the trim is located, sink a screw into it, and then drive a perfect finish nail into your target with the hammer. Similarly, nail and set up the trim in all other locations.

Should You Paint Before or After Installing Trim?
Numerous experts advise that you paint the trim before installing it, then do touch-ups after installation. It’s a simple and quick method that can significantly reduce paint time.

How Do You Install Trim on a Window That is Not Square?
Some windows (especially garage and basement ones) might not be square. So, you’re probably wondering how to install a window trim on these.
Simply start on one side. Measure and cut each piece as you go, rather than all at once. Use shims and filler to help hide gaps.
The Bottom Line
Now that you know how to install window trim, it’s just a matter of finding the time and patience to do it. The process of installing window trim is all about measuring twice and cutting once.