Your exterior door is on the front line in the battle to keep the elements at bay. So, getting the front door installation right is crucial if you want to retain the heat inside your home. A well-hung front door also gives your home curb appeal.
We show you the best exterior door installation techniques, including ways to insulate the door for colder climates.
Key Takeaways
- Choose the right exterior door: Options include wooden, fiberglass, steel, and composite doors, each with its pros and cons.
- Measure accurately: Measure the height, width, and jamb width of your existing door to ensure a proper fit.
- Follow step-by-step installation: Remove the old door, prepare the opening, and install the new pre-hung door, ensuring it’s level and secure.
- Weatherproof and finish: Add weatherstripping, install locks, and consider additional features like lighting or a door knocker for added curb appeal.
Is It Hard to Add an Exterior Door?
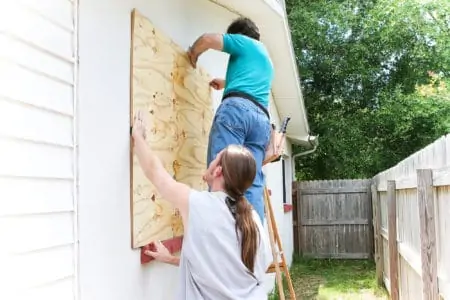
Installing exterior doors can seem like a daunting task, but with the right tools and a bit of patience, it can be done. The entire project shouldn’t take more than a couple of days.
However, if you live in an older house, you might want to call a professional. For the last 30 years or so, residential properties were built to a particular size standard, including the door openings.
Most homes have door heights of 80 or 81 inches and widths ranging from 34 or 36 inches. Older houses have no standard-size openings, so the door may need to be custom-made. Because it requires a whole different skill set, calling the pros is the best bet.
Take Note
Check out the local building codes because some old houses have strict rules governing the style and type of doors you can hang.
Choosing the Right Exterior Door
Knowing how to install an exterior door starts with choosing the right model. Old houses suit a traditional-style door, while modern homes look better with something more contemporary.
What is a Pre-Hung Door?
A pre-hung door comes mounted in the frame, removing the need to measure and fit the door to the opening. The plus side is you get a door that fits perfectly and matches the frame. The downside is you have a large hole in the front of your house.
This means the job will need to be completed within a single day for security reasons. You might also need to get some help because pre-hung doors are heavy.
Pre-hung doors are widely available from major stockists like Home Depot and Lowe’s, and online stores like Amazon.
Exterior Door Types
It can be a challenge deciding which type of door is right. From wooden and composite to metal and fiberglass, each has its merits. Let’s take a look at your options.
Wooden Door
Wooden doors are the most common, especially in older homes. They are sturdy, can be painted or treated with stains, and withstand everything the elements can throw at them. They do require more maintenance than other door types, which might put some people off.
Wooden doors are also reasonably expensive compared to materials like fiberglass and composite doors.
Pros
- Readily available.
- Can be painted and stained.
- Withstands the elements.
Cons
- Expensive compared to other materials.
- Require constant maintenance.
Fiberglass Door
Fiberglass doors are virtually maintenance-free and don’t warp, split, or rot. They come pre-colored, so you don’t even need to paint them, although you can if you want to. Fiberglass is a cheaper material than wood, so it is an affordable option.
Fiberglass doors are also lighter than wooden ones, making them easier to fit as a solo project. However, fiberglass is not the most robust material should someone decide to kick the door.
Plus, you may be restricted when it comes to installing a fiberglass door into an older home. Local building codes may not allow you to deviate from traditional materials.
Pros
- Lighter than other materials.
- Doesn’t rot, warp, or split.
- Can be painted or comes pre-painted.
- Cheaper than other materials.
Cons
- Not the most robust material.
- Not suitable for some homes due to building regulations.
Steel Door
If security is at the top of your priority list, owning a steel front door ticks all the boxes. Steel doors don’t need much maintenance, making them ideal for colder and wetter environments. They also give you better heat retention qualities because they are typically insulated.
Steel doors are heavy and expensive compared to other materials. They don’t crack, bow, or split, and they are extremely fire-resistant. However, you may need extra-strong hinges to hold that added weight.
Pros
- Excellent for increased security.
- No bowing, cracking, or splitting.
- Better heat retention.
- Fire-resistant.
Cons
- Heavier than other materials.
- Expensive compared to some doors.
Composite Door
Composite front doors are solid and durable, making them better than other door types at resisting the elements. They are virtually maintenance-free and offer excellent insulating qualities because they have a foam core.
If you live in a heavy traffic area, choosing a composite door reduces external noise better than other materials. However, these doors are not cheap, costing many times more than other door materials. Plus, they are prone to creaking in hot weather as the composite surface heats.
Pros
- Great at resisting the elements.
- Maintenance-free.
- Excellent insulating qualities.
- Reduces external noises.
Cons
- Expensive compared to other door materials.
- Creak in extreme heat.
How to Measure for an Exterior Door Replacement
The door measurements are crucial to the success of the project. Get them wrong, and you open up a whole world of frustration. Get them right, and the task should be a breeze.
Measure the height of your old door in two places from the left and right. Use the smallest measurement as the guide. Don’t forget to round up the measurement to the nearest whole number, like this: 79.75 inches becomes 80 inches.
Now measure the width in three places, from the top, middle, and the bottom, using the rounded up smallest number as the guide. For example, 35.75 inches becomes 36 inches.
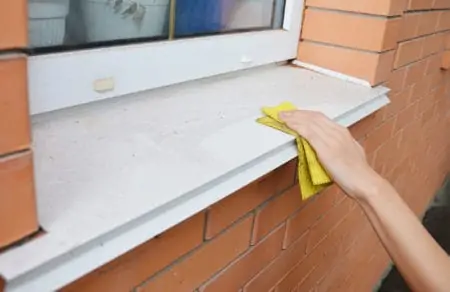
You will also need to measure the jamb width. Measure from the backside of the interior trim to the backside of the exterior trim. To get the dimensions of the rough opening, run the tape measure from the inside of the brickwork where the door frame butts to the opposite side.
Do this for the top, middle, and bottom, and use the smallest measurement.
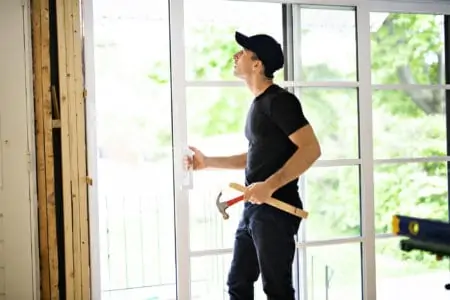
How to Install a Door in an Existing Wall
Because you are replacing like for like in an existing wall, it makes the whole task easier. However, before you begin, you will need to gather the correct tools to reduce the chances of making a mistake.
What You’ll Need
- Spirit level.
- Utility knife.
- Prybar.
- Caulk and caulk gun.
- Drill and assorted bits.
- Hammer and nails.
- Reciprocating saw.
- Tape measure.
- Spray foam.
- Wood shims.
- Face mask.
- Goggles.
1. Remove the Doorbell
Before beginning, don your face mask and goggles for protection.
The wires on the doorbell will be low voltage, so you don’t need to cut the power. If you keep the doorbell, disconnect the wires and cover them with insulating electrical tape. If not, cut the wires and remove the doorbell.
2. Remove the Existing Trim
Score along the trim with the utility knife and pull it away. The new door will have trim attached, so don’t fret if you damage the old one.
3. Remove the Door
Tap out the hinge pin and remove the door using the hammer and a single nail. Now unscrew the strike plate from the door frame.
4. Cut the Screws
Slice through the old screws that hold the frame to the wall using the reciprocating saw. It may be nailed, but the saw will cope with either. Don’t force the saw, just let it work at its own pace; if you push too hard, you risk damaging the door jamb.
5. Remove the Frame
Start at the top and push out the door jamb. If you get any resistance, use the hammer to help tap it out. You may have to score along the sealant again with the utility knife if the door frame sticks.
Sweep away any dust and debris.
6. Level the Subfloor
Once the door threshold is removed, check what is beneath. You can probably skip this stage if the door frame sits on concrete. If not, you will need to level it using shims.
7. Protect the Sill
Weatherproofing the sill stops water damage beneath the door frame. Use flashing tape for the quickest solution. The tape should also overlap the sides of the opening.
8. Drill a Hole for the Doorbell
Remove the transport plug that holds the door in place while in delivery, and drill a hole for the doorbell wires.
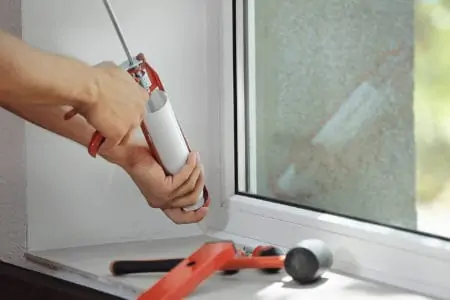
9. Apply Caulk
Run a line of caulk along the top and two sides of the brickmould, where the door frame presses against the brick wall.
10. Install the Door
Lift the door and frame into the rough opening, placing the base in first and then easing the rest in place. Don’t forget to feed the doorbell wires through the hole.
Take Note
You may need to get someone to help you if the door is too heavy. Also, don’t use the door while the caulk sets.
11. Install the Shims
The shims are attached to the inside of the door frame, above the three hinges. There should be one at the top, middle, and bottom of the latch side of the jamb.
These small wooden wedges keep the frame square, allowing for minor adjustments and stopping distortion when screwing it to the wall. You should also install a shim behind the strike plate.
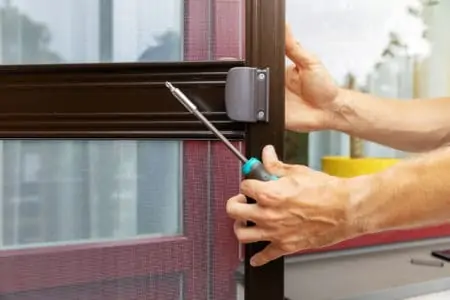
12. Screw-In the Hinge Side
Check that the frame is centered using the spirit level. Grab the drill and drill pilot holes through the hinges on the frame side. Now insert the screws part-way in. Do the same for the two other hinges.
Place the shims above each hinge and tighten the screws, and your hinge side is secure.
13. Check the Weatherstripping
From the outside and with the door closed, examine where the weatherstripping makes contact with the door. Ensure that it is equal at the top, middle, and bottom. Now drive screws in the top and bottom of the latch side part-way in.
14. Place the Shims On the Latch Side
Insert the shims above the screws on the latch side and check the frame is square with the level. Drive in the top and bottom screw, but not the middle one.
15. Attach the Strike Plate
Place a shim over the location of the strike plate and one behind. Now drive the last screw in the middle to secure the strike plate.
16. Test the Sill Cap
Grab a sheet of paper, lay it on the sill cap, and shut the door. When you pull the paper out, there should be slight resistance. If so, it means the sill cap is fitted correctly.
You can adjust the cap by raising or lowering the screws.
17. Caulk the Sill Cap
Apply caulk to the edges of the sill cap, and then use the self-stick corner pads included with the door. If the door opening is tight, skip the stick pads and just use the caulk.
18. Install the Locks
The locks and deadbolt should be installed according to the manufacturer’s instructions. Open and close the door to ensure the lock lines up with the strike plate.
19. Trim the Shims
Score the protruding shims using the utility knife, and snap off the excess, ensuring that they are concealed beneath the door frame.
20. Use Spray Foam
Shake the spray foam can and then squirt it in the gaps where the frame meets the wall, ensuring that you use just enough. Wait for the foam to set hard.
Take Care
If you use too much foam, it could warp the frame as it expands.
21. Install Interior Trim
Tack the interior trim and seal along the edges with the caulk.
22. Install the Doorbell
Reconnect the wires to the old doorbell or the new model if you are updating it.
Extra Ideas for Finishing an Exterior Door
Once your door is hung, you will rightly want to finish it off properly. That could be installing better door hardware or increasing the insulation. Let’s take a look at some ideas that caught our eye.
Increase Insulation
Adding weatherstripping or draft excluders helps to seal the door and keep heat inside your home. It is easy to do and very effective once in place. This is a useful idea for people living in areas with extreme cold or strong winter winds.
It doesn’t cost much, maybe $10 or $20, and you can install it within about 30 minutes.
Fancy Door Knocker
Nothing quite sets off an exterior door more than a fancy door knocker; something big and bold makes a real statement. The only thing to remember is that it needs to fit with the style of the door. Don’t be tempted to add a Victorian-style knocker on a contemporary door.
Street Numbers
Adding some classy street numbers to your door sets it off. Think brushed chrome for a new-style door and maybe brass for something more traditional.
Lighting
While lighting doesn’t attach directly to the door, it creates the right look for the outside of your home. Lights transform the exterior of your home, softening it and creating a welcome entrance.
It also adds to your security measures because an intruder is unlikely to come near when they are lit like a Christmas tree.
Cost to Install a Pre-Hung Door
The average cost of DIY installing a pre-hung door is the price of the door and any additional material you need, like expanding foam. You should bring it in on budget between $170 and $470.
The type of door you choose makes the most significant material difference.
When you compare the costs of DIY installing the door to hiring a professional, the savings are incredible. You have to factor in labor costs, which could increase the price significantly. Expect to pay between $800 and $1,000, depending on how long the task takes.
FAQs

How Long Does It Take to Install a Pre-Hung Exterior Door?
Because a pre-hung door leaves a large opening in the front of your home, you should try and complete it within a day for security reasons.
Having a large hole in a brick wall will likely invalidate your home insurance should you fall victim to an intruder.

Can You Install a New Door Without Replacing the Frame?
You can install a door without replacing the frame. Simply remove the hinge pin, lift the door off, and swap it with the new one.

When You Install an Exterior Door, Which Part is Leveled or Plumbed First?
The first thing to check is that the door is plumb with the wall, regardless of the top or bottom.

Can You Install an Exterior Door to Open Outward?
You can have the door open outward, especially in areas where you are less security conscious. The only thing to remember is you cannot have a storm door if the exterior door swings outward.

How Do You Weatherproof an Exterior Door?
The easiest way to weatherproof your door is to use weatherstripping and draft excluders. Also, replace any faulty door hardware and tighten loose hinges.
Adore Your Door
Your door entry has many tasks to fulfill. Whether it’s in a garage, a commercial building, or a residential property, it has to guard against the weather, keep intruders out, and above all, look good.
So, if your door looks a little tired, consider getting a new one and follow our guide to installing an exterior door.