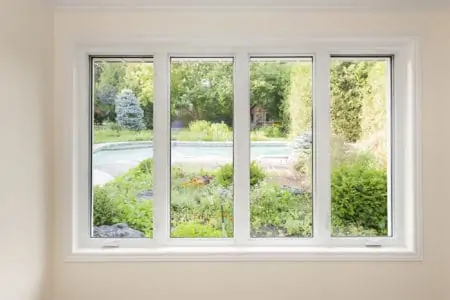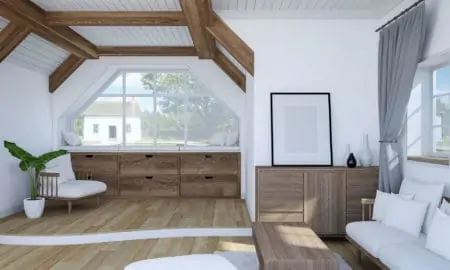
Arched windows often puzzle those who aren’t keen on interior design when it comes to window treatments. Commonly found in homes with a high ceiling, these side-by-side windows are the epitome of elegance and style.
But enjoying the beauty of these windows often comes at the sacrifice of privacy. But never fear when an interior designer is near! We’ve put together a comprehensive list of window treatments that work on these particular window types.
Key Takeaways
- Consider custom curtains, swag drapes, arched shades, roller shades, cellular shades, or straight rods for arched window treatments.
- Take accurate measurements of your arched windows to ensure a perfect fit for your chosen treatment.
- Think about your privacy needs and desired level of light control when choosing the right treatment for your arched windows.
- For a DIY approach, create an arched curtain rod using materials like plastic pipe, finials, and brackets to achieve a custom look.
Window Treatments for Arched Windows
Depending on the type of window treatment you have, there are a few methods to consider.
Custom Curtains
Custom curtains are one of the best solutions for arched windows and doorways, especially when dealing with different heights. This is because they are aesthetically pleasing, and they’ll match the exact dimensions of such an irregular window shape. However, they are also the most expensive option out there. So some people opt for alternative solutions.
If ordering custom curtains for arched windows, it’s a good idea to prepare a paper template to ensure correct measurements. Because arched windows are available in a variety of sizes, it’s important to ensure that each window’s width and highest point are measured.
Pros
- Fit your arched windows perfectly.
- Highly customizable.
- Can match any room decor.
Cons
- Can’t be taken down and used on other windows.
Swag Drapes
Swag curtains for arched windows are basically window scarves or sheers. The scarf tails can be hung evenly or asymmetrically, as desired. These work great if you have several windows in a row. You can hang the drapery fashionably across them.
If you’re concerned about privacy, drape translucent curtain panels across the lowest section of the windows.
Swag drapes work really well when you want to give your windows a very distinct look. They are an excellent method to emphasize an arched window’s shape without framing it in harsh vertical lines.
This is perfect if you’re looking to make the most of the softer lines that a round top window brings. Swag-style curtains can be used on smaller or larger windows, depending on the degree of drama desired.
Pros
- They work for small and large windows.
- Great for windows with soft lines.
- Can be hung evenly or asymmetrically.
Cons
- Don’t offer the best privacy when used alone.
Arched Shades
Stiff materials are used to construct arched blinds, so they hold their shape when hanging. These materials provide complete functionality for an arched blind and come in a variety of colors and styles. Semi-opaque, light-filtering, translucent, and blackout variants are available.
Arched shades are just like regular shades in terms of properties and characteristics. But they are shaped to match the curved lines of an arched window.
Pros
- Fit your arched window perfectly.
- They can efficiently block light.
- Are good in terms of privacy.
Cons
- Unusual shape makes them unsuitable for other windows.
Roller Shades
Does the furniture and décor in your home have straight lines that you’d like to replicate on the tall windows? Elegant roller blinds are a popular choice for arched windows.
When the shade is drawn, the window’s arched shape will be seen through the light filtering material positioned above the top of the arch. The shade pulls up into an unnoticeable roll when lifted, allowing the windows to remain the focal point.
This form of blind is popular for arched windows due to its affordability and visual appeal. Additionally, roller blind fabric is available in a wide variety of colors, allowing you to match the blinds with your current room setup simply.
Pros
- Easy to match with decor.
- Simple to install.
- Affordable compared to other arched window treatments.
Cons
- Easy to crease material.
Cellular Shades
While cellular shades are a common choice for concealing arches, many of the cellular choices are stationary. To maximize the effectiveness of your window curtains, choose an adjustable style.
“Cellulars,” as they are frequently referred to, are available in a range of colors and textures and are frequently made of durable polyester. This makes it simple to coordinate with other window treatments and the rest of your room’s interior décor.
Some arched window coverings are movable, while others are “permanent” window treatments that must remain closed at all times.
For seclusion and light management, blackout or light-filtering choices for your arched windows may be just what you need. You can create a customized, well-designed aesthetic throughout your home.
Pros
- They are energy efficient.
- They can insulate noise.
- They have multiple textures/colors.
Cons
- Not that flexible when it comes to light.
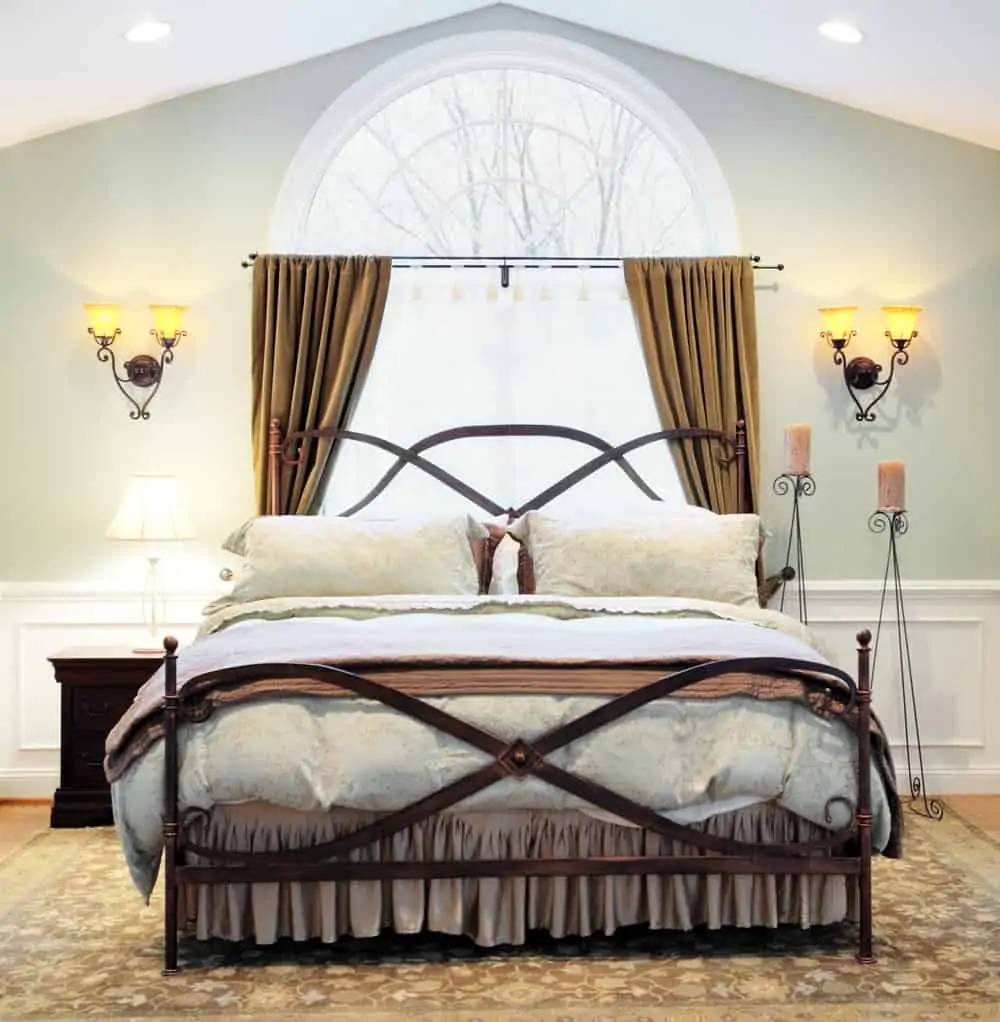
Straight Rods
Extending a straight curtain rod from one side of the window to the other is one technique to highlight the arch’s shape. In this manner, you can use ornate tiebacks to pull back the panels on either side of the window.
You can install this rod above the arch and have it cover the entire height and width of the window or underneath the top arch. Thus leaving this window part exposed.
If you opt for the second method, the top arch will be left uncovered even when you close the curtains, and some people might not like how it looks.
Choosing straight rods for arched windows means you won’t have to worry about complicated installation or irregular rod shapes.
Keep in mind, placing the straight rod beneath the arch doesn’t work on Palladian windows. Those are just an arch, with no square window below.
Pros
- Installed just like regular rods.
- Curtains are easy to open and close.
- Just about any rod works with an arched window.
Cons
- Might not cover the transom, depending on positioning.
DIY Arched Curtain Rod
You can use several materials for a DIY arched curtain rod. So here is a quick tutorial on how to do it.
What You’ll Need
- Screwdriver.
- Screws.
- Brackets.
- Finials (the decorative knob that goes on the end of the rod).
- Plastic pipe.
- Measuring tape.
- Shears.
- Spray paint.
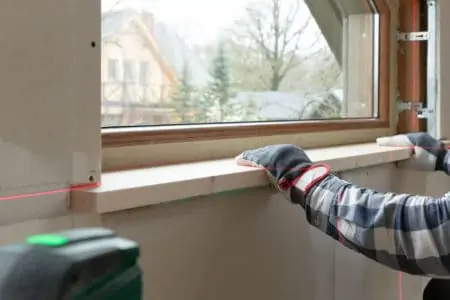
1. Measure
Measure the circumference of the arch. Cut a piece of clear plastic pipe to match this size plus the appropriate allowance for the finial mounting. Plastic pipe is flexible, often transparent, and easily cut with shears.
As for the diameter of the pipe, you need to consider the size of the window (if you have a large window, you have to opt for a pipe with a big diameter).
2. Pick the Finials
Choose finials that screw onto the pipe’s end. The mounting allowance required is the length of pipe that the finial covers when installed. You can use spray paint to give the rod the color of your choice.
3. Install Brackets
Every six to eight inches along the perimeter, install a curtain bracket. Choose closed-end brackets, as these feature a circular end and a slot for the rod to slip through.
4. Finish
One finial should be affixed to the rod. The pipe should be threaded through the brackets and secured with the remaining finial. Install the bracket screws, holding the rod in place. When you’re done, attach the curtains to the rod.
How to Hang Curtains on Arched Windows
We’re going to show you how to hang draperies on arched windows using just a few materials.
What You’ll Need
- Pencil.
- Level.
- Curtain bracket.
- Drill.
- Screws.
- Plastic wall anchors.
- Curtain.
1. Draw Your Lines
Draw a straight line on each arched window side using the level approximately 1/8 inch above where each straight side terminates.
2. Bracket
Arrange the bracket across the line where the rod will be installed.
3. Mark Your Screw Holes
Using a pencil, mark the location of each screw. This procedure should be repeated for each bracket.
4. Drill Holes
Drill pilot holes in the locations of your pencil marks. If the holes are going through drywall without striking a stud, insert plastic wall anchors into them. If they do strike a stud, then you don’t need the anchors.
5. Attach Brackets
Assemble the anchors so that they are flush with the opening. Screw the bracket into place over the pilot holes, beginning with the top hole. Repeat this procedure for each bracket.
6. Add the Curtain
Thread the curtain rod through the curtain panel’s rod pocket. The rod should be hung from the brackets.
7. Finishing Touches
Separate the curtain at various heights to find the ideal location for tieback hardware, if required.
Final Words
So you’ve learned how to hang curtains on an arched window. Now, it’s a matter of deciding what type of window treatment works best for your home.
Consider the different options available for half moon windows and opt for a design that you feel fits best with your existing decor.