Have your windows looked dull and ordinary for too long? Were you hoping to get more privacy without spending too much money?
Frosted windows can solve those problems. We guide you through the process of how to frost a window using different methods, highlighting just how easy and affordable it is.
Key Takeaways
- Frosted windows provide privacy and can save money on utilities.
- Methods to frost a window include spray paint, window film, etching, cornstarch, and acrylic glaze.
- Each method requires different materials and steps to complete.
- Frosted glass spray and film are the easiest and most popular methods for DIY home improvement.
How to Frost a Window for Privacy
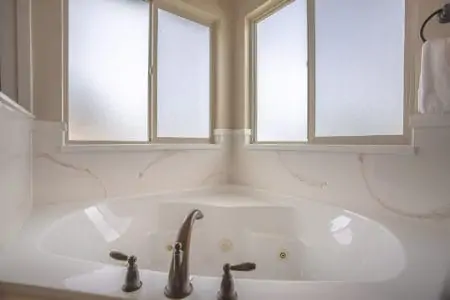
More than a cosmetic finish, a frosted glass pane also has a practical purpose. It lends seclusion to otherwise transparent doors and windows by obstructing the flow of light.
Professionals frost glass using sandblasting equipment. But you can use the following methods to produce a similar effect through DIY projects.
Each of the following methods will teach you exactly how to frost a window using simple steps and products that are readily available online.
How to Frost Glass with Spray Paint
Probably one of the easiest methods. So, if you’re not super handy, this might be one to consider. It’s also considered a temporary solution because spray paint can easily be scraped off later.
Pros
- Easy to apply.
- Easy to remove.
- Multiple coats result in higher opacity.
Cons
- Plenty of subpar products on the market.
What You’ll Need
- Special spray paint like this Rust-Oleum Frosted Glass Spray Paint.
- Painter’s tape.
1. Clean the Glass
Thoroughly clean the glass and tape off the frame of the door or window you want to frost.
2. Apply First Coat
I recommend starting with thin coats, so you don’t overdo it. Hold the can six to eight inches away from the surface and lightly spray one continual coating.
Allow the spray paint to dry after applying a thin coat, usually about ten minutes.
If you ever get tired of it and want to switch back to clear glass, you easily remove it using a glass scraper.
How to Frost Glass with Film
This method takes some patience and finesse. I’d recommend you do a practice test on a flat surface.
Pros
- Can block UV light.
- Cuts utility costs.
- Multiple designs to choose from.
Cons
- Any improper application leaves air pockets.
What You Need
- The window film of your choice (Rabbitgoo Window Privacy Film is a great option).
- Glass cleaner.
- Lint-free cloth.
- Clean spray bottle.
- Squeegee.
1. Clean the Glass
First, thoroughly wipe the glass surface with glass cleaner and a piece of cloth that doesn’t shed lint.
2. Make a Cleanser
In a spray bottle, add water and a few drops of dish detergent.
3. Spray and Cleanse
Then spray the glass lightly with the water solution before applying the window film.
4. Apply Film
Follow the instructions on the package. This usually involves slowly rolling it onto the glass, starting in a corner. Remove air bubbles with a straight edge as you proceed.
How to Frost Glass by Etching
Etching can be a versatile way to frost glass, although it can be difficult to remove.
Pros
- Dries pretty fast.
- Can be used on multiple surfaces.
- Plenty of products to choose from.
Cons
- Very difficult to remove without scratching the glass.
What You’ll Need
- Painter’s tape.
- Glass-etching cream such as Armour Etch.
- Bristle brush.
- Warm water.
- Face mask.
- Clean sponge/cloth.
1. Tape Off
Use painter’s tape to mask off the regions that you don’t want to etch.
2. Apply Cream
Put on your protective face mask. Grab a bristle brush and scrub the cream onto the surface of the glass.
3. Dry
Allow the etching cream to sit for the duration specified by the manufacturer.
4. Rinse
Remove the cream by rinsing it with warm water and a cloth.
Safety Tip
The cream is very toxic. Be sure to wear a face mask if you choose this method.
How to Frost Glass with Cornstarch
This isn’t a super common method, but it is easy and fun!
Pros
- Very affordable method.
- Can make it very opaque.
- Ingredients are already found in your home.
Cons
- Not great for windows in a shower as it’s not waterproof.
What You’ll Need
- Cornstarch.
- Tissue paper.
- Paintbrush.
- Water.
1. Measure and Cut
Measure the glass panes and cut down pieces of tissue paper to match their size.
2. Make Cornstarch Paste
Combine one tablespoon of cornstarch with the equivalent amount of cold water to form a thick paste.
3. Add Boiling Water
Combine this paste with ¾ cup boiling water. This will result in a uniform milky paste. Coat the glass window pane with a layer of the prepared paste using a paintbrush.
4. Apply Tissue Paper
Stick the tissue paper to the coated window, ensuring no air bubbles form and that the paper adheres to the glass surface. Then put another coat of paste on top of the tissue paper.
5. Let it Dry
As it dries, the opacity will increase. You can add another layer of tissue paper if you require additional seclusion.
How to Frost Glass with Acrylic Glaze
If you’re handy with painting clean lines, this is a great method to go with.
Pros
- Stunning visual effect.
- Multiple good products to choose from.
- Similar to the etched glass effect.
Cons
- You have to apply in straight lines.
What You’ll Need
- Acrylic glaze such as Liquitex 7508.
- A foam brush.
- Squeegee or sponge.
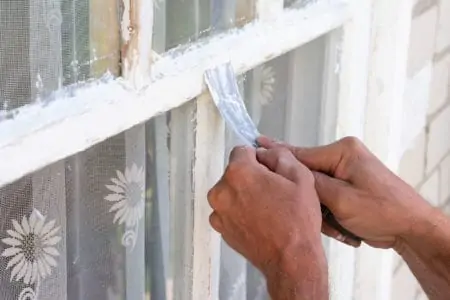
1. Apply Glaze
Take your foam brush and dip one side in the acrylic glaze. Use it to coat the window pane. Ensure that it is applied in straight lines. Anything else will result in a cluttered appearance once the window dries.
2. Second Coat
Allow the first layer to dry completely before applying the second coat. This will take about 30 minutes.
3. Wipe Excess
Wipe away the glazing using a sponge moistened in water. If it does not work, scrub it off with a squeegee.
Frosted Glass Spray vs. Film
To determine which method will work best for you, here’s a side-by-side comparison.
| Frosted Glass Spray | Glass Film | |
| Ease of Application | Easy to apply; just spray it on. | Requires care and a squeegee to remove air bubbles. |
| Prep Work | Requires masking frames with painter’s tape. | Doesn’t require covering anything up before application. |
| Average Price | Costs less than $10 for a can of spray (depending on the brand). | Usually more expensive (about $6 to $8 per square foot). |
| Removability | You can remove it with a scraper. | Easy to remove; just peel it off. |
FAQs

What is the Easiest Way to Frost a Window?
Frosted contact paper is a great solution for those that want to frost glass fast and easily because it adheres directly to the glass surface. Simply peel off the frosted window film if you ever want to see your transparent glass again.

Can You Sand Glass to Make It Look Frosted?
Frosting on most objects such as glass will give a nice and soft white hue. Any of the above methods will work for frosting your glass.

Does Privacy Window Film Work at Night?
Yes, frosted glass at night will still provide the opacity you’re looking for. But you can see shadows and movement from outside, especially if lights are on inside.

Can You See Through Frosted Glass?
Even if frosted glass windows are not opaque, you won’t be able to see through them because of the scattered light that renders any image visible through it hopelessly distorted.
In Conclusion
Now you know how to frost a window through a variety of different methods. Hopefully, you’ll build up the courage to give your windows a fresh new look. Frosted glass windows are great for privacy and can even save you some money on utilities.