You’ve finished your spray paint job, but the result doesn’t look even. And for those of us with even the slightest hint of perfectionism, blotchy paint is a real nuisance. So, how do you go about fixing it?
Different materials call for different methods. But don’t panic! We’ll take you through them all, ultimately teaching you how to fix uneven spray paint for a picture-perfect finish.
Key Takeaways
- Understand the cause of blotchy paint: Cheap materials, insufficient coats of paint, incorrect technique, and inconsistent lighting can all contribute to an uneven paint job.
- Prep the area properly: Sand down rough surfaces, clean the area thoroughly, and adjust your position based on the type of spray gun used.
- Apply thin coats of paint: Begin on the side of the area and move over the surface, waiting for each coat to dry before applying the next one.
- Fix blotchy paint by sanding and reapplying: If the blotchy area is minimal, add more paint until it’s even. For larger blotches, sand the surface first and then apply new paint.
Why Does My Paint Job Look Patchy?
Knowing how to fix spots of blotchy spray paint first requires understanding what caused it.
Cheap Materials
Painting is a task that appears to be uncomplicated and is something that everyone can attempt to complete. However, to achieve professional-level outcomes, you must pay careful attention to the details and utilize high-caliber instruments.
Even the caliber of the paint used makes a difference. Paints of lower quality may require several applications to get a uniform finish.
Insufficient Coats of Paint
If you don’t apply sufficient coats of paint, you can end up with patchiness. Various factors determine the number of coats required. These include the color of the paint, the type of primer utilized, and the color previously present on the wall.
For example, if you paint over a dark color with a lighter hue, you will need to apply more coats of paint than usual.
Incorrect Technique
Holding the spray paint can or the sprayer gun at the wrong distance can also cause patchy paint jobs.
Inconsistent Lighting
If the lighting is poor or if you paint at different times of the day also affects the consistency with which you coat your walls.
How to Fix Uneven Spray Paint
It’s a simple process. It just takes time and patience.
What You’ll Need
- Sandpaper.
- Spray cans or spray gun.
- Cardboard.
- Dish soap.
- Bucket of water.
- Piece of cardboard.
- Alcohol.
1. Prep the Area
For the paint to properly adhere, prepping the surface is the most important step of all. You need to even out the surface if you want a clean paint job.
Depending on the material in question, you may need to sand down a rough surface as a primary step. This works if you’re painting a wood surface or one with a previous coat of paint.
2. Adjust Your Position
Your starting position will need to be adjusted depending on the type of spray gun that you will be utilizing. You must maintain around eight inches from the surface when using an HVLP gun.
But approximately eight to 10 inches is needed when using a regular spray gun. And approximately 10 to 12 inches when using an air-assisted airless spray gun.
Get better coverage and finish faster if you position yourself so you can properly reach the area from top to bottom without staining.
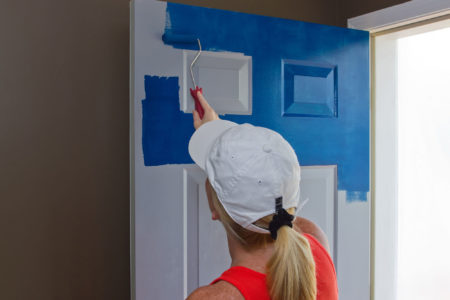
3. Apply the Paint
To achieve smoother results, begin spraying on the side of the area first, then move over the surface itself as you work. Apply thin coats of paint, waiting for each coat to dry before spraying the next one.
How to Fix Blotchy Spray Paint
From mistakes on tumblers to furniture, blotchy paint can happen to the best of us. If the blotchy area is very minimal, you can just add more paint until it’s evened out. But, if the blotches are large with definition, sand first, then apply new paint.
On Metal
- To remove any traces of dirt and grime from the surface, you can wipe it off with a damp sponge or microfiber cloth.
- Make use of a wire brush to remove any rust or other debris that is more difficult to remove than other types.
- Sandpaper or a sander powered by a compressed air pump should be used to remove any paint that is flaking or loose.
- Repeat the procedure of wiping down the surface to eliminate any dust that may have been left behind from the sanding operation.
On Plastic
- Remove traces of dirt and grime off the surface with a damp rag or a sponge.
- Use fine-grit sandpaper to smooth out the surface as much as you can.
- Repeat the procedure of wiping down the surface to eliminate any dust that may have been left behind from the sanding operation.
On Wood
- Use trisodium phosphate (TSP) to remove any paint that may be left over from the previous coats.
- Sandpaper with a very fine grain can make the surface as smooth as possible.
Tips For Avoiding Blotches When Painting
It is much simpler to take the necessary steps to avoid blotching than to correct it once it has occurred. Let’s have a look at what you should do to acquire a beautiful finish with your spray paint.
- Always prep the surface correctly based on its material. As you previously learned, prep work is different for metal, plastic, and wood.
- Clean the surface thoroughly before spray painting.
- Practice with the spray gun before painting, particularly if you have never used one.
- Use quality paint for a nice sheen and more durability.
- Know how far away from the surface you should stand to ensure that the paint gun functions correctly.
- Establish the appropriate angle from which to apply the spray.
How to Fix Spray Paint Mistakes
It happens. Spray paint takes some getting used to. If you’re not happy with the job you did, follow these steps.
Cracking
Too much spray paint can result in cracking, which is one of the most typical blunders. In most cases, the issue is brought on by improper surface preparation, which results in inadequate adhesion.
Paint may not adhere properly if any oils, dirt, or other impurities are present on the surface it is being applied to. This will cause the surface to break, so make sure that you take your time and are thorough with the preparation process.
But, the best way to deal with cracked paint is to sand the surface. When you’ve got a nice, smooth area again, apply fresh coats of paint.
Peeling
Peeling is typically the result of inadequate surface preparation that prevents the paint from adhering completely. This is usually because there are pollutants on the surface, such as dust, grime, or oils from your fingertips.
Any pollutants on the surface might cause the paint to flake (and eventually peel when dry). So, complete surface preparation is the most effective technique to avoid this problem.
To fix this, peel away what paint you can with your hands. Sand the surface to make it smooth. Apply fresh paint.
Drips
Avoiding drips needs patience. It is necessary to apply very thin coats and wait for each one to completely dry before moving on to the next one. When you are in a hurry and attempt to apply excessive paint all at once, you will inevitably end up with runs or drips.
To fix drips that are still wet, take a clean cloth and wipe them from the surface. Apply fresh paint where you’ve wiped. If the drips have dried, sand them, then paint.
Overspray
This error does not truly relate to your project; rather, it relates to the area that is surrounding your paint station. The term “overspray” refers to paint that gets on the area around what you’re painting.
Spray painting requires a great deal of preparation work on the surface that will be painted. Masking tape, newspapers, plastic, and cardboard should be considered your closest companions. This is an effective and reliable method available for avoiding overspray.
A few different courses of action are available to take if goods sustain overspray damage.
If it is still moist, you could try to wipe it off with some water to see if it helps. You could try adding paint thinner to get it wet again if it is dried. You can also remove it by scrubbing it with a textured sponge or scraping it off with your nail.
Lines
If you’ve attempted to get rid of streaks in your paint but were unsuccessful, you’re not the only one who’s ever had this problem. These can be incredibly annoying and can completely spoil an otherwise excellent paint job. Most of the time, they are brought on by filthy or clogged tips.
To fix lines in your paint, try adding another coat, but in larger sweeping strokes to avoid lines.
Bottom Line
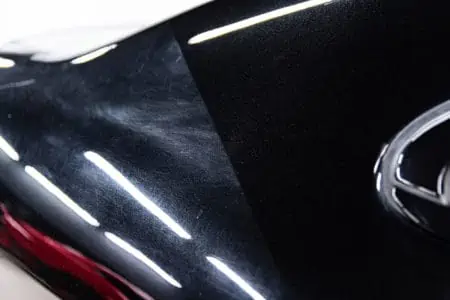
Learning how to fix uneven spray paint isn’t complicated, but the process differs based on the surface in front of you. Fixing uneven spray paint on a car is different than on furniture.